Wednesday, December 31, 2008

catch up post #5! (last one!) machine embroidered baby ornaments! (aka, amy's crazy!)

i don't know WHAT possessed me to make these!

i was looking around for baby's 1st christmas ornaments, and all i could find were really cheesy ones that were available at all the big chain stores. i really didn't want to buy ornaments that were also going to be purchased by grandparents and other family members, and as someone with a december birthday, i know that happens!

i realized i could machine embroider ornaments, and once i started thinking about that, i though how cool would it be to have an ornament for EVERY year until the kid's an adult? it would be like those back to school frames that people hang in their houses, with every single school year's photo, but less cheesy! they could be hung on the tree, or they'd look really cool hung on a garland all together!

i started trying to figure out what kind of ornament to do. i wanted a round image, with a hole in the centre for each year's picture. i kind of obsessed about wreaths for a while, and digitized a really pretty wreath design.

however, and this is a lesson that i totally need to learn, i didn't think to check how many stitches it was, and it took FOREVER to embroider! i set my countdown for 30 minutes, and it took well over that. not such a big deal if i was only making one ornament, but i knew that i didn't have time to make 2 sets of 20 or so ornaments that each took 40 minutes just for the embroidering!

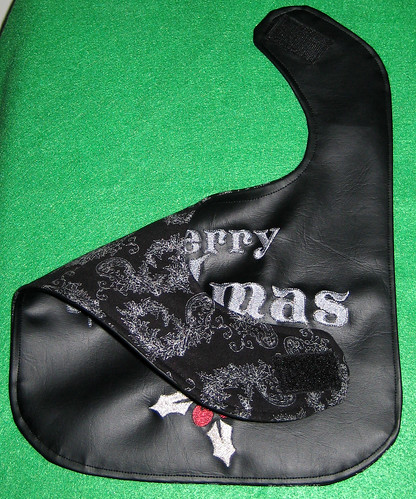
i did end up using the one i stitched out though, since my mom had a friend who also had a baby this year. it turned out really pretty.
wreath xmas
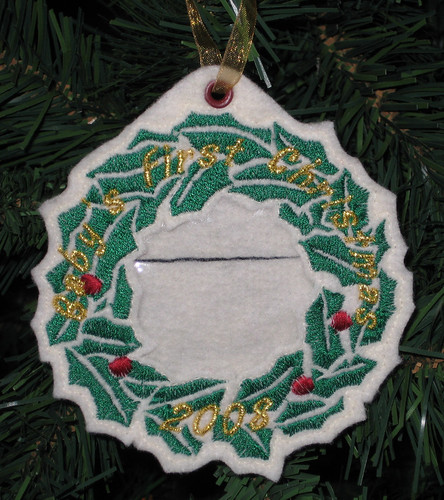
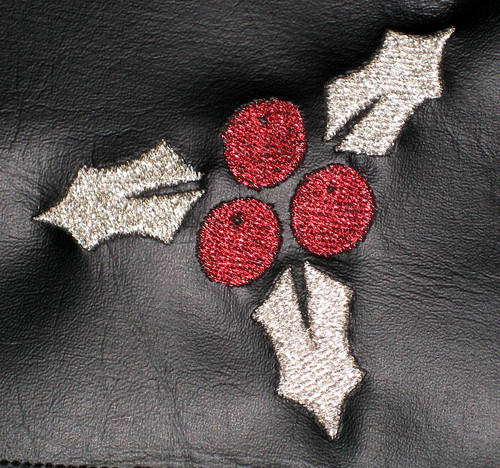
the centre is cut out and then thin vinyl was sewn in, to protect the photo, and there's a slit in the back to slide the photo in. making this one, i realized that not only was the embroidery super time intensive, it took forever to stitch it together, what with going around each holly leaf carefully!

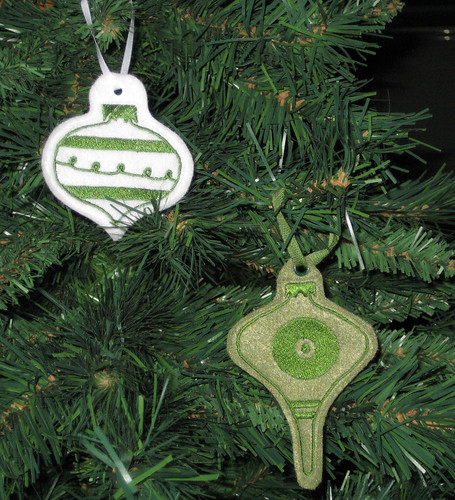
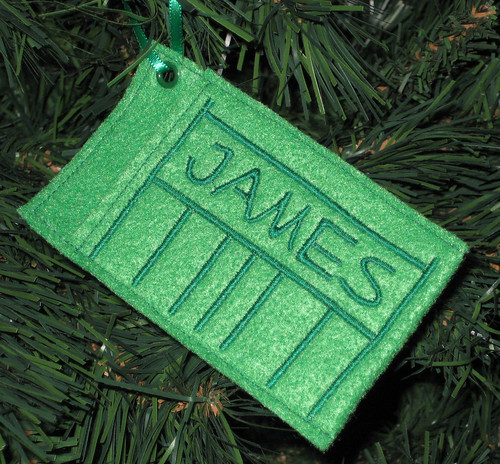
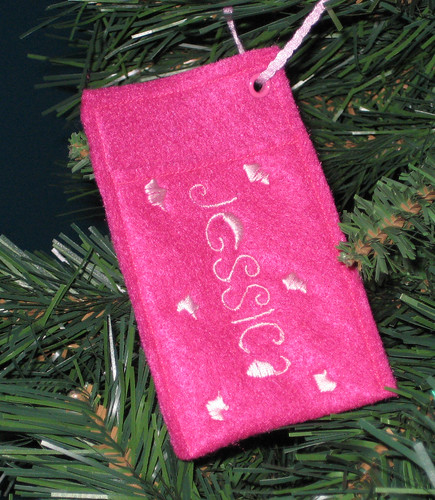
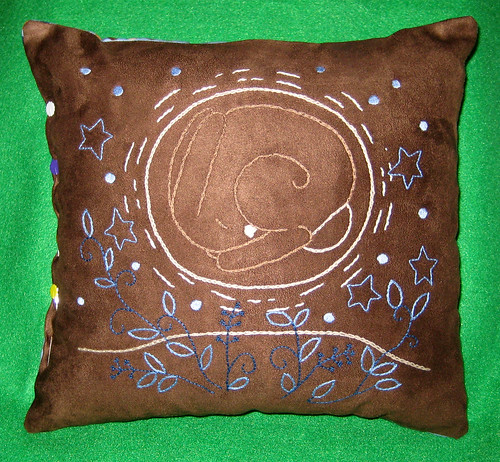
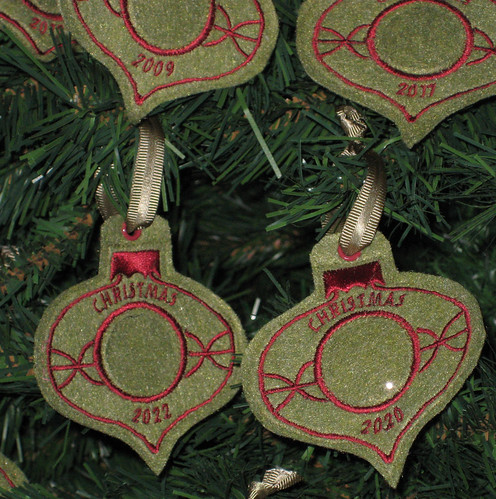
so i looked at the ornaments i'd already made, and realized that the short one was round as well. i removed the decorative aspects from it, and created a frame in the centre. i played around in photoshop, adding some fanciness around the circle.
babyornament frame

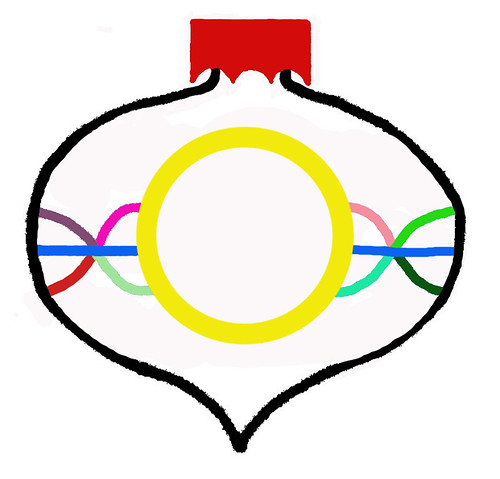
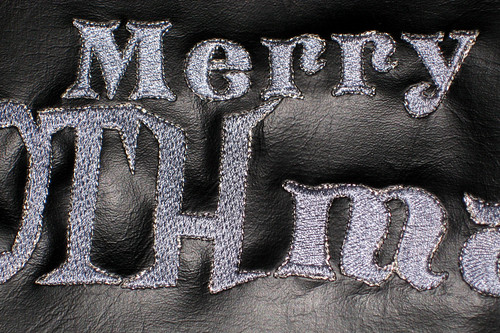
i used the font options in PE Design Lite to add writing around the circle.

and this is what i ended up with!

camdens xmas scan
warrens xmas scan

two of my friends had babies this year, angie and jean. i sent them sneaky messages telling them that i'd been asked to forward some questions from a friend who wished to stay anonymous, asking about the colours they use for christmas decrating. they may or may not have seen through me!

it ended up that the colours they replied with were the same ones i would have chosen for them anyway, but it was still good to check.
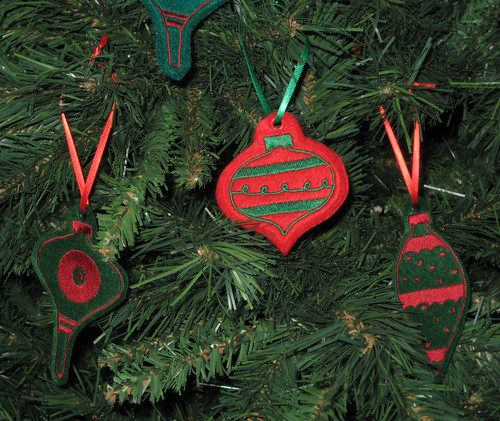
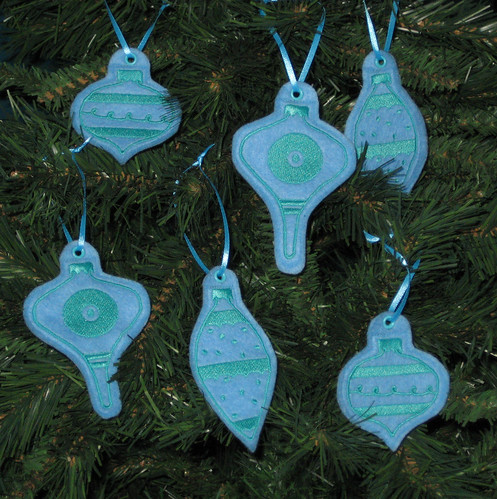
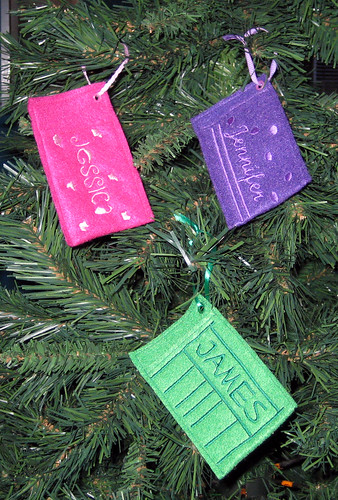
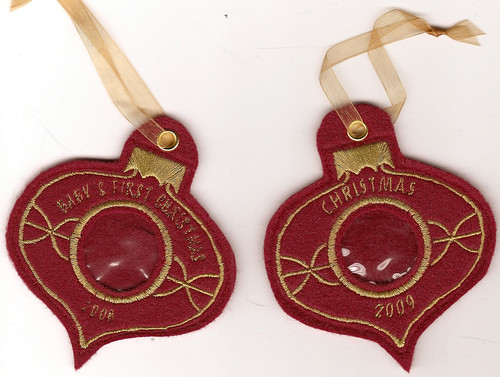
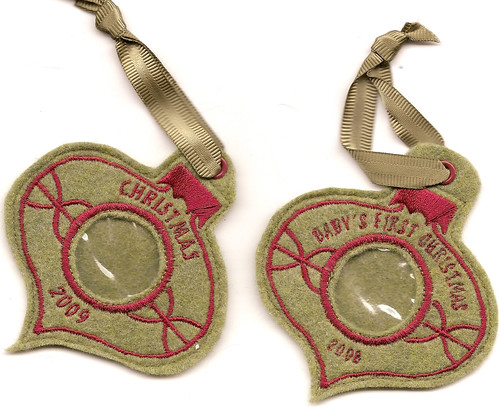
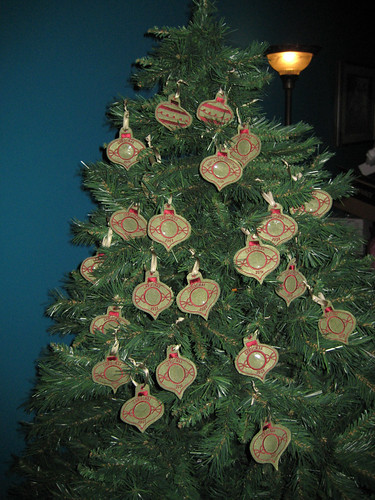
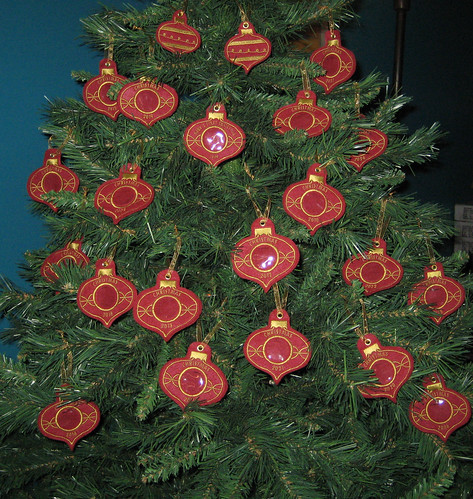
here are the sets!
i made a baby's first christmas ornament for each of them, and then a yearly ornament for every year until camden and warren are 19 years old. and then i made them two parents ornaments as well. sets of 22! (see, i'm crazy!)

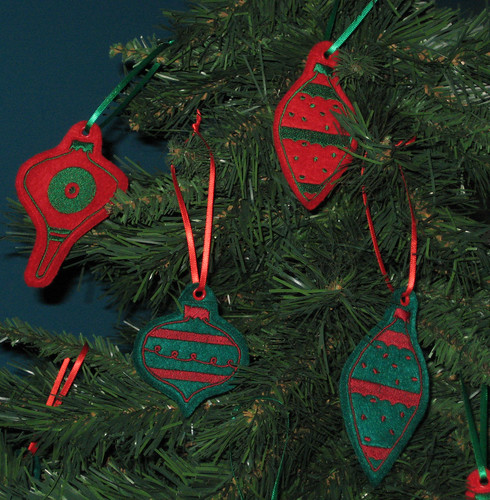
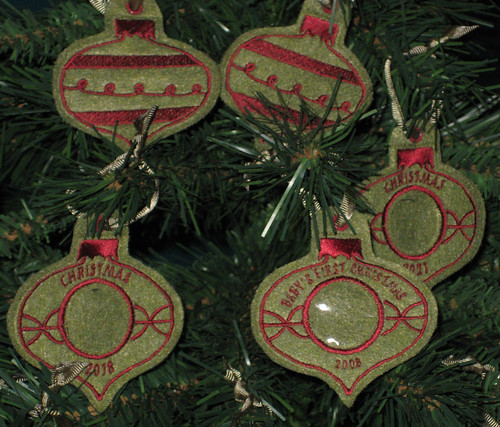
for angie, durin and warren's set i used a mossy green with a burgundy thread.
warrens xmas2
warrens xmas3
warrens xmas

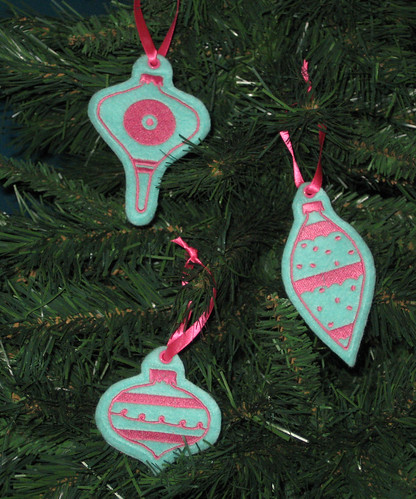
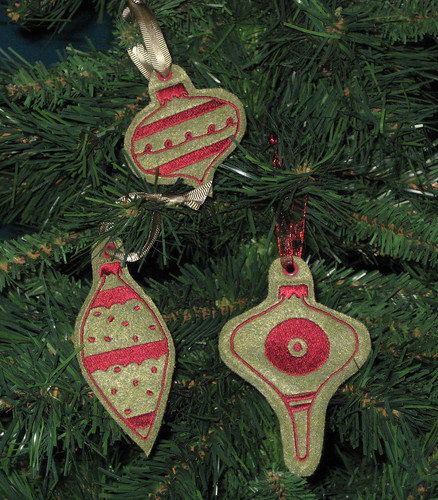
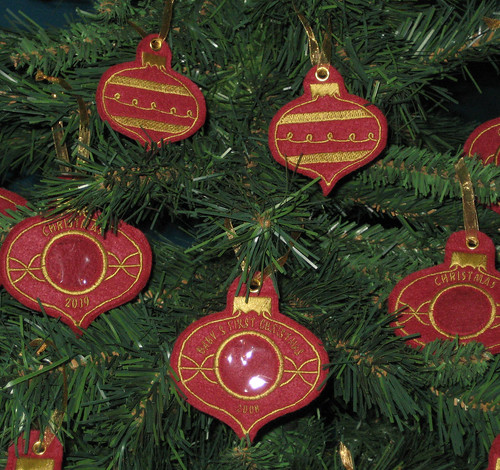
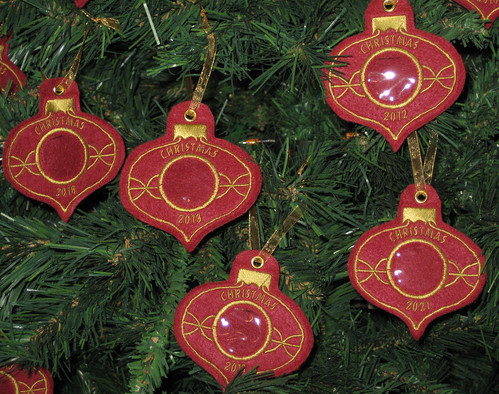
for jean, justin and camden's set, i used a burgundy felt, with a gold thread.
camdens xmas2
camdens xmas3
camdens xmas

they turned out so well, and i was so happy with them. they liked them too, angie even cried! however, i'm seriously reconsidering my original plan to make them for all mod babies!

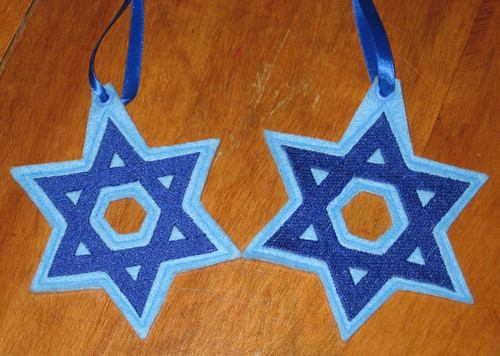
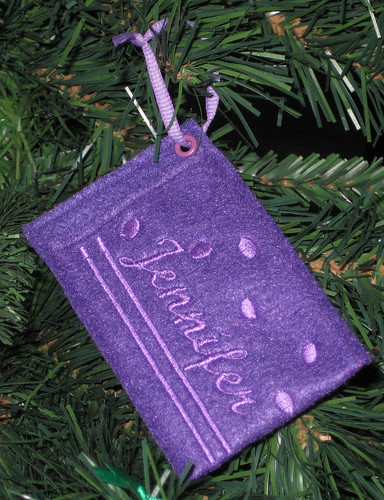
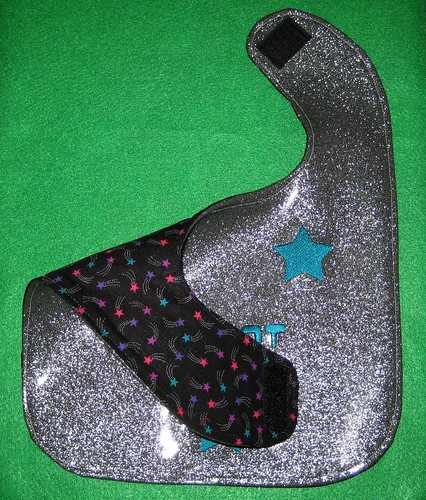
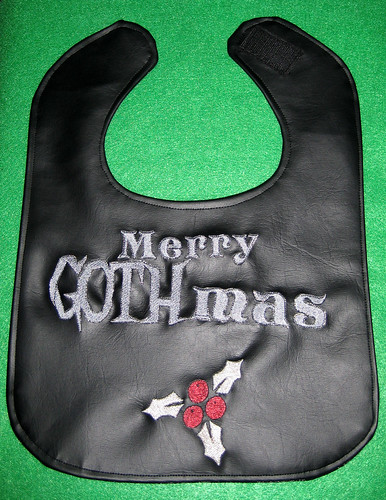
after i'd made those, i realized it would be super easy to change the wording and make a gothmas 2008 ornament for dev and torrin, to go with the baby's 1st gothmas ornament i made them last year.
gothmas 08

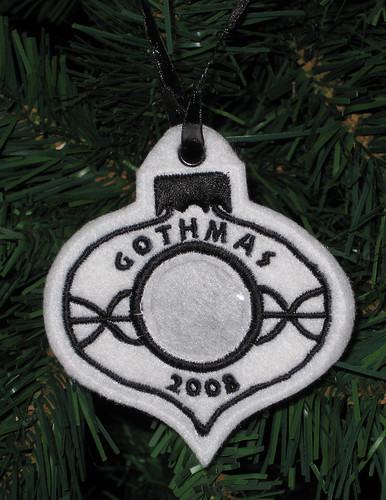
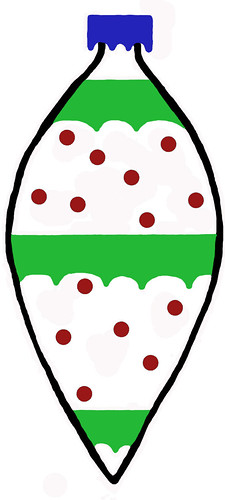
i made dev a set of 3 of the polka dotted ornaments in the same white and black as well.

see what i mean when i said i'd been doing a TON of machine embroidery lately?

catch up post #4! machine embroidered ornaments!

every year i try to send a little something out with my cards. it doesn't always happen, but i try! it needs to be something fairly flat, so my postage bill isn't ridiculous, and it needs to be something that will take the abuse of the mail (which is ALWAYS worse around the holidays!).

this year i decided to machine embroider something (of course!).

i absolutely love vintage glass ornaments, i have a ridiculous collection of them (huge!). most of mine are just simple balls, but i love all the shapes and sizes that were made. i decided to draw up some vintage ornaments and then digitize them.

this took a lot of fiddling between photoshop and PE Design. i edited the images constantly, testing them digitized, until i got them perfect (now you see why i was lazier for the gift card holders?!). even though i embroidered them all in one colour, i made the files multi coloured, so that i could better control which stitch was used for each part of the ornament. when the image used in PE Design is all one colour, the software wants to use the same stitch for the entire thing. i wanted to switch between the fill stitch and the satin stitch, so this is what one of my files looked like -
ornaments outline2donedotsfilled

and the ornaments themselves -
xmas red1

i embroidered as many as i could fit on each piece of felt, and then after embroidering, i lay another piece behind them and stitched around each ornament. i trimmed them, and added a grommet to hold the ribbon. i really love how they turned out.

xmas red2

xmas pink
i wanted to do some non-traditional colours too!

xmas white

xmas blue

xmas white crow
crows, of course!

xmas maroon

xmas olive

xmas green

i have a couple of friends who celebrate hanukkah either instead of or in addition to christmas, so i made star of david ornamants for them.
star of david


i was really happy with how they turned out, and they were pretty easy to do! i think i made around 50 in total, and i've only got a couple left!

catch up post #3! machine embroidered gift card holders

i was machine embroidering like crazy this christmas! since i've had the PE Design Lite digitizing software, i haven't purchased any designs online, or even used any of the design cards that i already have. if i get an idea, i just open up photoshop, create the file, and then digitize it. so far it's been working great, with a few little quirks!

i decided to make embroidered gift tags for my cousins, because my extended family has created a tradition of walmart gift cards for holidays. they live in a pretty small town, so there's not much else to chose from! i didn't actually get them done in time for them to be used this year (because we have to mail their cmas package out ahead of time), but i'm sure we'll be sending them the same thing next year!!

IMG_6243

james copy
the original file
james
the finished result

jessica copy
the original file
jessica
the finished result. as you can see, the stars didn't really stay star shaped, unfortunately

jennifer copy
the original file
jennifer
the finished result. again, the polka dots didn't stay perfectly round when digitized, and i ended up losing one of them, because the stitching started to unravel.

there were definitely quirks, but quite honestly, i probably could have fixed them, but i didn't. i was getting tired of the fiddling by this point! i think they turned out cute, and since they'll never see the original files, they won't know that they didn't turn out exactly as expected!

alpha stamps giveaway day 5!

blegh blegh blegh!

i've been super sick the last few days, mostly because of med changes and stuff, so i'm behind on everything again, INCLUDING the daily giveaways at alpha stamps!

check them out, every day the package has been amazing!
ASgiveawaylogo

i'm super sad that i missed day 3, with the Queen of Hearts theme! i have a bit of a thing for queen of hearts imagery, i've had a super elaborate queen of hearts costume planned for years that i've never had the time or energy to get done in time for halloween (even though half the fabric is already purchased!). those chipboard crowns are definitely making me lust...

today's package is a super cute Hearts and Flowers set, with an awesome heart shaped blank book (i've been way more into books since i made the tiny one for the halloween altoid swap), a tags and buttons chipboard set, matching paint dabbers, a pretty roses collage sheet, and a GORGEOUS rose dresden sheet. go leave a comment for a chance to win!

Saturday, December 27, 2008

catch up post #2! more baby goodies!!

my best friend's baby is a year old now, so he's getting a bit too old for the drool size bibs, and he needs more coverage now that he's learning to feed himself!

i'd been thinking about making vinyl bibs for a while, and i finally got around to it in time for christmas.

i digitized all of the designs using PE Design Lite software, and then machine embroidered them. PE Design Lite doesn't have a whole lot of font options (30 or so), so i created files in photoshop with the words, and then digitized them.

this image is from a wingding font, i think it was 80s themed. the design took FOREVER to stitch, well over half an hour, and it stretched the vinyl out quite a bit, even with the stabilizer, which was irritating.
tape bib

when i gave it to them, the mom said "you'll never know what this is, but i will!" it's true, i didn't even think of that!
tape bib detail

tape bib backing
it's backed with brightly striped flannelette. i LOVE this vinyl, it's the same stuff i used for the vinyl octopus last winter. it's got great depth to the colour, it's almost pearlescent.

this one was a wingding as well, though i forget which font it was. halloween maybe?
fangs bib

i just wanted a gothier type design!
fangs bib detail

fangs bib backing
it's backed in a skull print flannelette that i bought at joanns on halloween for 70% off. they only had about a yard left, not enough for a bigger project.

this one is a sublime stitching pattern that's been digitized, it was one of the samples i posted when i first started playing with the software
heart bib

heart bib detail
heart bib backing
it's backed with the same skull flannelette.

glitter vinyl!
glitter vinyl bib

glitter vinyl bib detail

glitter vinyl bib backing
this one is backed with a star patterned cotton, because i didn't have a flannelette that matched.

their family celebrates "gothmas" in addition to the christmas that the extended family celebrates (his mom hates the tackiness of christmas), so i HAD to make him a gothmas bib!

gothmas bib
i'm really irritated that the "mas" isn't straight, but i wasn't going to restitch all the rest of it (or waste the metallic thread i'd already used!).

gothmas bib detail1
the holly is embroidered in metallic thread. i think the silver was coats and clark, and the red was gutermann. i stitched the leaves twice, because the silver thread broke and it was really obvious where i rethreaded it. going over it again covered that up and made the colour a lot more dense.

after i embroidered the writing, i went back and carefully stitched around each letter with the metallic thread to tie it in to the holly better. i think i'm crazy, it took forever!
gothmas bib detail2

it's backed with a black cotton that has silver holly printed on it. i didn't like how thin the cotton was on the backing of the glitter vinyl bib, so i added a layer of black flannelette between the vinyl and the cotton on this one.
gothmas bib backing

catch up post #1! baby goodies!

i've got a whole slew of things to catch up on, since everything i've made lately has been a secret until it arrived or until christmas. i'm going to split them into a few posts, and here's the first one!


i made these for jean/sweets and for jenn/nyxxie. jean had a baby in november, camden, and jenn's due to have anne marie in february. i did all of the hand embroidery while i was in manitoba, and then stitched them together in mid december.


here are the bibs for anne marie and nyx.

pink bibs
all of hers are backed with the same striped flannelette

the owl
pink owl bib
pink owl bib detail
the pattern is from doodle stitching by aimee ray it's actually the design for a stuffy, one of the felt forest creatures. the pattern called for french knot, applique, split stitch, straight stitch, satin stitch and split stitch. i skipped the french knot in the eye, did back stitch to outline the inside instead of applique, did split stitch for the outer outline, did chain stitch for the wings instead of the straight stitch, followed the pattern for the stems, with the split stitch, and did french knots instead of satin stitch for the flowers.

the cupcake
cupcake bib
cupcake bib detail
i found the image online somewhere. the outer liner is chain stitch, with the inside lines back stitch. the icing is stem stitch, the sprinkles are straight stitch (stitch twice in the same spot), the cherry is satin stitch, and the stem is back stitch again.

the flower
rose bib
flower bib detail
the pattern is from sublime stitching, the lisa petrucci pattern i used chain stitch for the petal and the hair (i LOVE how the chain stitch looks in the bangs, almost like a knit consistency), back stitch for the eyebrows, eyes, eyelashes, lips, leaves and stem, satin stitch for the eyes, french knots for the eyes, and straight stitch for the nose.

and the kitty
kitty bib
kitty bib detail
the pattern is from sublime stitching, the lisa petrucci pattern i used backstitch for the outlines, satin stitch for the stripes, eyes, and nose. i added a few straight stitches to the eyes, because they looked funny without pupils!


and the hand embroidered bibs for camden and jean

camdens bibs
the two brown bibs are backed with solid brown cotton, and the two blue are backed with solid blue flannelette. i couldn't find a brown flannelette to match, unfortunately.

the red koi
red koi bib
red koi detail
pattern from doodle stitching by aimee ray, for the zen lampshade. the pattern calls for the thicker lines being stitched with 6 strands, and the thinner with 3. the stitches in the pattern were split stitch, lazy daisy, scallop stitch, straight stitch, french knot and satin stitch. i did mine all with 3 strands, because i hate the look of 6 strands, so i used chain stitch for the thicker lines, and back stitch for the thinner, and that gave the same effect without looking sloppy. i wanted to do them entirely in one colour, so i didn't do the white french knot, though i did use satin stitch for the eyes.

the orange koi
orange koi bib
orange koi detail
pattern from doodle stitching by aimee ray, for the zen lampshade
stitched the same as the red koi. these took FOREVER, i made my stitches way too tiny!

the owl
blue owl bib
blue owl bib detail
pattern from doodle stitching by aimee ray, again one of the felt forest creatures. again, i deviated from the pattern, partly just to add interest for myself since i stitched this in pink as well! i skipped the french knot in the eyes again, though stuck with the satin stitching for the eyes and beak. i did chain stitch instead of split stitch for the outer outline, and chain stitch instead of applique for the inner outline. i continued the chain stitch instead of split stitch for the wing outline, and then followed the pattern with straight stitch inside them. the flowers were satin stitch as instructed, but the stems were back stitch instead of split stitch.

and the drum set
drum bib
drum bib detail
the pattern was from the sublime stitching craft pad, but it's also available in the rock'n'roll pattern. i used back stitch, straight stitch, chain stitch and split stitch.


i did a set of machine embroidered bibs for camden as well, since his cousin was born within weeks of him. i'm much older than my cousins, and i was always sad about it, so i'm kind of jealous that he's got a friend for life out of the deal!
friends bib
friends bib detail


and this was my big project for camden, and i LOVE the end result so much!
moon pillow

it's the sweet dreams baby pillow from doodle stitching by aimee ray showing the bunny in the full moon, but i changed the colours up to match camden's room better.

moon pillow2
the stitches used were satin stitch, split stitch, couching, chain stitch, french knots, back stitch and stem stitch. the pattern only called for chain stitch, straight stitch, satin stitch and split stitch, but i switched them up a bit to add interest, both for me while stitching, and for the finished project! the length of the straight stitches in the sample concerned me a bit too, i could see little baby fingers getting stuck in them, so they got switched to couching on the stars (my first attempt at couching) and stem stitch in the outer reflections of the moon.

moon pillow3

moon pillow4

moon pillow back
i love the backing fabric, it just matched so perfectly, and it's such a fabulous quality flannelette! SOOO soft for baby!
Related Posts with Thumbnails