hi! welcome!
i'm amy dame.
if you'd like to know more about me, i'll direct you over to the excessively long about me page, but the basics that that seem to either repel or attract folks are these - i hate capitalization, i swear a lot and babble just as much, i'm a bleeding heart lefty who's super opinionated, but i try to keep the worst of it off the blog, i get distracted kinda easily due to a mixture of mental and physical health stuff combined with my inherent inability to focus on one project or technique, and i often get so excited that i bounce up and down and clap my hands like a 6 year old. (if you like me, you might find it endearing, otherwise, it's probably just annoying)
and most importantly, i love quilting! i'm the vice president of the Vancouver Modern Quilt Guild, and i'm the challenge and swap coordinator for the Fraser Valley Modern Quilt Guild. my guilds are amazing. not only are they full of incredibly TALENTED people, they're also full of incredibly AWESOME people!
this is the third time i've posted for the Blogger's Quilt Festival, the last two are here and here. previously i've posted recent projects, but today i'm posting a quilt that i finished last summer, but am still incredibly proud of. i blogged about it a few times when i finished it, but i never did post any of the construction details, so i thought i'd do it now.
the past few years i've participated in the Queer Arts Festival Curated Art Exhibition, and this was my piece for 2012. 2011's patchwork and machine embroidery piece is HERE, and my 2010 embroidery pieces are linked HERE (2010 pieces are totally NSFW!) (also, there's still a page about me from last year on the QAF website.) the QAF is a three week multi-disciplinary festival held in Vancouver, BC, Canada every summer by the Pride In Art Society, and i've been attending it for years.
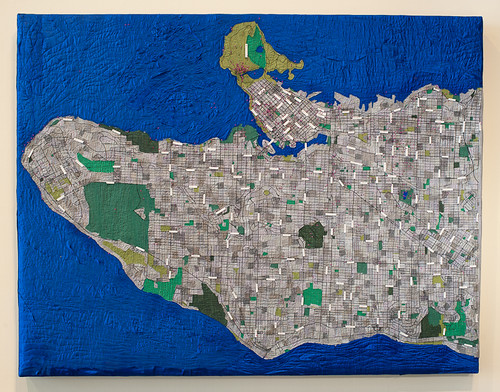
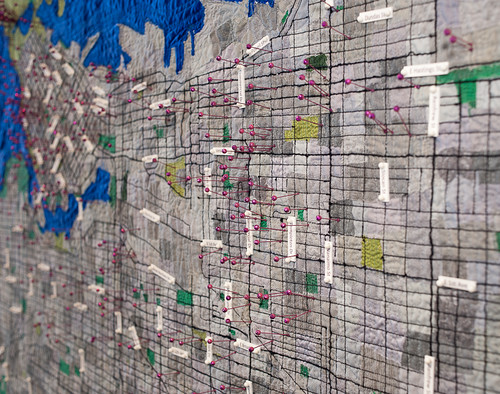
every year my projects get more and more complicated, and my 2012 piece was incredibly ridiculous! i don't remember the exact measurements, but it's at least 50" x 60", it has thousands of tiny pieces, and i used an incredible amount of thread and spray adhesive.
my artist's statement is in this blog post, but the short and sweet version is that i wanted to create a piece that encourages people to think about what makes an act specifically queer, and where in the city those acts have taken place. i wanted to draw attention to the concept queer "ghettos", or the lack thereof, and the concept of community spaces. and since my 2011 quilt that encouraged audience participation was such a hit, i wanted to make a quilt that would be interactive.
i posted about this quilt a few times right after the show, but i never did get around to posting about the details, so here they are - (feel free to skim, i know not everyone will care!)
Step 1 - i drafted a pattern of Vancouver which included all streets and parks. i blew it up to the size i needed, and printed out each section. i taped them all together to create a full size pattern (like assembling a pdf pattern), and using a sharpie, i traced over all of the streets that i wanted to transfer to my map to make them more visible.
Step 2 - i connected yardage of wash-away stabilizer to be big enough to cover the full map. i laid the stabilizer over the paper map and retraced all of the sharpie lines onto the stabilizer, then set it aside.
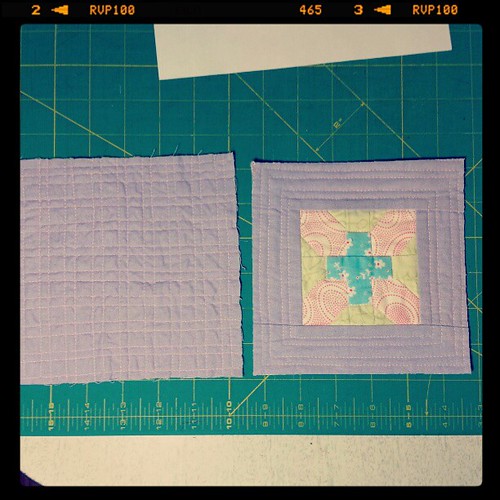
Step 3 - i laid thin white broadcloth over the paper pattern and traced the shape and edges of water and land, and all of the parks in the city.
Step 4 - i sandwiched the white broadcloth with a layer of cotton batting and a second layer of white broadcloth as the backing.
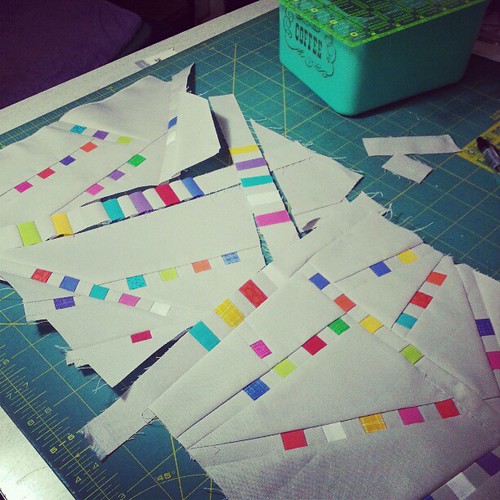
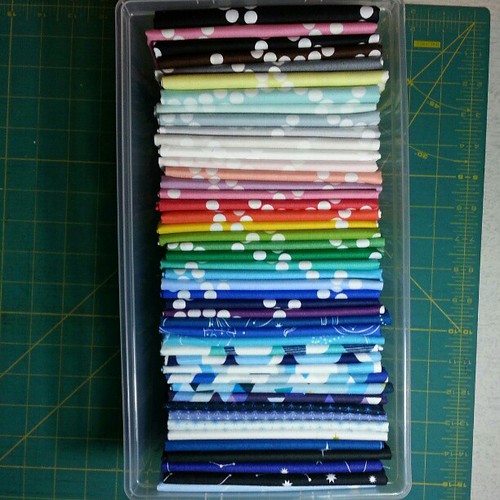
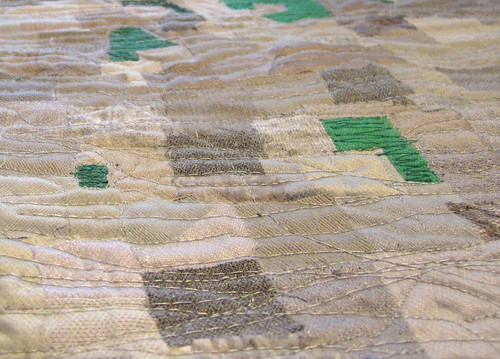
Step 5 - after purchasing a wide variety of grey and green fabrics with a bunch of different textures, i started cutting them into small pieces. a LOT of small pieces! nothing more than an inch or two wide, and most were much smaller than that.
Step 6 - working in small sections, i used 505 spray adhesive and a UHU glue stick to adhere the tiny pieces to the broadcloth backing fabric. i used the variety of greys for the city itself, and the greens for all of the city's parks. this step took a looooong time!
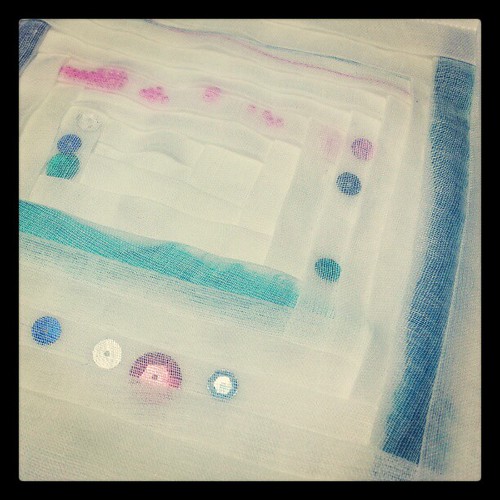
Step 7 - i added a layer of grey tulle over all of the small pieces to hold them in place.
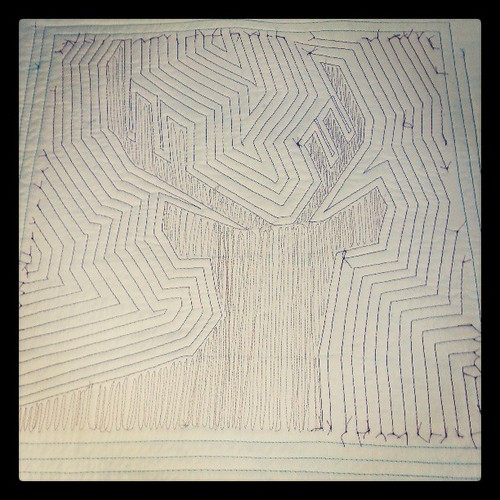
Step 8 - i freemotion quilted the entire map, using grey on the main areas and a mixture of greens on the parks. this was really fun, though also super hot in july! i particularly loved the fmq i did on the parks. these threads were all 50wt, a combo of cotton and polyester.
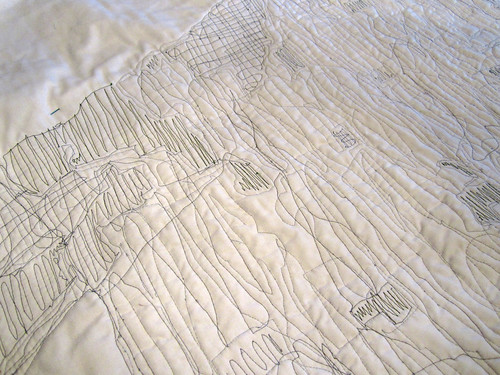
(the back shows the quilting better)
Step 9 - using 505 spray adhesive, i adhered the blue satin "water" fabric all around the city and free motion quilted it heavily.
Step 10 - i used more spray adhesive to adhere the washaway stabilizer from Step 2 to the map, and using 12wt cotton thread, began stitching along all of the streets on the map. i started out using aurifil 12wt cotton, and really struggled with it. it's a very loose twist, and because a map has so many criss crossing lines, it didn't hold up very well. i also had a ton of issues with tension and the thread breaking, though i think my needle choice caused a lot of that. i started to run out of thread, so i did a frantic search for more in the lower mainland, and no one had any! thanks to a FVMQG member's suggestion, i found Sulky 12wt cotton thread locally and switched, and it ended up working much better anyway.
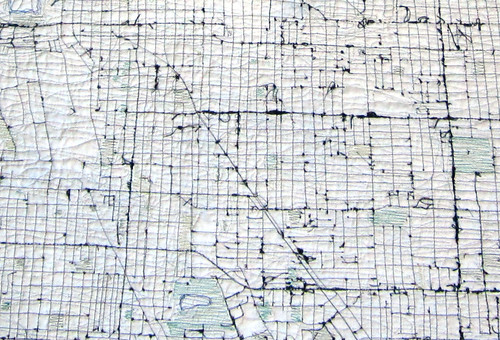
(a close up, complete with tension issues!)
(the back with the 12wt quilting over the 50wt, with the ocean fmq as well)
Step 11 - i washed the quilt, to remove the wash-away stabilizer. it shrunk a bit, but the use of the poly cotton base fabric and the netting helped some.
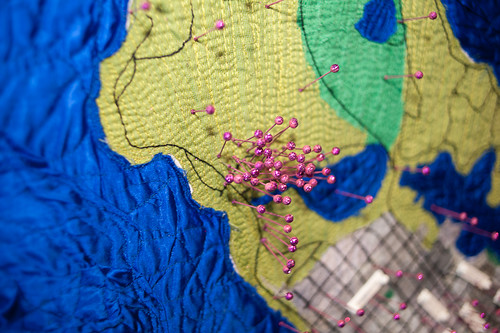
Step 12 - i bought hundreds and hundreds of straight pins, stuck them all into foamcore boards and spraypainted them pink. while the paint was wet, i sprinkled them with fuchsia glitter. yes, i did think i was going out of my mind by this point!

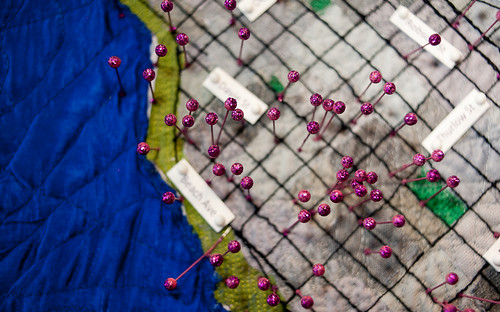
Step 13 - i created a list of street names in a word file and printed them onto printable Shrink Plastic. i cut them all out, hole punched both ends, and shrunk them in my oven.
Step 14 - my dad helped me build a frame for the quilt using 2x4s, 1x2s, and a layer of styrofoam insulation for the pins to stick into. the frame had to be in two pieces with a hinge, to fit in my van!
Step 15 - using my staple gun, i stapled the quilt to the frame we built. i treated it like a canvas i was stretching, or a stool i was upholstering, stapling one side, then stretching over to the other, etc.
Step 16 - i cut strips of the blue satin, pressed under the edges, and using strips of stitch witchery or wonder under, used my iron to adhere the strips to the sides of the wood frame to cover the stapled edges.
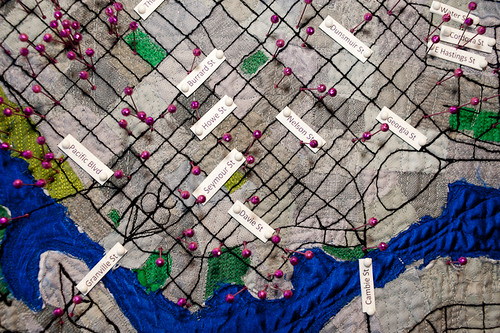
and FINALLY - my mom and i installed the piece, including sticking hundreds of glittery pins into the map for people to use to mark their spots. i used white straight pins to label the streets of the quilt, and about 10 minutes after i finished, the opening gala for the art show started!

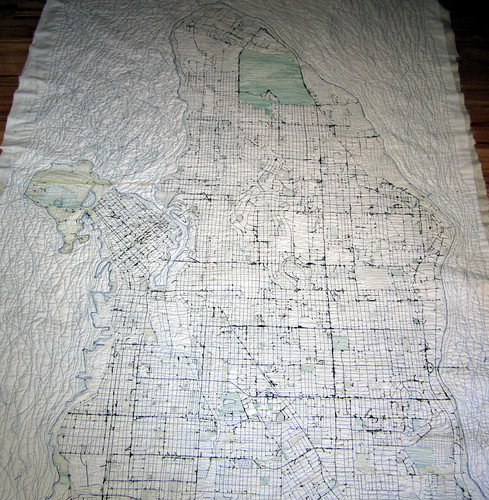
The Full Piece

UBC and endowment lands
Stanley Park

Downtown core
Beach Avenue
Downtown closeup
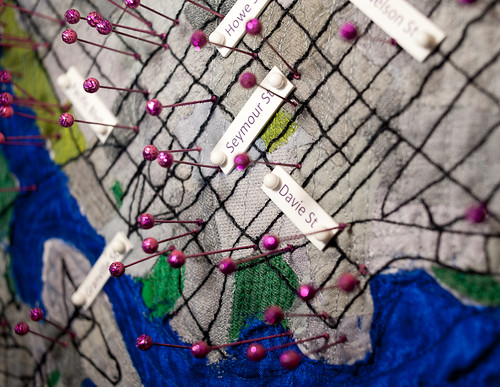
Seymour St

Granville Bridge
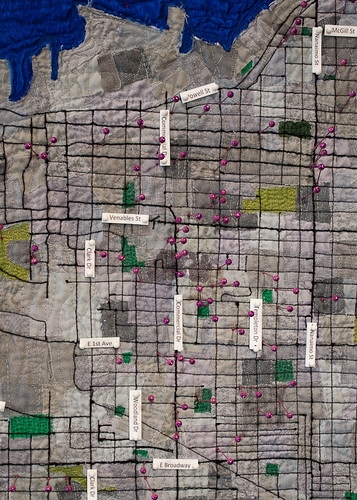
East Vancouver
Quilt Measurements: i don't remember... it's in storage right now, i'll measure it next time i'm over there and add them in. it's definitely bigger than 50"x60", i know that!
Special Techniques used, if any: applique, free motion quilting
Quilted by: me!
whew! that was a long post, with a ton of pictures, so congratulations if you made it all the way to the bottom. i don't blame you if you skimmed!
please note, i know that i'm taking a risk posting a political art piece for the Bloggers Quilt Festival, but i'm hoping we can all be responsible adults. if you disagree or disapprove of me, my life, my loved ones or my use of the word queer, please be respectful and keep it to yourself. thank you! regardless of how you feel about the theme, i hope you enjoyed my quilt itself, and the Bloggers Quilt Festival overall.

now go check out some of the other awesome quilts in the festival! (and don't forget to keep track of your favourites to nominate as you're surfing around!)