Tuesday, October 26, 2010

back to needlework!

i'm kinda alternating between halloween and needlework here, and since i still haven't had a chance to write up my thoughts on the class this weekend (i've been housesitting with no computer - i need a laptop!), i thought i'd post a project that i'm really really happy with.

again, this is a project that i've been planning forever, and just recently got around to doing. now i can't wait to do more!

two of hearts

this was really hard to photograph, but i think you get the idea. the stitching is all done in metallic thread (which is SO much easier to use on vinyl than on fabric!), and the vinyl has a bit of a sheen, so it's a very luminous and sparkly piece.

close up

cool, huh?

Monday, October 25, 2010

halloween trees - spooky and sparkly

first off, this weekend was AMAZING. i'll post more about it once i have time to edit photos and write everything up, but Trish was a wonderful teacher, and there are so many incredible things that you can do with encaustics. i have a million ideas running around in my head, of course, the day before i go to pick up my new embroidery machine and software! too much inspiration at the same time. it's too bad it can't be bottled and kept in reserve.

in the meantime, halloween is getting closer and closer, so i thought i'd post another halloween project.

trees!

i saw a variation on these in a christmas magazine, and immediately thought "white?! they'd look even better in black!"

IMG_9382IMG_9374IMG_9378


i did mine a little bit differently. i used 3/4" dowels, because that's what i had, and i painted them after i drilled them. i can't imagine painting them first, as they chipped/splintered a bit when they were drilled, and i had to sand them smooth. you'd just have to repaint them anyway. i also didn't make my trees as tall, i cut the dowels at random lengths.

no flash

with flash

and instead of the foam in an urn base, i used blocks and triangles that were leftovers from a recent project. i drilled a hole in each block with a 3/4" drill bit, and the dowels fit in nicely. after i painted them, i used white glue to coat each edge lightly, and pressed them into black glitter.

bases

i used a spray adhesive to apply the glitter, and that made them look a little more matte than i'd like. i think i'm going to spray them again with a gloss, to bring out the glitter, and to help it stay on. but i like them.

close up

and i can't wait to make a tall silver one for xmas!

Wednesday, October 20, 2010

Embroidered Halloween Headbands

ohmygoodness, halloween is SOON!

i was originally thinking that i was going to try to post a halloween idea every day, or at least every second day, up until halloween, but that has sadly fallen to the wayside. i'm working on projects, but getting them photographed and posted is a whole other story!

this week in particular is really overwhelming - thursday night is the next meeting of the Vancouver Modern Quilt Guild, and then this weekend i'm taking a 3 day encaustics class with Patricia Baldwin Seggebruch, which i am hella excited about!

but! i took some pics last night, so i have a few projects to share. the first is a really simple and easy halloween project that doesn't have to be for halloween at all - i just love halloween!

Embroidered Headbands!

it's been no secret that i really love embroidering on non-fabric surfaces (paper, speculums, safety glasses), and this idea has been rolling around in my head for close to a year, waiting patiently for me to find the time to get started on it.

the first thing you'll want to do is find some plain, solid, fairly wide, plastic headbands. these were trickier to find than i'd expected, there are so many fancy headbands out there! however, dollar stores prevailed, and i managed to find a variety of them.


take your headband and trace it out onto a piece of scrap paper. you might need to tape two pieces together, headbands are usually longer than 11".

headband1

cut out the strip, and make sure it fits your headband

headband2

now play! think up some designs, and sketch them out, using your cutout piece as a pattern. these headbands have a fun outline that felt kind of gothy to me, and seemed to lend itself perfectly to a spiderweb design. after you've drawn your designs and you're happy with them, go back with a marker and draw dots where you want to drill holes. make sure they aren't too close together, and that you have holes at corners and places where the embroidery floss will join. once you've finished your pattern, tape it onto your headband with invisible tape.

headband3

now, i cut a styrofoam head in half for this. you don't have to, but it makes it a lot easier, because you have something to put the headband on while drilling it that will keep it from bending oddly or possibly breaking. i had to cut the head shorter, because it was too tall to fit in my drill press! if you're using a hand drill, that won't be an issue at all. the styrofoam head i used had been rolling around in the trunk of my car forever, and was pretty beat up anyway!

put the headband on the head, and get ready to start drilling. i used a 1.5mm drill bit, which i bought on amazon.com.

headband4

drill! slow and steady wins the race.

headband6

you can see how the pattern was taped on, and the bits of styrofoam that stick to the inside of the headband. they'll blow away, it's all good.
headband5

headband7

when you remove the pattern, remove it carefully, because depending on how fancy your pattern was, you might need to refer to it when stitching. this is kind of like connect the dots embroidery, but without the numbers!

headband8

now start stitching! i LOVE these dental floss threaders for stuff like this (they also work fabulously for mending holes in sweaters, and for stringing beads onto yarn), but if you don't have any, or can't remember where the hell you put the pack of them, you can also use a piece of wire folded over.

headband9

rather than knotting your embroidery floss, when you begin and end a piece, use a little bit of the invisible tape to secure the ends. once you've embroidered the entire thing, go back in with a clear glue (i use glossy accents, because it doesn't seem to affect the plastic the same way crazy glue does) and glue the floss to the headband. once the glue is dry, you can go in and remove the tape, and trim the floss right down to the glue.

headband10


and here are the finished headbands!

(i've been waiting for a good hair day to take action shots, but i've accepted the fact that i'm not going to have a good hair day until i get around to dying my roots, so you'll just have to settle for pics taken over my awesome pink formica table instead.)

the spiderweb headband, which i stitched in grey floss with a silver metallic thread.

web band1

web band2
(see how neat and tidy the back looks?)

the bat headband, stitched with embroidery floss and two strands of guttermann metallic machine embroidery thread.

bat band1

bat band3

bat band2

bat band4

and the star band, with just embroidery floss, no metallic. i don't like how the tortoise shell is slightly see through, and you can see where i carried the floss from star to star. i'd go in and fix that, but i'm never gonna wear it anyway - i don't really like tortoiseshell anyway!

star band1

starband2


so! what do you think?

Saturday, October 16, 2010

nevermind the black, how about some pink?

i mentioned the other day that i was working on a project in a very non-amy dame colour scheme, and i thought i'd interrupt the halloween love that i've been posting (and will continue to post) to show you.

other canadians are probably familiar with the United Way, though i'm not sure if they exist in the states as well. basically they're a big charity. they raise money, and then distribute it to community projects and programs. personally, i'm not a huge fan of them, because i've worked non-profits, and know what a freaking hassle it is to jump through the rings that the United Way creates for even small amounts of funding, but they do provide easy ways for people to donate who wouldn't otherwise, and there's definitely value in that (i just think it's better to donate directly), and they do provide funding for really vital community programs. (though your definitions of vital may be different than theirs)

every fall they have a huge campaign in workplaces across the country that involves signing people up to donate through their payroll system and a whole bunch of fundraising within the workplace. my office does a giant book sale, bake sales, random activities, a silent auction, etc, but the big thing that everyone loves is the basket raffle. a group of people or a section of the workplace gets together and picks a theme and gathers up fun things to put in a basket, then everyone buys tickets and puts their tickets in the baskets that they really want to win. people do sports themes, scratch&win trees, christmas themes, etc. the alcohol baskets used to be hugely popular, but the provincial fundraising rules have changed around that, so we can't have booze or booze gift certificates anymore. sometimes people just pool their money and rather than buying a bunch of stuff to fill a basket, they buy one big ticket item, like an xbox or a wii.

this year my work area decided to do two baskets, one tea/coffee themed, and the other breast cancer awareness themed, since it's october.

i wanted to contribute, but i know that a lot of the "pink" products out there don't actually raise much, if any, money for cancer research. and besides that, i also wanted to do something that wasn't just a generic item with a pink ribbon slapped onto it.

so i made a pillow. and i really like how it turned out, even if it's not my usual style!

i remembered seeing quilting fabric with pink ribbons on it, so i went searching for that. i tried a few local quilting shops with no luck, and ended up at fabricland, where i found 3 prints, ranging in price from $5 to $18 a metre. i totally lucked out in that the $5 print was the one i liked best! i carried it around with me, gathering up other pinks. it was harder than i'd expected, actually, peachy pink shades aren't super popular right now, but i managed to find enough to have some variety in my pillow.

i started with this breast cancer awareness embroidery design that was a freebie from embroidery library last october (they have a different freebie this year).

embroidery

after i'd stitched that (on preshrunk twill that was in my stash - i prefer not to preshrink when i'm quilting, but you have to if you're embroidering), i laid the fabrics out next to it to decide on their order, then cut strips of varying widths and sewed them around the embroidery log cabin courthouse steps style.

pillow

i sandwiched together the pillow top, some cotton batting, and a backing fabric and quilted twice on each strip, a bit in from the seam on each side. i ended up with an extra strip that didn't fit once i started sewing, so i used it for a piping style trim around the pillow. the back was just a standard envelope style pillow backing, made out of the ribbon print fabric.

corner


in addition to the pillow, i decided to do some free standing lace (fsl) designs for the basket as well.

i found this ribbon design from embroidery library, and stitched up a few in pink to use as ornaments.

ribbons

i also found this design, which is actually intended to be a bracelet (child size, given my hoop limitations), but i decided to make it into a bookmark instead.

bookmark

after i'd stitched it all out, i found matching embroidery floss in my stash and made tassels for each end of it. once again, not my style at all, but i really like how it turned out.

bookmark detail

(you might have noticed that i'm a bit obsessed with fsl at the moment!)

so that's what i did for the basket. my coworkers were all super impressed with everything, especially the pillow, though of course, when it came to decide on a value for it to include in the basket listing, they had no concept of the actual value of an item that isn't factory sweatshop made. not unexpected, unfortunately!


i also made something fun for the coffee/tea basket, and i'll post that soon as well.

Friday, October 15, 2010

batlove!

i'm working on a couple halloween projects right now, and they're all in varying stages of completion.

but! today a new group was started on flickr for bat crafts, and i realized that there were some bat-themed projects that i'd never posted here.

last year i machine embroidered bat necklaces for myself and for a friend, using the free standing lace design from urban threads.
bat necklace

and i think i did post this pendant, which i made using a fsl design from embroidery library. it was one of the ones i made for a pendant swap on craftster.
3

but i'm certain i never posted this, because i made this costume many years ago... for halloween 2004 i was a bat! it was totally a fun costume. i made hairfalls and batwings, and a little headpiece to wear.

the wings were made out of vinyl, and they held up super well.

in progress
vinyl wings in progress

complete
vinyl batwings

a closeup of the little vinyl headpiece, with ears and a widow's peak -
bat headpiece

and the yarn hair falls
bat hair falls front

bat hair falls side

bat hair falls back

my hair was longer then, so i could put it into little ponytails/buns to attach the hair falls to. they were made out of 2 or 3 different types of yarn, black gimp, black pony beads, black bat rings, and rubber bats that i drilled holes into. the hair falls were so awesome to dance with - it's been so long since i've had long hair, i forgot how fun it is while you're dancing!

Thursday, October 14, 2010

3minute, 2dollar bunting decoration!

when i walked into work the other day, one of my coworkers had started decorating our area, and had put up a fabulous string of bunting. it looked really sharp from a distance, and it wasn't until i got much closer that i realized how she'd made it.

it was napkins!

duh! how have i never seen this before? as obsessed as i've been with bunting for several years now, and as obsessed as other craft bloggers have been, you'd think one of us would've come up with the idea by now! (someone may have, if so, link to them! i haven't seen it though, and google didn't find anything either)

this was the simplest, fastest, cheapest bunting ever, but it can look amazing. the one at work uses napkins that have an all over fall leaf design on them, and as much as i hate the colours of fall, it looks awesome.

napkin garland

i picked up a spool of metallic purple cord, hung it on the wall, and slipped the napkins over it. if you wanted to, you could put a strip of glue or doublesided tape on each one, though that might add another 2 minutes or so to the project!

the cool thing about this idea is that once in a while i totally fall in love with a paper napkin design, but i'm always torn. what am i going to DO with them? i hate paper napkins. they're super wasteful, and it seems really consumerist to buy new ones for each and every event, but you never have enough left of each design to use them again! i could use it in a collage, but do i need 24 napkins to use in a collage? this is a fabulous way to use them as decor!

napkins

i have really awesome spiderweb napkins in storage, i should go dig them out....


(fyi, it probably took me me 5 times as long to take the pictures, edit them and post this entry, than it did to make the garland!!)

Sunday, October 10, 2010

just a bit of a mish-mash.

i've been working on some rather random stuff lately, but i don't have finished shots of anything yet, so i thought i'd post some teasers...

it might seem like i haven't been doing any needlework, what with the quilt mania goin on around here lately, but that's just because i've been working on one particular project that has taken me soooooo much longer than anticipated!

i'm doing a cross stitch design using waste canvas -
xstitch pansies

and i also stitched up a cute little sheet to donate to a silent auction for a friend's immigration costs -
silent auction


back to the quilty stuff, today i finished a project in shades that are SOOO not my usual palette!
pink

and i spent some time making hexagons... so fun!
the backs of my hexies


the other night i did a puzzle with a bunch of friends at one of my favourite places in the world, rhizome cafe. it was supposed to be board game night, but i <3 puzzles more! i've had this puzzle for a while, and it is so PERFECTLY me, but i hadn't actually put it together before. it was totally fun, though it would've been easier with more light - i thought about bringing a lamp, but that felt kind of cheeky!
ta-da
you know that you're a huge crafty geek when you say things like "no, i need a puzzle piece with a red machine formed glass button, that one's not glass, and it's hand carved" or, "does anyone see more of the molded plastic 40s floral buttons?"!!!


i've been doing some machine embroidery projects as well, and fighting with my machine a lot! i've decided that i need to upgrade to a machine with a larger stitch size capability (5"x7"!! so exciting!!), and i'm torn between sticking with brother, most likely getting the PE-780D or switching over to janome/elna and getting the Elna 8300.

i'm irritated as hell with brother, because this machine has been so frustrating, and honestly, my previous non-embroidery machine was a brother as well, and it had some issues. mostly the problem is that i sew random crap, and put my machines through a lot of stress. since brothers are usually plastic interiors, they don't hold up well to rigorous sewing. in addition, i'm not super fond of the brother dealers in my area - one's in vancouver, and has always been rather snotty, and is a pain in the ass to take machines in to, as they have no designated parking and they're on a super busy street, and the other is about half an hour away from me, and some days they're extremely friendly, but other days they're not, and half the time they don't seem to have any idea what i'm talking about anyway. plus, all of the brother machines come with disney/pixar designs, and i HATE disney, for a multitude of reasons. i don't spend money on any item that will support disney, so why would i spend a large amount of money on something affiliated with the company?

the elna looks fabulous, and i went in today to a dealer who i've gone to in the past for servicing and repair. he's incredibly knowledgeable, almost to the point of information overload! i really like the idea of having a separate embroidery machine, because then i don't have to worry about ruining the embroidery functionality by sewing other projects out of heavy stuff. it has a lot of features that i really like, include the ease of portability compared to the brothers, the estimated time remaining to complete the design, a fancier lcd screen than i have now, etc. and it's metal interior, so it's going to hold up for longer. and i like elna, i've always had good experiences with them, and they have a great reputation. i feel like they're a better company than brother....

elna 8300

the problem is that i've already bought the basic brother design software, and it doesn't work with any other formats. however, it isn't that great of software anyway, and i would need to spend about $1000 to upgrade to the software that does what i actually want to do. i could get the janome digitizer MB, which is pricey as well, but actually does the stuff i want, and does lots of other fun stuff too.

so i'm waffling. but i'm leaving towards the elna.... another perspective is that every single time i go in to tom's sewing machines (the elna dealer) with problems or questions, someone is always available to help me, whether it's tom himself or one of the women who work there. and almost every time i've gone into the Laura's (the brother dealer) with an issue, they've been too busy to help me and have asked me to come back, or there's no one there who knows enough to help.

i'm super excited to have the capability to do larger designs though!! one of the very first things i'm going to make is this lace witch hat from urban threads. and then the lace top hat...


and speaking of witches, and therefore halloween, craftcritique.com is doing a halloween blog carnival! so awesome. i have multiple halloween projects that i need to get a move on to post!

in addition to the projects i was already planning on, i spent hours today googling xmas ideas for a guild project, and lots of them could be adapted to be for halloween instead... remember my halloween wreaths a few years ago? i think i need to make a couple of new ones...

Monday, October 4, 2010

Quilt Show!

this past weekend i went to my very first quilt show, "And the Stitch Goes On", presented by the Boundary Bay Quilters Guild in celebration of their 10th anniversary.

i'd never been to a quilt show, but i assumed it would similar to an art show - lots of quilts on display, and since it's a guild, not one artisan, lots of variety.

and it totally was. there was so much eye candy and inspiration! 
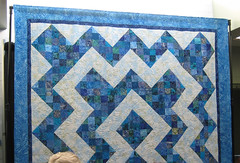
(there are a lot of pictures, so i'm posting them small, and as usual, click on them to go over to flickr and see them bigger)

this quilt was what you saw when you walked in the door, it was being raffled off. i love the blue batiks!
raffle quilt

rainbow logcabinrainbow log cabin info
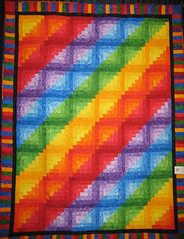
i really love log cabins, and this one was just so bright and beautiful.

little monsterslittle monsters info
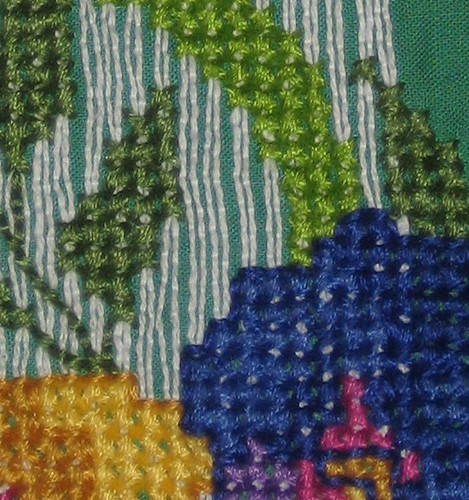
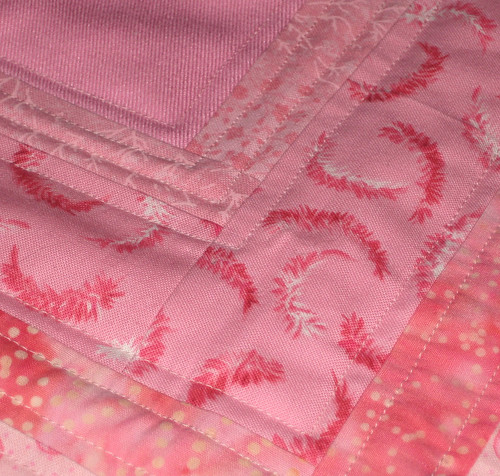
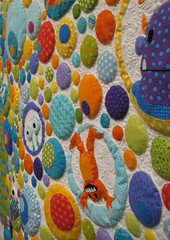
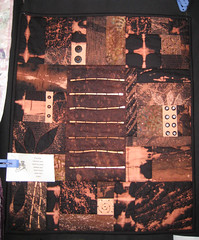
ohmygoodness, the work involved in this! there was another version of it upstairs that had been simplified a bit and was equally cool, but wasn't accessible to take a photo of. but check out some close ups of this one -
little monsters detail1little monsters detail 2

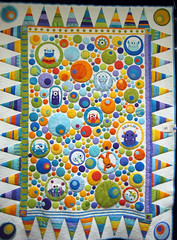
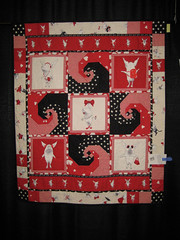
this is a baby quilt, using "olivia" fabric. my friend sass really loves olivia, so i had to take a picture of it!
oliviaolivia 2

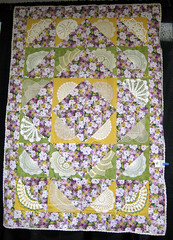
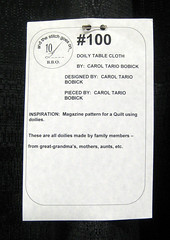
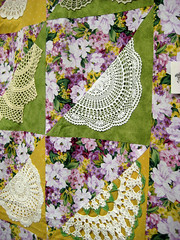
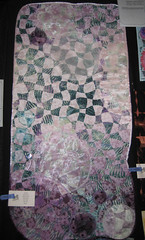
i found this one really interesting, because as anyone who's seen my rubbermaid full of them would know, i LOVE doilies, and i've been planning a doily quilt for a few years now, and just haven't gotten around to it yet. this one is definitely not my particular style, but it's still really neat.
doily tableclothdoily tablecloth infodoily tablecloth detail

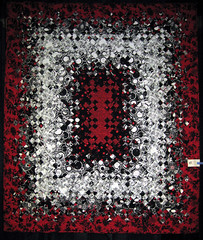
this quilt was made by someone i know, for her daughter's 21st birthday. as much as i'm freaked out that she's 21 (i knew her when she was a brownie!), the quilt is awesome.
black jackblack jack infoblack jack detail

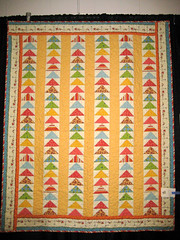
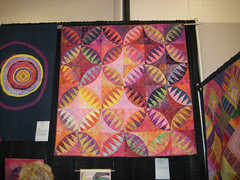
i love the brightness of this one, and the single rows of the flying geese pieces (are they still called flying geese if it's just one row? i think so...)
flying chirpersflying chirpers info

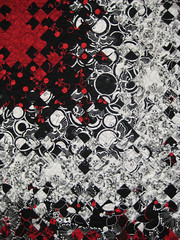
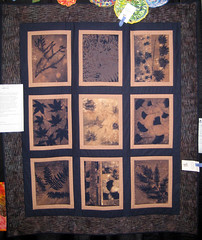
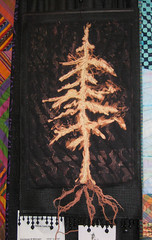
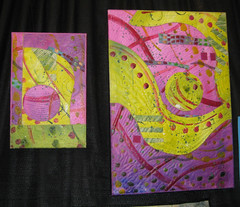
there is apparently a smaller group within the guild who get together to focus on art based quilts, different surface designs, etc. they obviously have read the same issues of quilting arts as me, as there were a few pieces that were very recognizable!
bubblesbubbles info
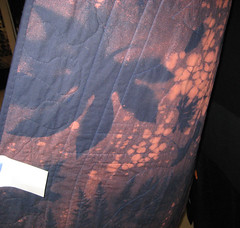
there were also several pieces using bleach discharge, which i love, and i'm currently working on a quilt using the same technique myself, so i was excited to see theirs.
bleach discharge sampler
out of the boxout of the box infoout of the box back

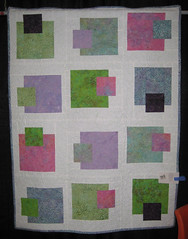
i loved the modern lines and squares in this baby quilt. so lovely.
city blockscity blocks info


there was also a section of the show where a number of quilts by the same person were displayed, and she was their feature quilter. a lot of her stuff was bordering on art quilt style, and was really amazing.
featured quilter 4featured quilter 4 info

featured quilter 3

featured quilter 2

featured quilter


the other part of the quilt show, the part i WASN'T expecting, was the vendors. yay, fabric shopping!! now that i think about it, i really should've known there would be vendors, but i just didn't think about it. i think i read somewhere that there were 17 vendors total...

it could've been very dangerous, but the majority of the vendors weren't my style, or didn't interest me (like the thread vendors. so many different kinds of threads! so overwhelming!), so it wasn't as hard on my wallet as it could have been. i mostly bought small pieces to add to my stash, or things that i'd been thinking that i needed anyway.

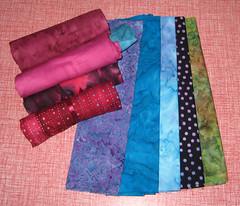
i picked up some batiks from BatikKorner, mostly in my usual batik colours - jewel tones, but also a few greens for a specific project.
batiks

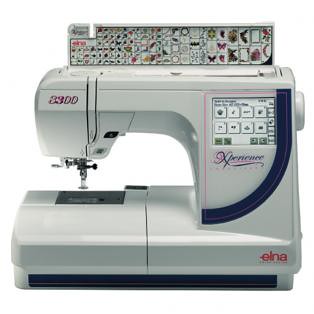
Country Folk Fabrics/Tom's Sewing Machine had a booth, so i picked up a few fat quarters from them, including a print i'd been planning to go pick up anyway, another halloween design from the line that i used for a bunch of my halloween blocks.
cupcakes and fqs

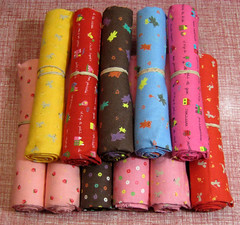
the guild itself had a booth, and among the pre-made things, they were also selling jelly roll "cupcakes" to celebrate their anniversary and to raise money for the charity quilts that they do. since i love stripes, i picked up a few. okay, 4. (and i kinda wish i'd bought more, cause that's only 40 strips....)
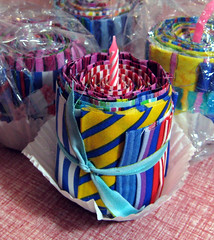
cupcake
hello CUTE!
stripes
there was some duplication between the rolls, but really not that much, considering.

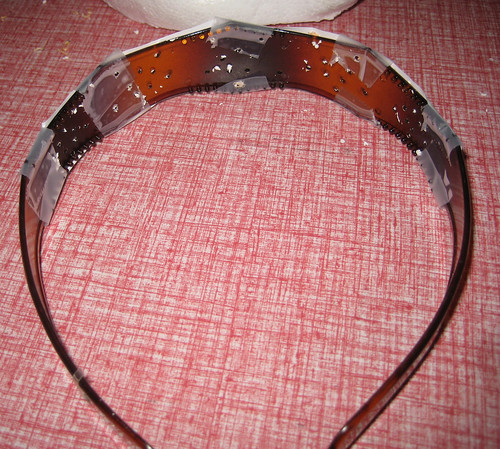
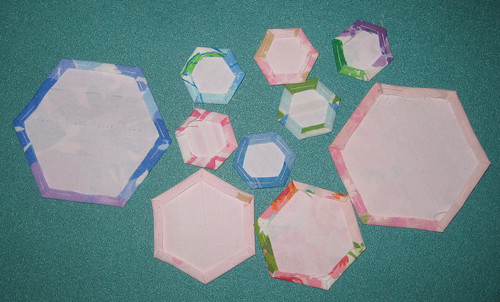
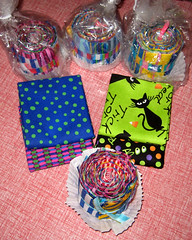
i bought 3 thermal screens, though i only managed to get a halfway decent photo of one of them.
dragonfly
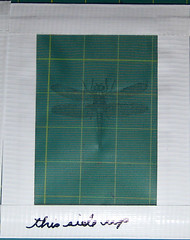
i got a dragonfly, a butterfly and a screen with several bees on it. they're very cool, similar to silkscreens. and the woman who was selling them does custom designs at pretty reasonable prices, which would be so great if i decide i'm too lazy to actually silkscreen any of the designs i've been thinking about lately!
(she doesn't have a website, but her name is Eileen, and she can be reached via e-mail eileenneill AT shaw DOT ca if you're as intrigued as i am!)

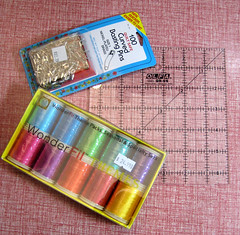
i got a few notions, pins because i really needed more (i ran out while basting my quilt-a-long quilt, darn it!), some threads to play around with (they were on special, not what the tag says), and a great 6.5" ruler, which is perfect for the halloween blocks that i need to get my butt in gear on, and it was only a $1 cause my bill was over a certain amount.
notions

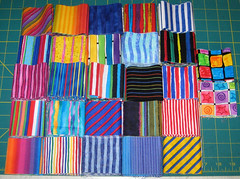
and then there were the fat quarters. ohh, the fat quarters. i got 24! for $40! they were $2 each, and for every 10 you bought, you got two free, which worked out splendidly. i scooped up a bunch of super cute japanese imports
import fqs
(the strawberries! the cuteness!)
and then got a bunch of stripes and polka dots, etc. and a sock monkey, cause i only had 23, and grabbed it quick!
fqs
the fqs, the thread and the ruler were from Carola's Quilt Shop and Thread Company. she had some lovely fq bundles as well - kaffe fasset and batiks, and some cute charm packs, but i resisted. i really love the prints that moda makes, but i hate how they all have creamy or brownish undertones. why must they do that, really?

there were a few folks from Vancouver Modern Quilt Guild there, Jenny from the Quilted Bear had a booth (i resisted buying halloween fabric from her at the show, because i knew i'd be going in to the store soon anyway), and so did Maureen from Creative Edge Quilting and Sewing, and it was lovely to chat with her.


all in all, it was a pretty fabulous first quilt show experience, though my body was pretty darn unhappy with me afterwards - i was so inspired, but i came home and collapsed instead of sewing!
Related Posts with Thumbnails