
speaking of the giveaway, ohmygoodness, y'all are leaving such lovely comments on that post! thank you! i'm definitely going to write up a tutorial for it, though it might not be until i'm home next week.
yes, you read that - i'm home next week! yay! i enjoy being out here, but i miss my friends and family, time to myself, and most of all - my own bed. i can talk to friends and family on the phone, and steal a few hours at night for myself, but there's nothing i can do about my bed! sofie and i will both be very happy to get back to it.
it occurred to me that i made holiday ornaments over a month ago, but i've yet to blog them. maybe that should be a new year's resolution.... hmm. anyway.
remember a whole long time ago when i mentioned the Trim The Tree Swap on flickr? i wanted to wait until my ornaments have been received before i blogged about them, but then i got distracted, obviously. and then i started making more, so i figured i might as well blog about them all at the same time.and then i contemplated writing a tutorial for some of them, but that's not going to happen, so i'm thinking i'll meet you half way and share my pattern. cool?
but wait! i'm getting ahead of myself here!
let's talk about the ornaments for the swap. i had three partners that i was crafting for, and because i think thaty's the best part of swapping, i always try to take my partner's likes and dislikes into consideration.
my first partner likes red, green and blue, woodland creatures, nature, and embroidery. after going through her favourites and checking out the mosaic that she made, i saw that she really loved owls. i spent a whole bunch of time looking at different owl projects, and pinterest'd a ton of them, and in the end, used a pattern that i've made before, because i love the end result, and it's totally mailable.
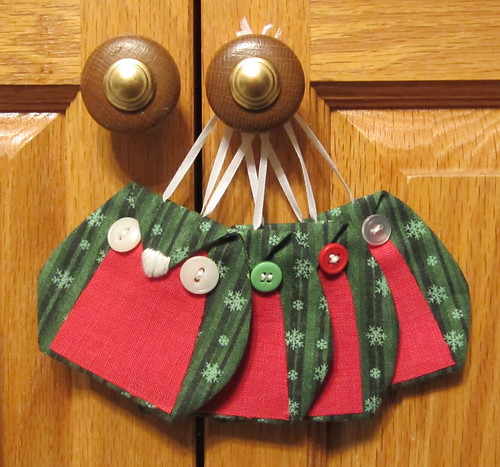
aren't they cute? i used red linen for the bellies, and a stripey green snowflake print for the owls themselves. i figured that way they can be christmassy or they can be wintery, however you prefer to look at it.
the pattern is actually for an owl garland, but i adapted it to make individual ornaments as well back when i made them in 2008. if you were on craftster.org back then, you probably recognize the pattern, they were super popular that christmas. the tutorial is by moonstitches, who also has a tutorial for cute little stuffy owls.
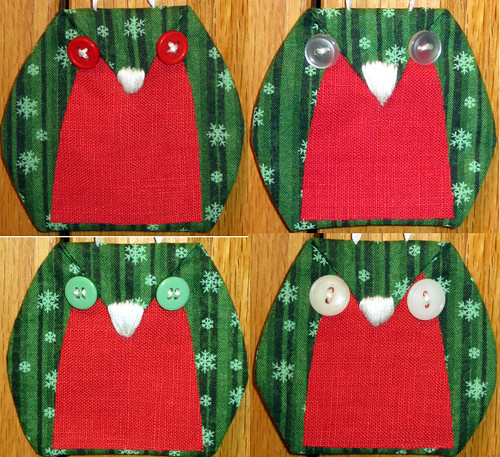
i posted them in the flickr group and asked which owl people likled best, and my partner liked the one on the bottom right, with the white eyes. i kinda think the upper right one looks evil, what do you think?
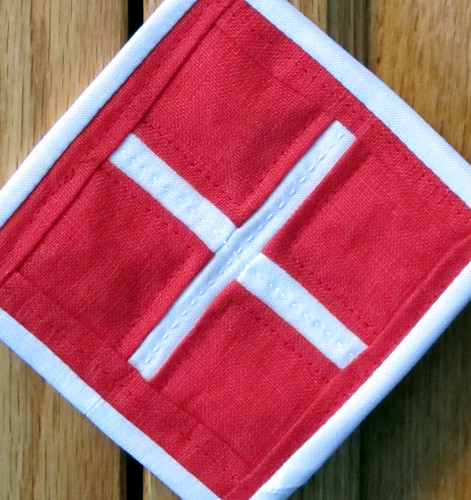
my second parter didn't make a mosaic of ornaments that she liked, so it was a bit harder to figure out what to make for her! however, she did say that she liked red and white, and after going through her favourites, i saw that she liked this cross pincushion made with teensy little wonky crosses.
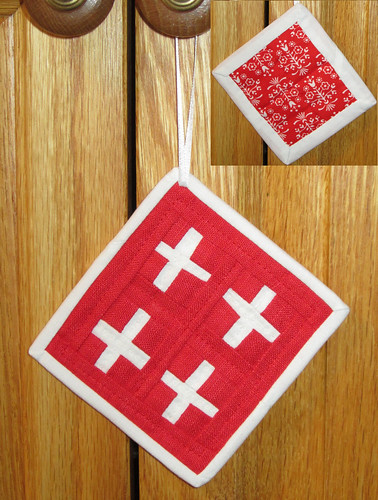
i decided to use the red linen to incorporate a bit of contrast, and white kona. there's a layer of cotton batting, and as you can see, the backing is a neat red print that i found at the thrift. i made the ornament when i was out here in november, without rotary cutting tools or my own sewing machine, and i decided to embrace the wonkiness inherent in hand cutting strips of fabric.
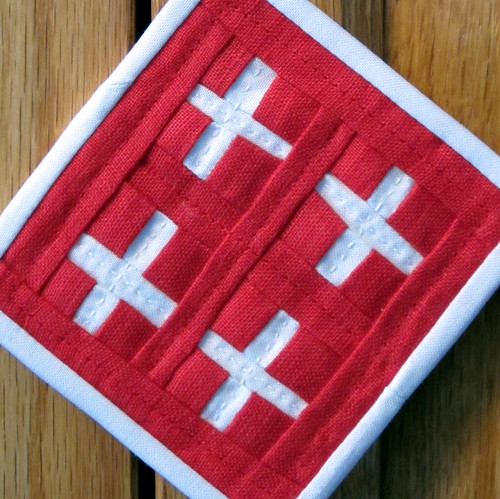
i did a bit of hand quilting inside the crosses, and machine quilted on the linen. i like the combination of hand and machine.
and then because i LOVED how that one came out, i made myself an ornament with just one wonky cross. i bound them both in strips of white kona.
i combined hand and machine quilting in this ornament as well.
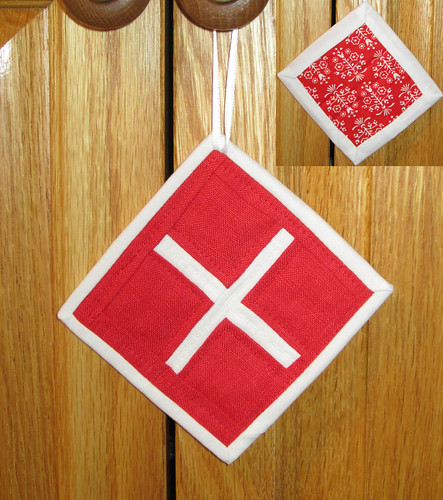
i was really happy with how they turned out, though i think that my binding was a bit too wide.
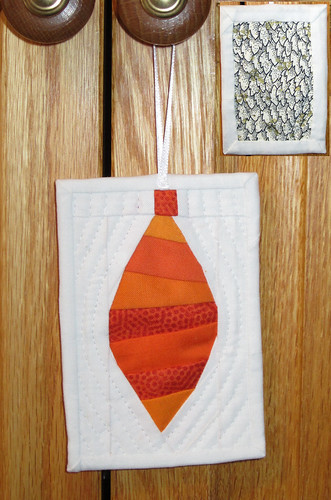
and my third partner! i struggled a bit with hers too, just because i really didn't see any patterns in her favourites or mosaic, any particular thing that she really loved. she said that she liked teal, burnt orange, and red, and that her tree was very eclectic tree. she preferred ornaments that are a bit funky, and is attracted to modern and scandinavian designs.
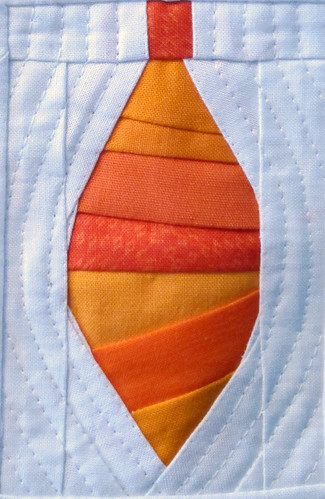
i decide to use one the shapes commonly used for vintage ornaments, and make it a little funky by (somewhat) freehand paperpiecing it. i made two ornaments using shades of orange, both solids and prints, and white kona, and again posted them to the flickr group asking which people liked best. she was super busy and didn't have a chance to comment on it (which i sooo understand), so i sent her the one with the most burnt orange in it.
i used christmassy fabric for the back of one of them, and the same folky red print as the cross ornaments for the second.
i didn't do hand quilting on these ones, just machine quilting, but i really like how the quilting emphasizes the curve of the shape.
so those were the swap ornaments!
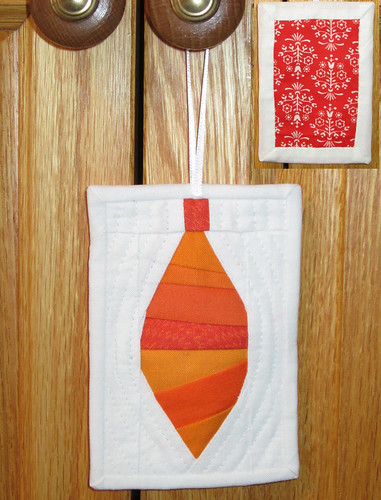
and then i decided to make some more paperpieced ornaments. i have three more started, but these are the only two that i've finished so far. i wanted to try using a single fabric for the ornaments, and i like how that worked too.
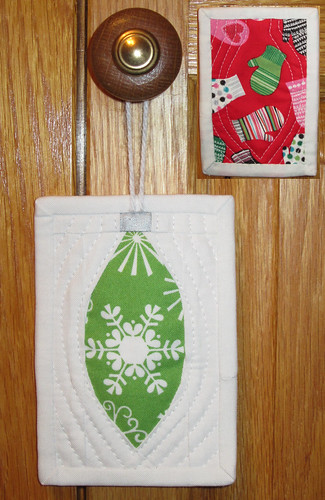
i fussy cut the ornament fabric so that the snowflake would be centred, and i like the little bit towards the "neck" of the ornament too. i backed it with a super cute mitten print that i think is from the same fabric line... maybe. i might be wrong. robert kaufman, a few years ago? i'm not sure.
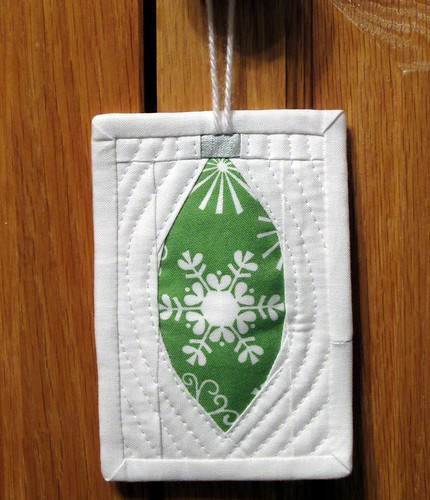
speaking of the "neck", i changed how i did the little hanger portion too. i used silver fabric, to look more like the usual ornament top. it's the same fabric used on ironing boards, and it worked perfectly. i also used white yarn, but that's just because i forgot my white ribbon at home and raided my grandma's yarn stash out of desperation!
i fussy cut the second one as well, and this particular print had the benefit of the stripes giving the appearance of piecing even though it was a single fabric.
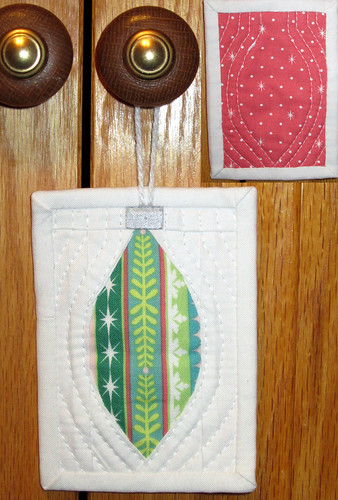
i backed it with fabric from the same line, which is a bit more peachy than it comes across in the pictures.
so! do you like my ornaments? do you want to make your own?
here's the template i drew up -
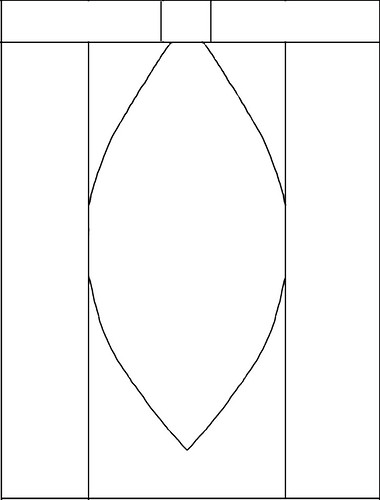
if you open a word file, change your margins to narrow and set it to landscape, you can fit three upright patterns across the top of the page, and two sideways patterns across the bottom, with plenty of space around them to cut them out. and here's a sideways version, for anyone who doesn't have photo editing software to turn it themselves.
you can see that the ornament has four distinct sections - the top, the centre, and the two sides. piece the centre, then add the solid strips along the sides. piece the top, then sew it to the bottom three sections. does that make sense?
when you're piecing the background, you'll need to use multiple pieces, each with a slightly different angle, to maintain the curves. if you're not sure, click on any of my pictures above and go to flickr, where you can see the photos larger by clicking on "actions" then "view all sizes". clear as mud, right? on that same note, if you'd like to download the original size pattern, view all sizes and click on "original", then right click and save.
i wouldn't suggest these for your very first paperpiecing project, but don't be intimidated by the curves either!
if you make one, i'd love to see it!
2 comments:
I think the one with the red eyes is creepier looking than the black. But the green & white are super duper cute! Totally dig the ornament ornament, though I'm nowhere near ready to try that! LOL
These are very cool Amy!! And thank you for sharing the pattern, I think I might try one out!
Post a Comment