Showing posts with label beading. Show all posts

Saturday, December 18, 2010

garlands garlands garlands!

wow, where did the last month go? we often say that time flies, or that time goes by very quickly, but honestly, this year has REALLY flown by!

i have great admiration for folks who can blog regularly, and folks who read blogs regularly, but i don't know how they do it - i can't even update my own blog regularly, much less keep up with others!

i've been working on lots of things the last little while, and kept intending to blog about them... that obviously didn't happen!!

i've been really overwhelmed lately, and felt like i had too many projects on the go, and that i was working on little bits and pieces without actually finishing anything.

some of the bits and pieces i've been working on were garlands, because i LOVE garlands, and they've been a good low key stress reliever type craft to work on periodically. i had a grand plan to post a different garland every day for a week - but now xmas is less than a week away, and most people are probably more organized than me, and actually have all of their decorating completed already.

i thought i'd post them all anyway, because they were fun to do, and i quite like them. maybe i'll repost them again next year, earlier!

the first bunch of garlands that i made were these snowball garlands. i found bags of small styrofoam balls covered in the iridescent clear glitter at the dollar store, and fell in love. i decided to pick up colours from the iridescence with beads, and string them into garlands. i still have a TON of the snowballs left - i think i need to make some garlands with no beads, just snowballs!

snowball garland 1

snowball garland 2

blue snowballs

green snowballs

then i made super quick and cute ribbon using my much-loved ruffler foot, and spools of chiffon ribbon from the same dollar store. i like the turquoise one better - i think the fuchsia ribbon is a bit too wide.... the fun thing about these garlands is that if you don't want to use them for your tree next year, you can use them for your next sewing project!

fuchsia ribbon

turquoise ribbon

i also made a few strands of card garlands, the same ones that everyone does cause they're so easy and cute. punch out the circles with a paper punch, and then use stickers to adhere them to your string. easy-peasy! i've seen them made with recycled xmas cards, and that's lovely, but i really wanted mine to be more cohesive, so i bought a half full pack of christmas cards from a thrift store, and punched all my circles and ovals from them.

card garland

and then i started playing with measuring tapes. i loooove measuring tapes.. i wish they came in more exciting colours, but i can't really complain when i only paid $1 for 4 of them! i learned the hard way a few years ago that the super cheap measuring tapes aren't actually accurate, which is so bizarre, but that just means you don't have to feel bad about cutting them up to make them into other things!

first i made a chain

blue chain

i sewed the ends together on my sewing machine, using a teflon foot, since measuring tapes are plastic coated.

blue chain in progress

i used 3 measuring tapes to make a garland that measures about 70".

blue chain close up

i cut the blue pieces about 7" long, and i don't think i would cut them any shorter than that. i tried cutting a yellow tape into smaller pieces, and the chains didn't hang as nicely, and they looked a little off.

so i chopped them into smaller pieces, and played around with that idea.

yellow detail

i sewed through them with bright blue thread, again with the teflon foot.

yellow

it gets tangled super easily, but the left over spools from the ruffled ribbon garland work perfectly for storage!

yellow stored

i played with a black and white tape as well - the result isn't as christmasy, but it would definitely look fun hanging in your studio year round!

black and white

black and white close up

sooo... those were my garlands. i had a few others that i was going to do as well, but garlands were pretty low on my priority list. the only reason i managed to get this much completed was because i started them super early, before i realized how much i had on my plate!

Friday, May 28, 2010

Mixed Media Heart Brooches (belated valentines!)

given that it's almost june, i figured it was about time i posted this year's valentines! (you can see last years, and the year before, and the year before that, here)

this year i was all determined that i wasn't going to go overboard, that i was only going to send valentines to people who i knew would really appreciate them, and i was definitely going to stay below 30.

that was all fine and good, until i had a brainstorm that ended up with them being the most time intensive valentines EVER!

this was the finished result - cause if i'm gonna go overboard, i'm gonna go all the way!
card fronts

this is what i started with - fabrics in shades of pink and red, trims and tulle.
in progress 1

using spray adhesive, i laid out pieces of fabric onto a large piece of tulle and then used more spray adhesive and covered it with wash away stabilizer, which is seriously the coolest shit ever. i sewed the crap out of it (good time to use up bobbins and almost finished spools of thread!) to hold it all together, and then added some machine embroidered hearts scattered around it.
in progress 2

the next step was to remove the washaway stabilizer, so i filled up my kitchen sink with hot water and dropped it in.
in progress 3
i swished it around in there for a while, replaced the water at least once, and then tossed it into a pillowcase and put it in the dryer.

and this is what emerged -
in progress 4

and the back -
in progress 5

i started out cutting the large piece into smaller shapes, squares and rectangles mostly.

and that's when the REALLY time consuming brainstorm hit!


what if i cut out hearts and made everyone heart brooches!!?? how fabulous would that be?

so i drew up heart templates. i cut out hearts. i cut out backing for each heart. i cut little pieces of the backing to hold the pin on.

and i started embroidering. every heart is embroidered, some have beads stitched on as well. i collected fun floss in pinks and reds (including metallic and rayon), buttons, sequins, beads, etc and stitched them all on. some of them had 1" pins attached to them, with images of other stuff i've made. i experimented with different stitches, and played around. they were so much fun! i've been really wanting to do more art quilting and mixed media embroidery, and these were the perfect size to carry around with me to work on.

but they kinda took a long time - by the time i finished the decorating, it was march. oops!

i used my machine to sew the brooch pin onto the backing, and then the backing onto the hearts. just a zigzag stitch around, holding them together. because i'd decorated right up to the edge on some of them, it was slightly challenging, but i switched to the darning foot, and that helped a whole lot.some of them came out a little wonky from the fabric stretching, but that just gave them character.

hearts 1

hearts 2

hearts 3

hearts 4

hearts 5
they were difficult to photograph, given the variety of textures and surfaces that caught the light.

at this point i decided that not everyone would want to actually wear a pink/red heart brooch, which is perfectly valid. so i decided to make them multitasking hearts, and make them magnets as well.

i sewed little pouches out of lace fabric - it was thin enough that the magnets still worked through it, and sturdy enough to not rip, and slipped magnets into them. i stitched them shut, and pinned them onto the hearts.

heart backs
the bigger hearts were a bit too heavy though, so i tried using two magnets, as you can see. it worked, but wasn't quite as pretty as i'd have liked! i went and found some larger magnets and redid them, and i liked them much better.

i also had to think about presentation, right? how was i going to mail these? hmmmm...

i pulled out some pink cardstock and cut it into rectangles that would fit inside standard card envelopes. i wrote up a message in word, and printed it out onto my favourite paper - vintage french pink paper with graph lines on it. i cut the pink paper into smaller rectangles, and attached them onto the pink cardstock. i punched holes in the middle to poke the brooch through, so that the hearts could be pinned on.
card fronts detail 1

card fronts detail 2

for the backs, i hauled out some rubber stamps and staZon ink and stamped away.
card backs

i stamped my blog address along the sides, a cute "handmade" stamp below the holes, and used a date stamp to stamp the month and year at the bottom.

card backs detail
i also decided that i should explain the magnet, so i wrote up a little message in word and again printed it onto my favourite paper. i cut out the little snippets and ran them through my xyron, then applied them to the backs.

and those were my 2010 valentines.

and despite how much i love the end result, 2011's will be MUCH less time intensive!

Saturday, August 23, 2008

catch up and dotee dolls!

ohmygoodness, it's been a while! i've been so busy, it's just been ridiculous!

after my last post, i had some bad health weeks (as usual), went to a wedding which wore me out immensely, and then started on a super intensive secret project that basically had me sleeping and sewing for two weeks straight! i was supposed to leave for a holiday last tuesday, but due to exhaustion and stress and a whole bunch of family stuff (my poor little sister was in a car accident 3 days before we were supposed to leave! she's okay, just sore), it was canceled. i'm sad that i'm not going but wow, what a relief at the same time! that gave me time to finish up round 2 of the dotee swap, which i was late for, and now i can finally breathe again! and start catching up on here and on craftster!

since i've just finished the dotees for round 2 of that swap, it's about time i posted the ones i made for round 1!

i have to say i wasn't completely happy with these ones (i love the ones i made for round 2 way more!). they were fun, but i think i tried to make the shapes too wacky...

the faces were all made with iron on transfers ironed onto white felt. i chose the felt because i wanted something non-fraying, and it worked really well. before i printed the faces, i changed the colour tones in photoshop to match them to the fabric colour, and i love the effect.

the two blue ones -
PhotobucketPhotobucket

Photobucket
(this face is from an old ad - i think it's deborah kerr, though that was just a fluke!)

Photobucket
(the face for this one came from a bunch of old photos than Jane Doe sent me - she was my favourite!)

the green ones
PhotobucketPhotobucket

Photobucket
(this face came from vintage photos purchased from thepaperfleamarket.com )
Photobucket

and the red ones
PhotobucketPhotobucket

Photobucket
(this face came from vintage photos purchased from thepaperfleamarket.com as well, i ended up with a few photos of this girl! the flowers are vintage beads purchased on etsy)

Photobucket
this one was my favourite! it's most my style i guess. and i looooove the red velvet i used, it's the same stuff i used for the sacred he(art) chunky page.

Tuesday, October 2, 2007

fabric ATCS

i made these in the beginning of september, but i was waiting for their recipients to receive them before i posted them, and then i forgot. oops!
i had been feeling crummy, and they were the perfect thing to keep me occupied while i sat on the couch in front of countless episodes of CSI.

(oh, as usual, click on the picture and the full image will open in a new window. if you know how to make my blog wider so it'll stop cutting off my pictures, let me know!


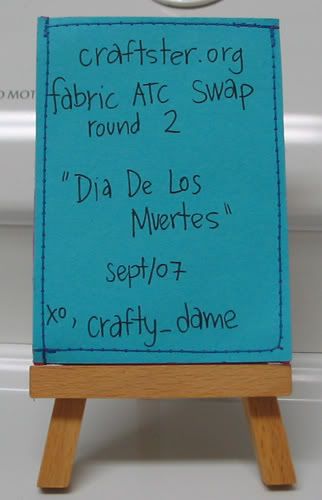
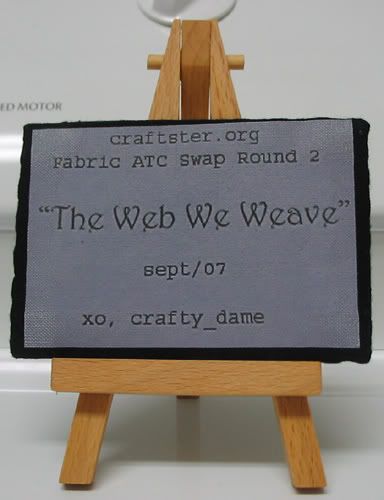
the first three were made for round 2 of the fabric ATC swap on craftster.org.

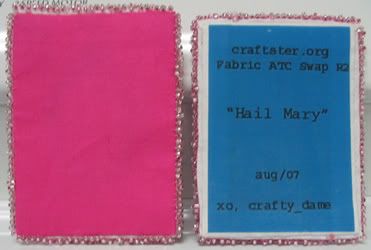
hail mary
the one on the left was supposed to be mine, cause i screwed it up (the text is upside down!), and i made it first to figure out how exactly i wanted to do the beading.


i forgot to print two backs onto the iron on paper, so mine doesn't have a back. i was going to add a loop and hang it in my bathroom, but a friend fell in love with it on sight, and i couldn't say no!

i made up the background in photoshop, it's "hail mary" typed out enough times to fill the rectangle. then i printed the background and the inside picture, cut out the picture as an oval and cut an oval out of the background, ironed them on at the same time. before i removed the paper i ironed some batting on too. then i pressed the edges under on the front and the back. i did the blue beading before i joined them, one bead at a time, and the scattered pink ones. then i hand sewed the front and the back together and sewed the pink beads on the edges (3 beads at a time, going from front to back). for the second one i added another shade of pink beads to the border cause i thought the other ones were too pastely.


day of the dead
for the second one i added another shade of pink beads to the border cause i thought the other ones were too pastely.

embroidery and sequins! i did some embroidery with metallic thread too...
i was pretty proud of my skull, i always get stressed out about day of the dead skulls, i can never draw them properly! i used regular embroidery floss, and the metallic machine embroidery thread.


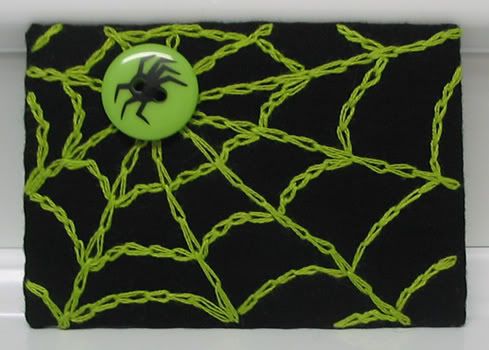
spider web

embroidered web and one of the fabulous buttons i bought at jo-anns in portland. (jo-anns has SO MUCH cool stuff!)

the spider one is simpler than the others i did for the swap, because i was having inspiration issues. i really love it though!

i got totally into the beading after the hail mary card, and made this one for my friend joanne.

i found this fabric with little women's symbols on it at a fabric outlet in burlington, wa and i couldn't resist buying a yard of it... i have no clue what else to use it for, but i thought it was fun for joanne. she's been so active is women's organizations and women's committees over the years, i think she'll love it.

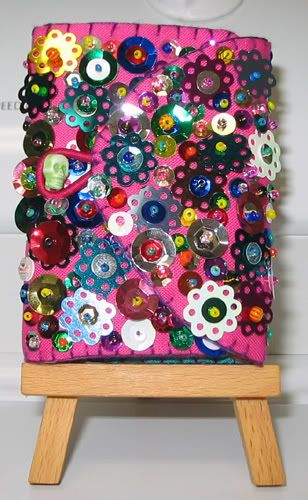
mexican mini-shrine atc. it's atc size, but it unfolds.
this one was originally going to be for the ATC swap, but i decided it was way too complex compared to the others, plus i really didn't want to give it up!

all sequined on the front (with a green skull bead and a loop of pink elastic for closure)

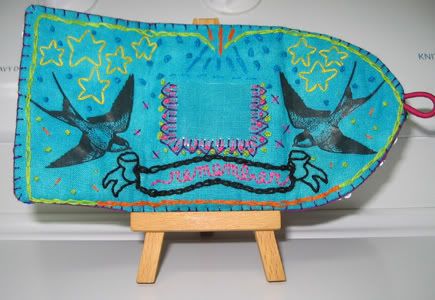
opened up. lots of embroidery! everytime i thought i was done i'd be like "oh, but i think it needs a bit more of this colour...."! the swallows are iron on transfers. the banner at the bottom says remember, and the empty square in the centre is actually a little vinyl pocket to put a photo in. i adore it.

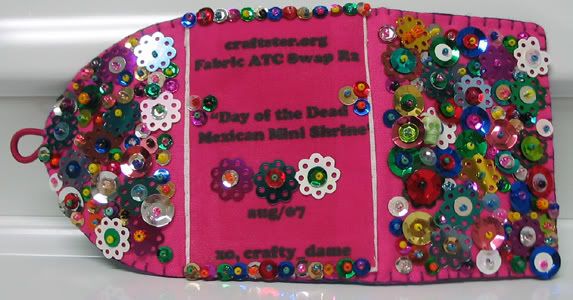
and the full back! you can see all the sequins, and the tag, which is actually wrong now that i'm not using it for the swap!

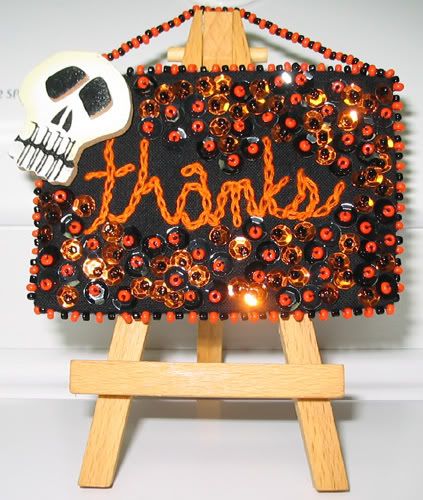
and then i made this card as a thank you for kittykill and her hubby after i stayed with them for a few days in portland earlier in the month.

embroidered thanks, black and orange sequins and beads, balsa wood skull
i put a string of beads on it in case they wanted to hang it, but i threaded them loose enough that they can fall down behind the card if they want to just lean it against a shelf or something.
Related Posts with Thumbnails