Saturday, June 26, 2010

crochet, yarn + vintage fabric = perfect flowers

another little project i did in the past few months were these festive little flower brooches for a friend's birthday.

i'd been looking for an excuse to make more covered buttons (i <3 covered buttons so much), and while i was trying to decide how to finish these, buttons seemed like the perfect idea.

the flowers are crocheted, and were actually crocheted ages ago. i have a bag full of flowers that i never did anything with - they were just something to keep my hands busy in front of the tv before i started doing so much needlework.

button brooches

i went through my stash of vintage fabric pieces, mostly stuff i've gathered lately, and pulled out pieces that matched the colours of the flowers i had. i chose the brown shades because they suit the recipient so well, but there are other brighter flowers too - as you can tell by the different fabrics i used!

IMG_0612

IMG_0613

i stitched the buttons onto the centre of the flowers, and then stitch a pinbacking onto the back. i could've glued them, i know, but that kinda feels like cheating!
button brooches back

simple little garland

now that i've spent way too long making the blog look pretty, it's about time i actually updated!

i've been working on lots of small things, ongoing projects, and things that i've forgotten to photograph, but even so, i'm super behind updating.

among others, i realized that i never got around to posting the garland i made back in february!

this was just a simple project, something that i could do while hanging out with friends and watching a movie (whip it - such a fun movie!)

garland 2

i used a fiskars squeeze punch to cut the scalloped ovals (i love those punches, they're so handy, and they cut so nicely!) out of an old book, and then a cheapy punch to cut hearts out of the scraps. i ran the hearts through my xyron, and then used staZon ink and a makeup sponge to colour them red.

garland hearts
it would've been a lot easier to just cut the hearts out of red paper, but i like to complicate things sometimes. for that matter, it probably would have been easier to run a piece of paper through the xyron, and then punch out the hearts, rather than trying to slide teensy hearts through it, but again, i complicate things!

i stuck the hearts smack dab in the middle of each oval, and then ran them through my sewing machine, leaving a thread chain between each one. easy peasy!

i hung the garlands along my shelves, and they're still up here! i kinda want to make more garlands using different shapes and stuff, but then i'd have to take these ones down, and i haven't been motivated yet.
garland 1

Friday, May 28, 2010

Mixed Media Heart Brooches (belated valentines!)

given that it's almost june, i figured it was about time i posted this year's valentines! (you can see last years, and the year before, and the year before that, here)

this year i was all determined that i wasn't going to go overboard, that i was only going to send valentines to people who i knew would really appreciate them, and i was definitely going to stay below 30.

that was all fine and good, until i had a brainstorm that ended up with them being the most time intensive valentines EVER!

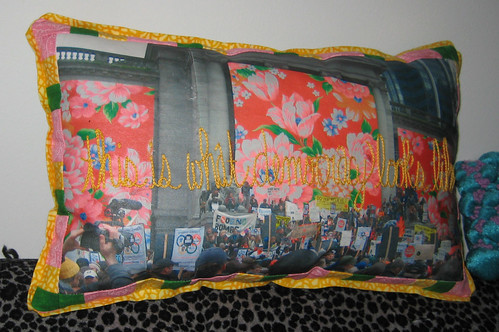
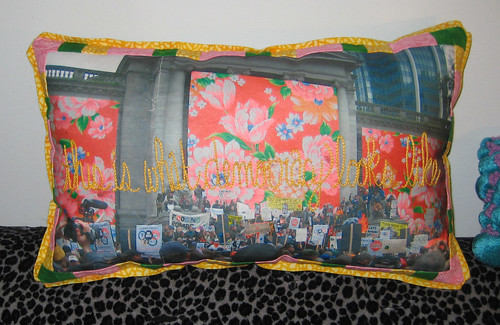
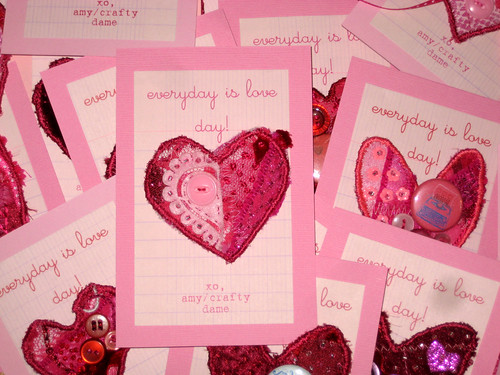
this was the finished result - cause if i'm gonna go overboard, i'm gonna go all the way!
card fronts

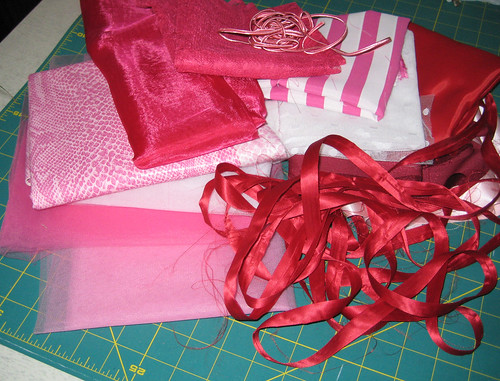
this is what i started with - fabrics in shades of pink and red, trims and tulle.
in progress 1

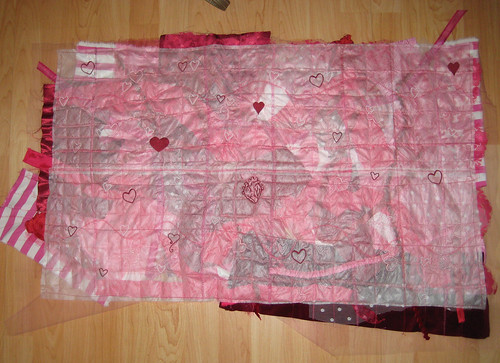
using spray adhesive, i laid out pieces of fabric onto a large piece of tulle and then used more spray adhesive and covered it with wash away stabilizer, which is seriously the coolest shit ever. i sewed the crap out of it (good time to use up bobbins and almost finished spools of thread!) to hold it all together, and then added some machine embroidered hearts scattered around it.
in progress 2

the next step was to remove the washaway stabilizer, so i filled up my kitchen sink with hot water and dropped it in.
in progress 3
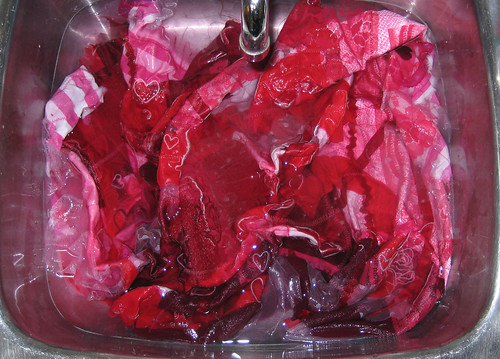
i swished it around in there for a while, replaced the water at least once, and then tossed it into a pillowcase and put it in the dryer.

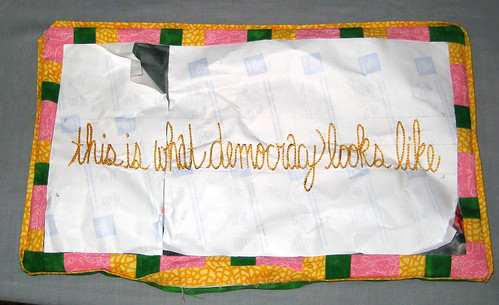
and this is what emerged -
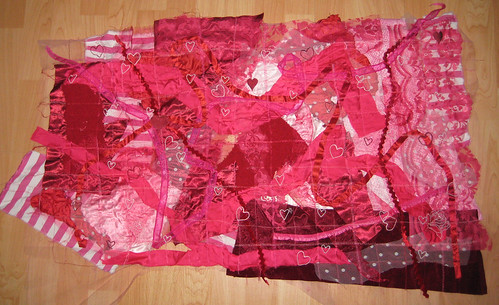
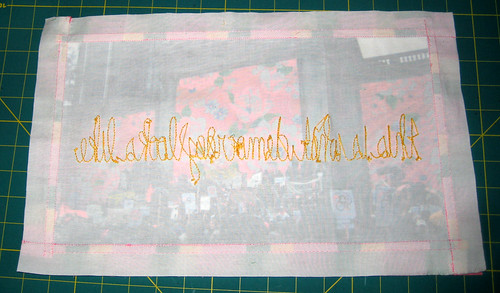
in progress 4

and the back -
in progress 5

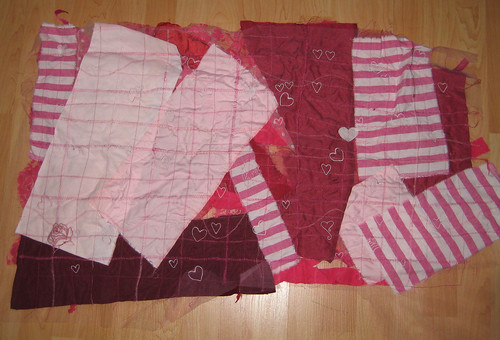
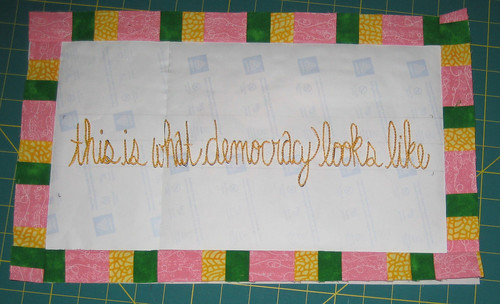
i started out cutting the large piece into smaller shapes, squares and rectangles mostly.

and that's when the REALLY time consuming brainstorm hit!


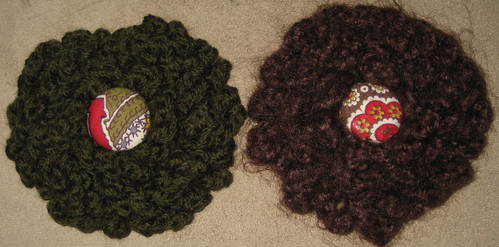
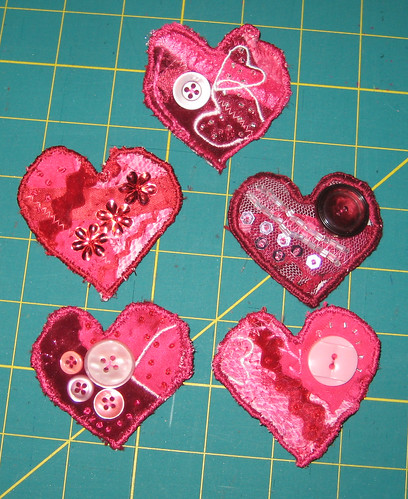
what if i cut out hearts and made everyone heart brooches!!?? how fabulous would that be?

so i drew up heart templates. i cut out hearts. i cut out backing for each heart. i cut little pieces of the backing to hold the pin on.

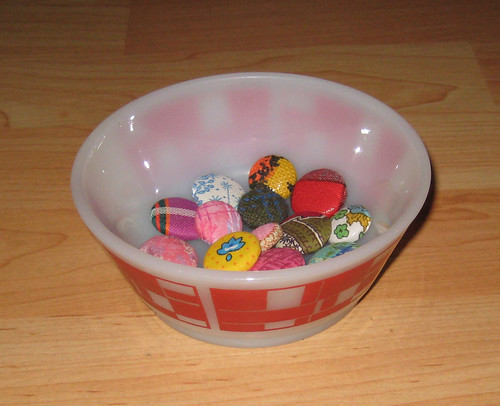
and i started embroidering. every heart is embroidered, some have beads stitched on as well. i collected fun floss in pinks and reds (including metallic and rayon), buttons, sequins, beads, etc and stitched them all on. some of them had 1" pins attached to them, with images of other stuff i've made. i experimented with different stitches, and played around. they were so much fun! i've been really wanting to do more art quilting and mixed media embroidery, and these were the perfect size to carry around with me to work on.

but they kinda took a long time - by the time i finished the decorating, it was march. oops!

i used my machine to sew the brooch pin onto the backing, and then the backing onto the hearts. just a zigzag stitch around, holding them together. because i'd decorated right up to the edge on some of them, it was slightly challenging, but i switched to the darning foot, and that helped a whole lot.some of them came out a little wonky from the fabric stretching, but that just gave them character.

hearts 1

hearts 2

hearts 3

hearts 4

hearts 5
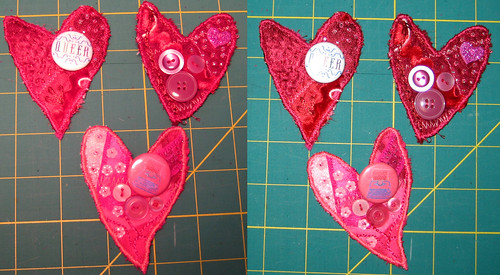
they were difficult to photograph, given the variety of textures and surfaces that caught the light.

at this point i decided that not everyone would want to actually wear a pink/red heart brooch, which is perfectly valid. so i decided to make them multitasking hearts, and make them magnets as well.

i sewed little pouches out of lace fabric - it was thin enough that the magnets still worked through it, and sturdy enough to not rip, and slipped magnets into them. i stitched them shut, and pinned them onto the hearts.

heart backs
the bigger hearts were a bit too heavy though, so i tried using two magnets, as you can see. it worked, but wasn't quite as pretty as i'd have liked! i went and found some larger magnets and redid them, and i liked them much better.

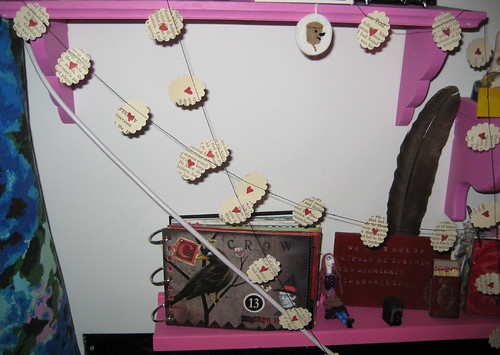
i also had to think about presentation, right? how was i going to mail these? hmmmm...

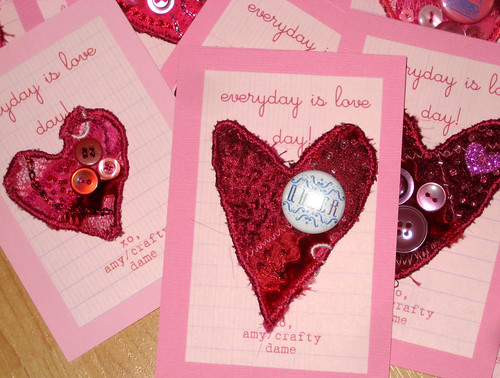
i pulled out some pink cardstock and cut it into rectangles that would fit inside standard card envelopes. i wrote up a message in word, and printed it out onto my favourite paper - vintage french pink paper with graph lines on it. i cut the pink paper into smaller rectangles, and attached them onto the pink cardstock. i punched holes in the middle to poke the brooch through, so that the hearts could be pinned on.
card fronts detail 1

card fronts detail 2

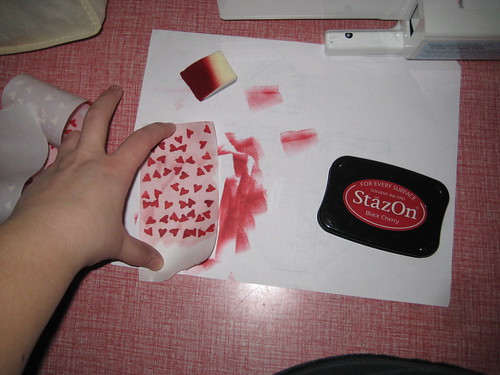
for the backs, i hauled out some rubber stamps and staZon ink and stamped away.
card backs

i stamped my blog address along the sides, a cute "handmade" stamp below the holes, and used a date stamp to stamp the month and year at the bottom.

card backs detail
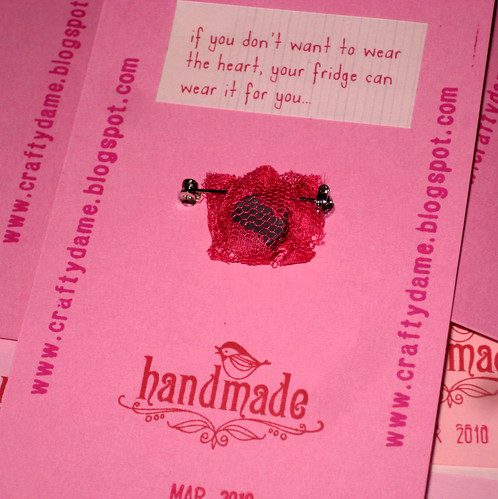
i also decided that i should explain the magnet, so i wrote up a little message in word and again printed it onto my favourite paper. i cut out the little snippets and ran them through my xyron, then applied them to the backs.

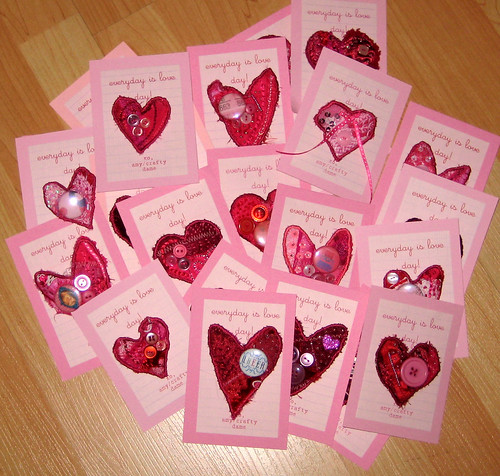
and those were my 2010 valentines.

and despite how much i love the end result, 2011's will be MUCH less time intensive!

Monday, May 10, 2010

the coolest safety glasses in the world!

i would just like y'all to know that i now own the awesomest pair of safety glasses EVER in the history of the world. no shit.

they are completely ridiculous, and so totally me. i adore them.

safety glasses

i started working on them back in march, drilling holes along the edges to embroider into. a few weeks later i started on the embroidery, using dmc metallic floss and a chain stitch, and that went fairly quickly. and then they sat on my table for a month.

i finally got my butt in gear to haul out my crazy glue to glue down the ends of the floss. it turned out that crazy glue wasn't the best option, since it turned the previously clear plastic opaque wherever it was applied.

i'd thought about adding a few rhinestones, in a tasteful sort of way.... and maybe those rhinestones could help camouflage the crazy glue mistake...

but the urge for glitz quickly overcame the idea of tastefullness!

left

there's actually some embroidery with silver metallic floss as well, along the sides of the glasses, but it's hidden by the rhinestones.

left back

right front

right

i switched over to glossy accents instead of the crazy glue, and it worked fabulously. even where there's extra glue between the rhinestones, the area is still clear. (i love that shit, i use it for EVERYTHING)

i'm still contemplating more rhinestones... the area above the lenses across the front seems a little bare with just the embroidery... i've been to three different dollar stores clearing out their stock of silver rhinestones, so now i've got a ton to glue onto other things as well!


the other day i decided that they needed the perfect glasses chain so that i could wear them around my neck. in the interest of safety, i wanted the chain to "break" easily if i ever got it caught on something. i contemplated buying a cheap cat's collar for the plastic breakaway clasp, but decided that a magnetic jewelery clasp would be comfier, not to mention more attractive.

so yesterday i went to the Upstart Crow and picked up some magnetic clasps, and this morning i hauled out all of my red and white/silver beads to start stringing the necklace. i added a few charms as well, a wonderful virgin mary, multiple types of stars, and a red glass skull bead.

chain

so now they're done. for the moment, at least! and they're completely ridiculous, and incredibly wonderful.


and it's perfect timing, because yesterday i went to a garage sale and walked away with a DRILL PRESS!!! and a whole bunch of cutting wheels, sanding wheels and polishing wheels for my dremel! what should i drill/cut/sand and polish first??

Sunday, April 4, 2010

this is what democracy looks like! embroidered pillow

i actually made this pillow right around the time of the intent, it's fucking magic pillow, but kinda forgot to post about it....

however, i LOVE how it turned out, and i've already brainstormed a bunch of other projects to be done using the same technique.

democracy detail

i started out with a photo, one i posted on my olympics post back in february. it's a photo i took at the anti-2010 rally the same night as the olympics opening ceremony, and it doesn't even come close to showing how many people were there that day.

the day after especially, but for many days afterwards, i had protest calls and shouts running through my head, the most frequent one being "this is what democracy looks like!" (i was less enamoured by the "this is what democracy feels like" chant after it started raining and my back seized up, let me tell you!)

i knew i needed to stitch it up, and i really wanted to SHOW what democracy looked like in the same piece, so this technique worked really well.

angle
democracy angle

i sized the photo to how large i wanted the pillow, reversed it, and then printed it out onto two iron on transfer sheets. i carefully ironed them onto a good quality white cotton (i've found that the quality of fabric has a huge effect on the longevity of the transfer)

paper covering
paper covering

after i transferred the image, i left the paper covering on. i knew i'd want to iron it after i finished stitching, and ironing it without the protective paper would ruin the transfer. i transferred the writing onto the protective paper, and used it as my stitching pattern.

i couldn't hoop this without interfering with the transfer, but it was fine, because the paper backing kept it stabilized.

i stitched in yellow floss, so that it would show up against the photo.
embroidery back
embroidery back

once i finished the embroidery, i decided to do a bit of patchwork around the image, to try to pull some other colours out of the image. i took the photo with me to the fabric store, and bought 3 different calico prints. i made a patchwork border and sewed it on, still with the paper attached.

patchwork
patchwork

and then i made up the back, with a bit of piecing in the middle cause i love how that pulls everything together.
back
democracy back

i also added a strip of yellow almost as a fake piping around the edges.

and this was the result!


democracy flash
(taken with flash)


it's not quite as clear as i was envisioning, i should have done the writing a little higher up, rather than centred on the photo, but it is a lot clearer in person than it is in a photo. and i love it anyway!
Related Posts with Thumbnails