
so, back on track. iron craft! i missed last week, so i was determined to do something this week. the theme of Challenge #22 was Al Fresco, outdoor dining, picnics, bbqs, etc.
i'm in the midst of several big projects right now, and at first i couldn't think of what to make. one day i'm going to make a giant picnic blanket, but that wasn't going to happen this week. i wanted to make a giant ruffley, lacey, pastelly skirt, because i'm DETERMINED that one summer i'm going to organize a big fancy tea party with costumes, hats, croquet and pink lemonade which may or may not be spiked with vodka. but i knew i wouldn't have time to give it justice.
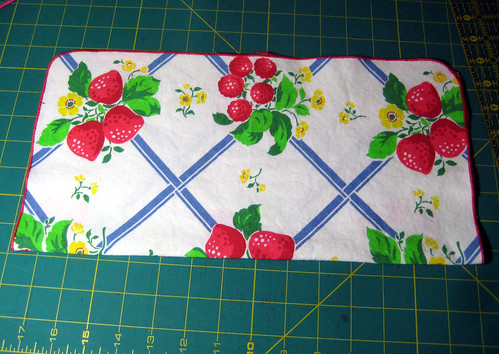
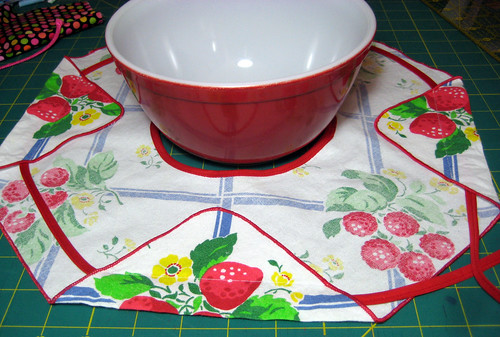
but then the other day, i picked up these fabulous vintage napkins. they just screamed picnic to me, with the berries and the blue lattice. that got me thinking about picnics, and my favourite summer salad - beet and apple!
i usually make the salad in one of my pyrex or fire king bowls, and then i have to carefully prop it in the backseat and carry it to the picnic spot cradled in my arm, making it hard to carry anything else. but if i put it in a bag, it always slips around, and doesn't stay level, blah blah blah.
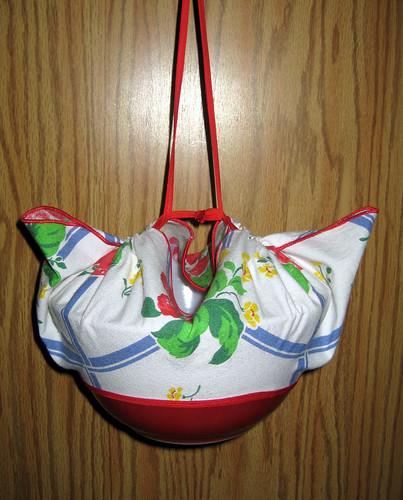
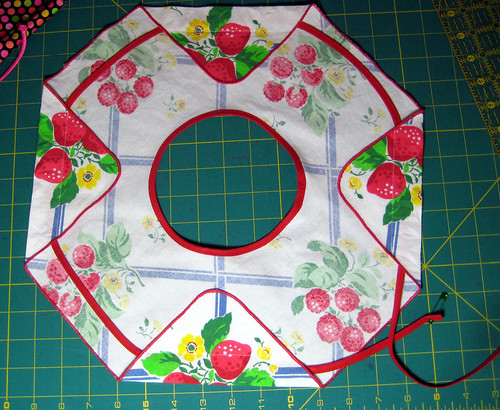
i started thinking about the casserole carrier in One Yard Wonders, wondering if it could be altered for bowls... i looked over the pattern, and decided it would be easier to start from scratch. and this is what i ended up with!
and i made a tutorial!
so! to start!
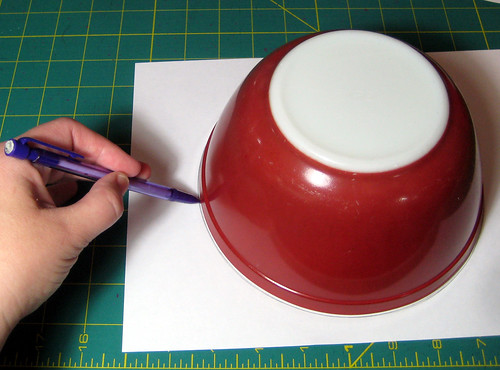
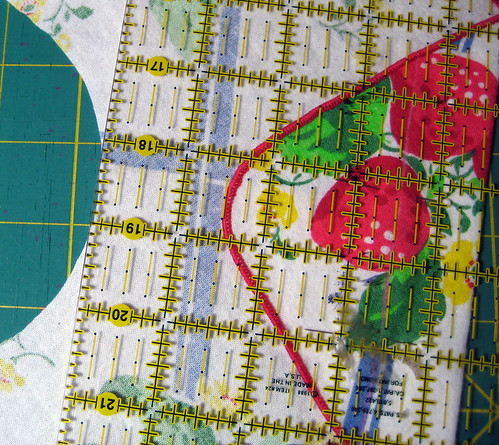
find the bowl you usually use for salad. this is a 1.5oz bowl - fairly small, i know, but the perfect size for a picnic with tons of food. trace around the bowl.
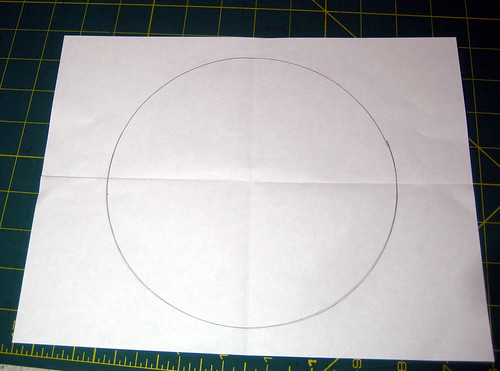
fold your circle in half and in half again, creasing the paper. you'll want these marks later.
measure 1" inside the circle
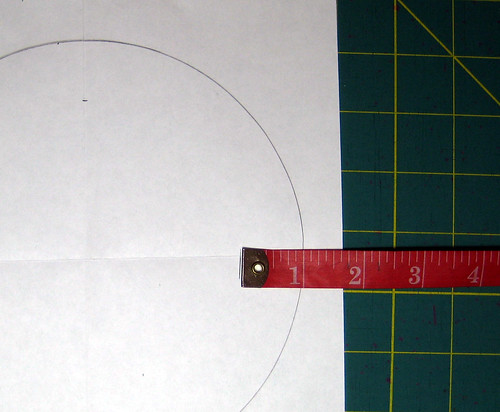
fold the paper back into quarters and make a series of marks 1" away from the first circle
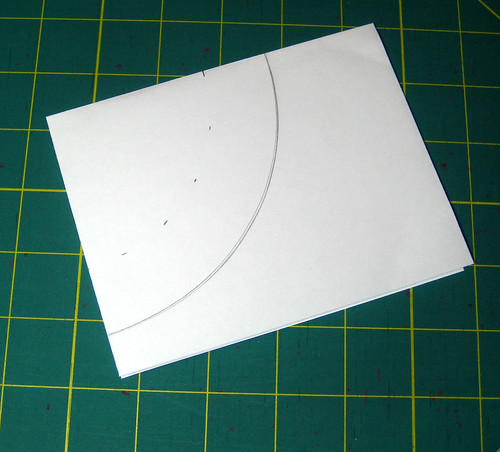
connect the marks to draw another 1/4 circle inside the first circle
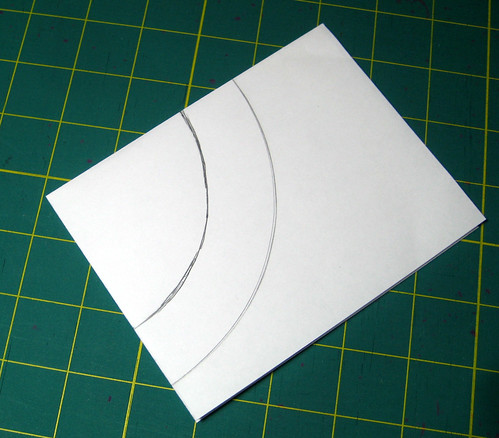
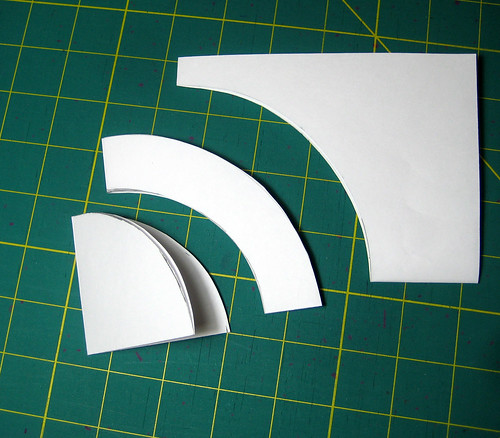
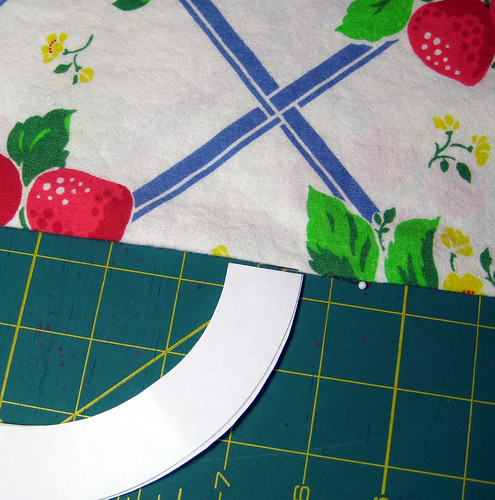
cut along the two circles and disregard the middle and the outside, leaving you with the ring
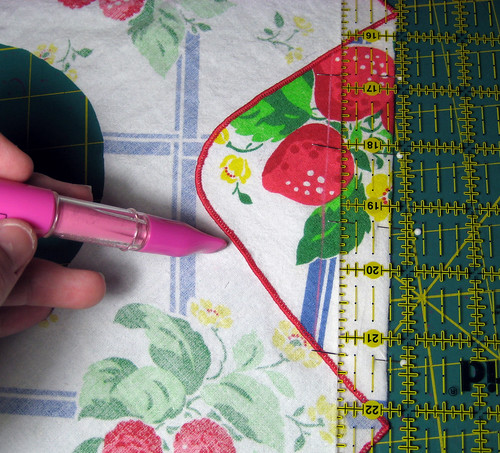
get your napkin. the size isn't super important, as this is a pretty flexible tutorial, but for reference, the napkin i'm using about 15"-16" squares
press it if required, and then fold it in half
use pins to mark the centre fold

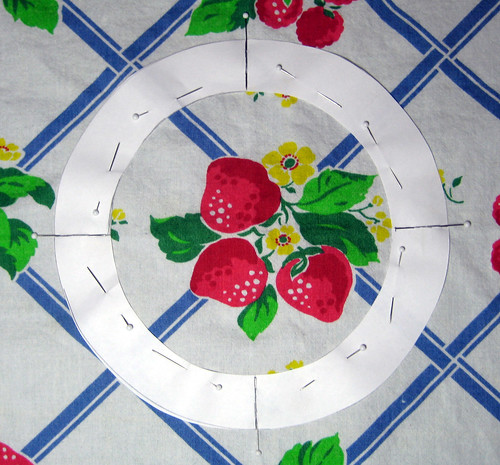
if you're unsure where to pin, use your paper ring centred along the fold to guide you
fold the napkin in half again, the other way, and pin the centre fold
now you'll have pins marking the four centre lines
centre your paper ring on the napkin, lining up the creases you made a few minutes ago with the pins you just poked in
pin the paper securely
and cut out the centre of the napkin
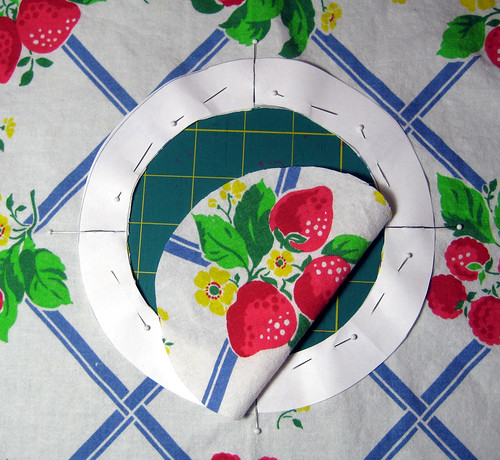
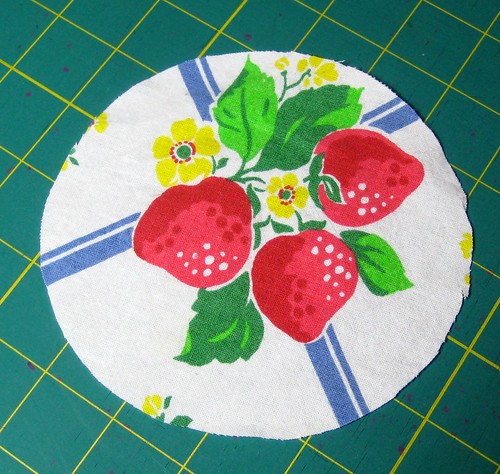
save the centre if you want - wouldn't the berries be a cute applique?
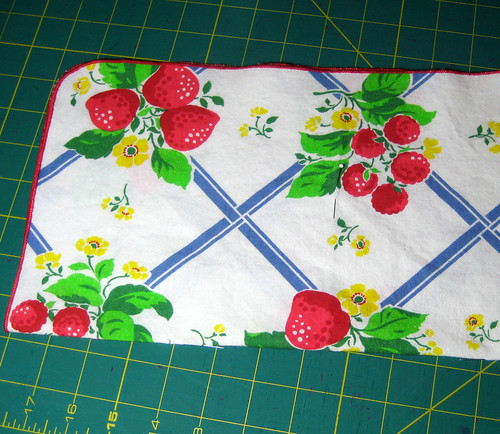
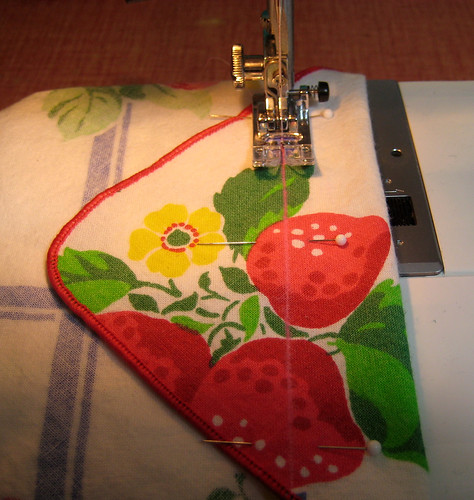
fold the corners of the napkin in
leave at least 1.5" between the hole you cut and the corners
use chalk or a marking pen to mark 1" from the fold on each corner
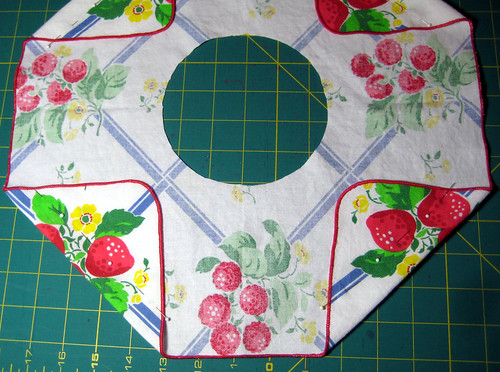
sew along the lines, creating a casing on each corner
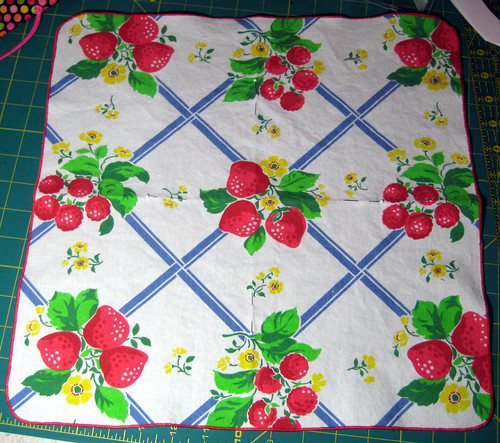
sew the bias tape around the edges of your cut out circle. there are tons of tutorials on applying bias tape, but you'll notice that i'm not doing the usual two steps, where you sewn down one side first. i just slip the cut edge into fold and sew, and using my handy dandy blind hem foot, it works perfectly.
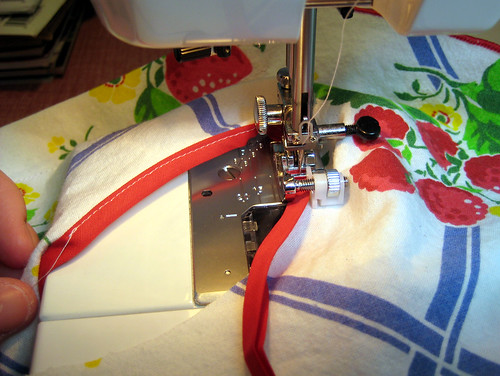
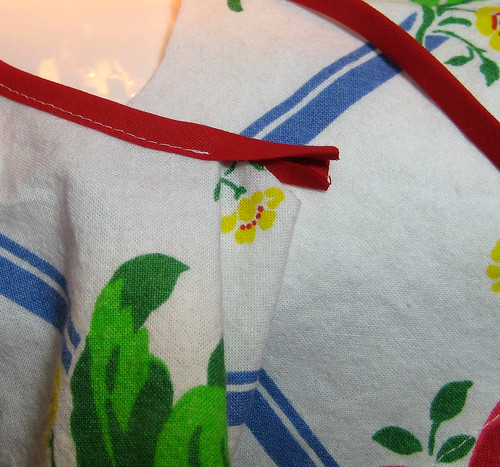
leave an inch or two unnattached when you start sewing it on
when you get close to the spot where you started, stop sewing. cut the bias tape, leaving yourself a few inches extra. unfold the bias tape and sew the two ends together. this tutorial explains it perfectly.
after you've sewn the ends together, fold the bias tape back up and finish sewing around the circle.
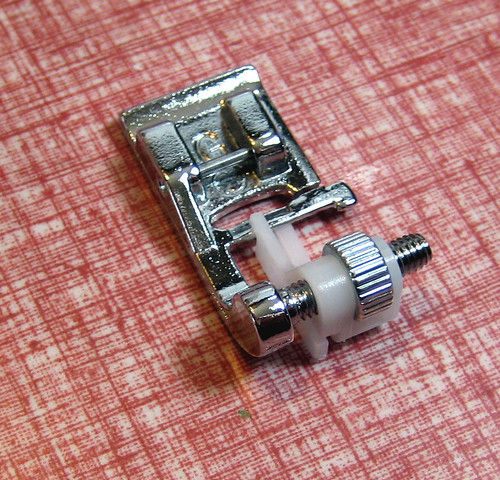
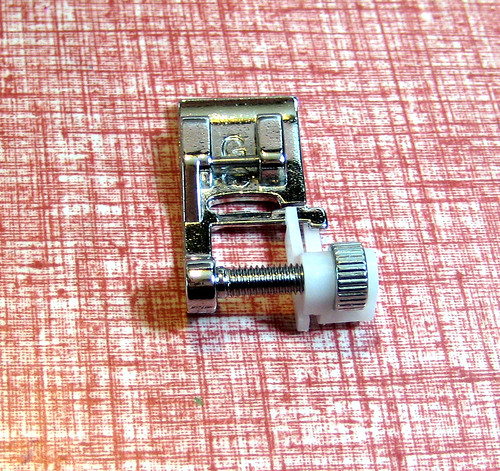
a note on the foot - when you're topstitching, the blind hem foot is your new best friend. i've been using it obsessively since i got this machine, and you get perfect results every time, it's like magic!
the blind hem foot has a little screw, and you can make the space of the foot wider or narrower, depending on what you're sewing. the edge of your bias tape lines up against the little metal ledge, so it's super easy to keep it on track. it looks like kenmore, elna, janome and bernina all have adjustable blind hem foots for sure, but other makes might as well. if your machine doesn't have an adjustable foot, it more than likely lets you adjust the needle position, and that'll work too.
but back to the project at hand!

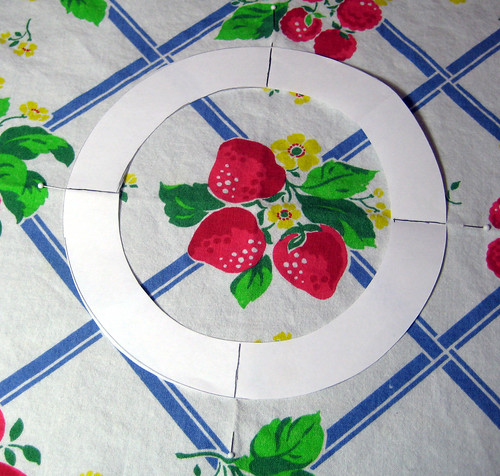
take the remaining bias tape and topstitch along the fold to turn it into a cord

thread the bias tape cord through the casing on each corner of the napkin
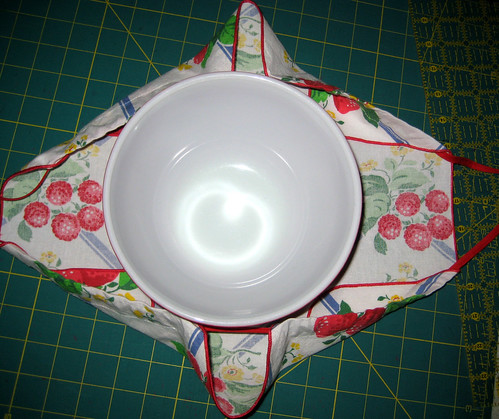
tie the two ends together and place your bowl in the centre
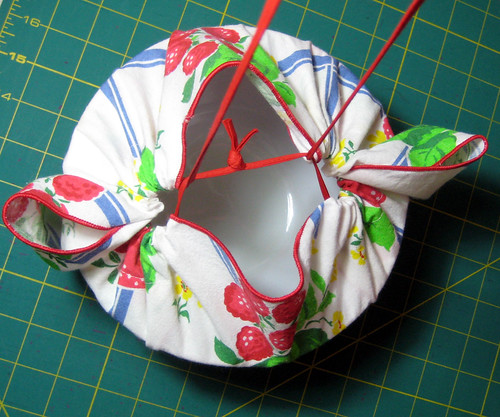
holding the cord on two sides, pull the cord, gathering the napkin along the casings
pull up the cords. you'll have two loops, one from each side.

slip one loop over the other and tug on the cord until the loop lies flat
tadaaa!!!
simple, huh?
so, what would you put in it? share your recipes!
5 comments:
your casserole carrier is very cool - I'd love to see your recipe for beet and apple salad. I love potato salad at picnics. Looking forward to a sunny day for the first picnic this year!!
So awesome. Totally going to make one of those for summer bbq potlucks!
Pinterest is the biggest timesink on the internet. Can't wait to see your boards!
Funny that you mention the Blind Hem foot. I was looking at mine just last week wondering what the heck it was, and now I know! Thanks! (I've only had it 23 years! :-D)
As my friend Lynne would say, oh my giddy aunt. This is such a great tute, Amy! I need to head out thrifting to find the perfect napkin to use (or, maybe I should just shop my ample stash). I'm going to email you my fav quinoa salad recipe.
Post a Comment