
like this fabric! i found it in a bag of scraps that i'd thrifted, and i wanted to sew with it immediately. i loved how vibrant the colours were, and the green stripe is exactly the same shade as my favourite green kona solid.
last week's iron craft challenge was the Summer Challenge, and the pinks with the orange stripe in this fabric practically screamed summer to me, so it was the perfect excuse to use it.
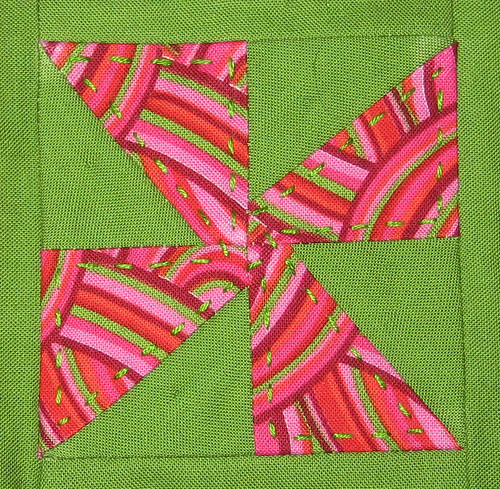
in addition, i came across this tutorial from Sew Lux Fabric & Gifts for a mini whirligig block the other day, and immediately fell in love. even though i have a million projects in progress, i wanted to make something little, just for the hell of it, and actually FINISH something!
i made three mini blocks, and joined them together with 1/2" sashing made from the same green kona. the blocks are supposed to be 3.5", but my blocks ended up being about 3 7/8". not sure how that worked, i think the fabric stretched a bit, because they were 3.5" when i added the sashing! i added a row of 1.25" sashing in the stripe, and ended up with a cute little wallhanging.
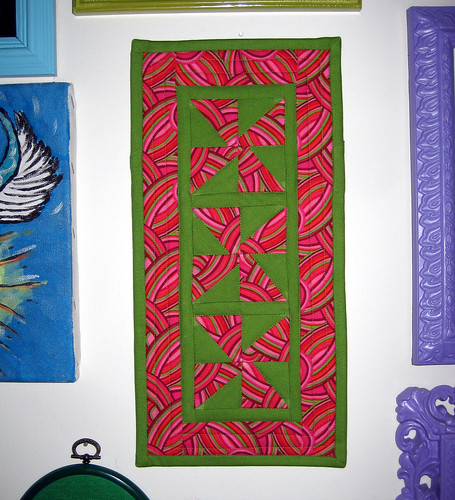
the entire wallhanging ended up 13.25" tall and 6.5" wide. i quilted in the ditch around the whirligigs, and then visibly on the outer border. the back is the same green, and i added a hanging sleeve made of the stripe.
i couldn't make up my mind how to quilt it at first, so i tried a few things. at first i wanted to hand quilt it - what was i thinking? ha! first, hand quilting is hard. i don't know WHY, considering that i have no problem with much fancier embroidery, but trying to keep the stitches even while hand quilting is entirely different. and it took forever. plus, hand quilting on the patterned fabric made it look too busy, in my mind.
after i ripped out the hand piecing, i machine quilted the same way i had hand quilted - on top of the whirligigs. i used a larger stitch length, which i was glad of when i decided to rip that out too!
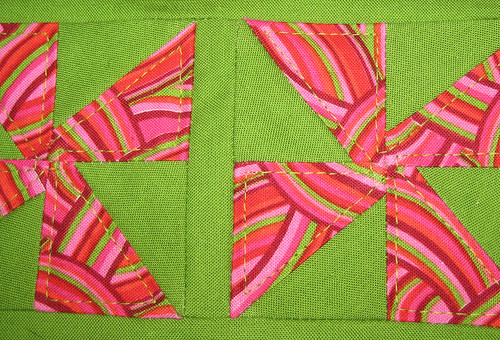
i'm really happy with the stitching in the ditch quilting, and that just goes to show that it's not always bad/boring/plain/traditional to stick with the basics.
the deadline for entering the Iron Craft Summer Challenge was 8pm EST. thanks to the time i wasted on the quilting, i posted the picture in the flickr group at about 4:59 PST! i machine sewed the binding on, but there are a few spots that need to be hand stitched down, and i have to hand stitch the bottom edge of the hanging sleeve. just a teensy bit of work left, and nothing that masking tape couldn't hold for the photos!
did you check out the prize for the Summer Challenge? yummy gnome fabric!
3 comments:
I think you did a great job & I like the hand quilting.
It's lovely! I was visiting Sew Lux and saw your entry! Great job!
Love this! Thanks for playing along :-)
Post a Comment