
i've had a few ideas. i bought a cute pair of stripey leg warmers that i was going to sew together and stuff. i eyed beautiful draft stoppers like the wool tree branch in Betz White's book "Sewing Green".
i had a few requirements for a draft stopper.
number one, it MUST be washable. i live in the land of dustbunnies, thanks to hardwood floors, my cat sofie, and the amount of work that i do with various fibres. that pretty much tossed out lovely wool stoppers, or anything in a light colour!
number two, it had to stay where i put it. sofie LOVES the hallway for some incomprehensible-to-humans reason, and sits at the gap at night. i knew that anything i tried to put down, she'd just pull away. plus, i wanted the door stopper to be in place when i wasn't home as well, so that meant it had to somehow lay against the door, even after i shut it behind me.
a few months ago, i found an awesome vintage towel, and it worked fairly well for the first requirement, but less so for the second. i kept thinking i'd sew it up and stuff it, and maybe add some straps, but i never got around to it.
fast forward to last wednesday, when i discovered the blog "Iron Craft" through a random post on facebook. Iron Craft started out as two friends in different parts of the states challenging each other to create cool things on a regular basis, but this year they've decided to open it up to anyone who wants to participate.

from their FAQ -
"Every Thursday one of us will post a creative challenge to be completed by the following Wednesday. The challenges maybe as specific as a particular pattern or as vague as a theme. They'll cover the gamut of crafting skills: knitting, sewing, quilting and so on. Every Wednesday we'll spotlight the results of the previous Thursday's challenge from our Flickr group."
they've had two challenges so far, challenge #1 was "lighting the winter gloom" and challenge #2 was "staying warm!", which translates to draft stoppers!
(be sure to check out their blog and their flickr pool to see what folks have made for each challenge, it's an amazing variety!)
reading their challenge info totally inspired me to get my butt in gear. i don't know if i'll be able to follow along all year, but i think it will be an interesting thing to attempt! i didn't manage to get my entry completed in time for this challenge, thanks to the need for a zipper (and if you saw my zipper collection, you'd see how ironic that is!) and only discovering the blog around supper time on wednesday, but i'm still super happy with it, so i thought i'd share, even if it is a week late. (today's deadline is a "bunting" themed project, which was the inspiration for my hoopla bunting pillow)
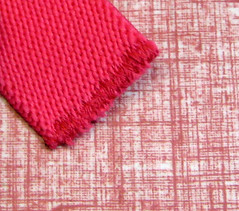
the first thing you need to know is that i LOOOOVE vintage towels. there's a specific kind that i like, and i'm not even sure if people in other countries have them, because 9 out 10 of them have tags that say "made in canada".
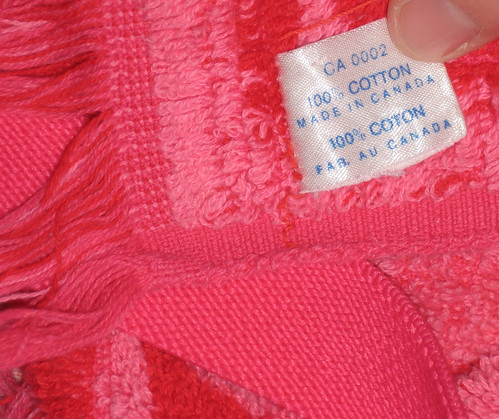
they're always two tone, with really fun brocade style prints (or random prints - i have a yellow one with buttons all over it that's my pride and joy!), and i've been collecting them for years. you occasionally see newer versions, but they're always cheap and thin. the ones i love are thick and lush and are pure cotton with none of that satin-finish crap, they actually DRY your hands and hair.
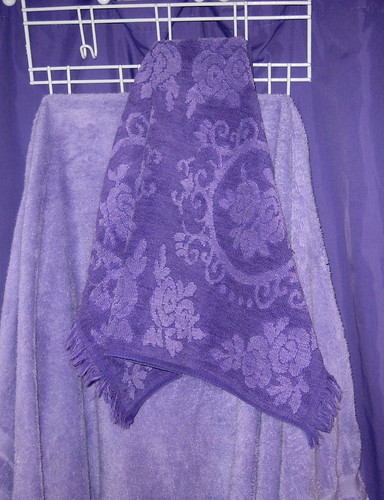
i have them scattered around the house, blue in my kitchen, purple in my bathroom for a bathmat, and pink toned ones in my old bathroom at my parent's house. i occasionally find ones that don't match anywhere, and i buy them anyway, because i have plans to one day make a big picnic/beach blanket out of them.

(note the kitchen towel with the vintage jantzen ad - it says "lure him... away from the poolboy!" how homoerotic is that? i love it! the 50s were so weird.)
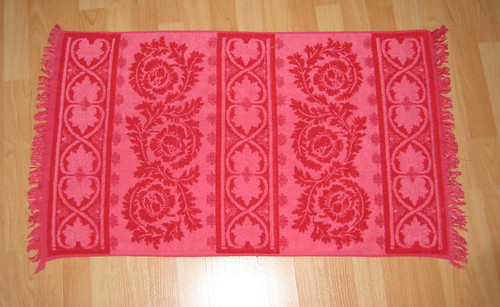
so when i decided to use one of my cherished kitschy towels for my draft stopper, i really didn't want to cut it up at all.
my original thought was to make a tube and stuff it, and i thought about ways of sewing it with the excess on the inside, so that i could always take it apart later and use it as an actual towel if i wanted. and then i started thinking about washing it. stuffing take forever to dry, and after awhile it starts to get lumpy, which is no fun at all. what if i didn't stuff it at all?
and then the easiest-peasiest draft stopper was born! no stuffing, minimal sewing, and easy washing!
you'll need:
tools:
- pins
- matching thread
- sewing machine
supplies
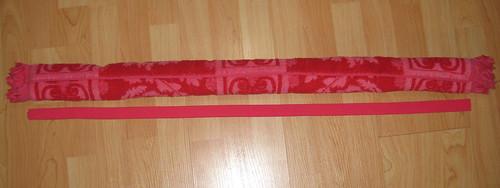
- a towel, preferably one that's about 36" long, which is a standard for doors (handy, that!) if your door or window is wider, you'll want a bigger towel, or two to sew together
- a separating zipper the length of your towel, but if you can't find that, it's okay if it's a bit shorter. mine was 30", and it was fine.
- a piece of waistband width elastic, either to match your towel or your door, depending on how concerned you are with what your neighbours think! ;)
step one:
measure your towel and your door
if you need to sew two towels together, or shorten one, do it now. don't forget to finish the ends and seam allowances, cause toweling totally frays.
step two:
cut a piece of elastic the width of your door, minus about 10-15" (in my case, 36"-10" = 26") if your elastic is super duper stretchy, you may want to cut yours shorter, but mine's a pretty standard waistband elastic, with minimal stretch. if you're being especially perceptive, you'll be thinking "but amy, your elastic doesn't look like it's 10" shorter than your towel..." and you'd totally be right! the photos are all taken with a longer piece of elastic, because it wasn't until it was done that i realized i needed to shorten the elastic. i went back and unpicked one end and took about 12" off, and i still could have cut it a bit shorter.
step 3:
zigzag the ends of your elastic to keep it from fraying, which is kind of a pain. it's usually easiest if you start in the centre of the edge and backstitch, rather than trying to start at the corner.
step 4:
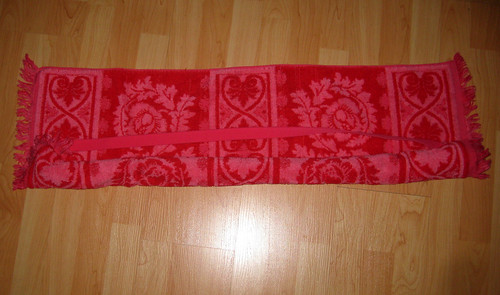
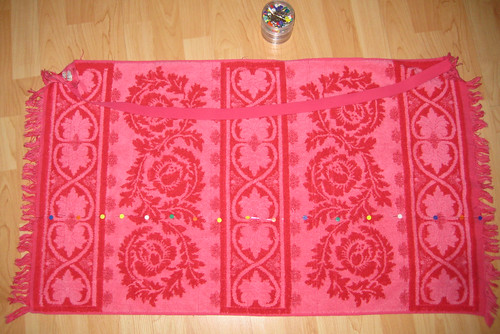
sew the end of your elastic to one end of your towel. you want the elastic to go along the long side, NOT the short side of the towel! making sure that you haven't twisted the elastic, sew the other end to the other side of the towel.

step 5:
lay your towel down and start rolling it up, starting with the edge that has the elastic sewn on it
step 6:
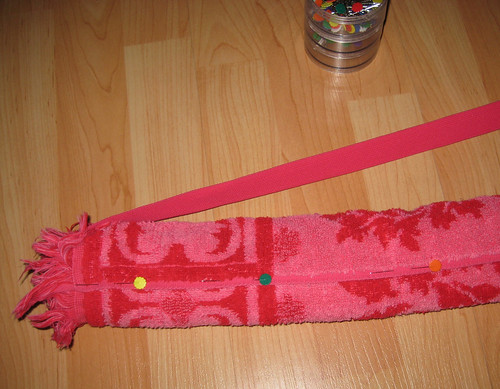
when you've rolled the towel into a tube, pin the edge to the roll
step 7:
now go along and pin the towel just beside the edge, to mark where it meets
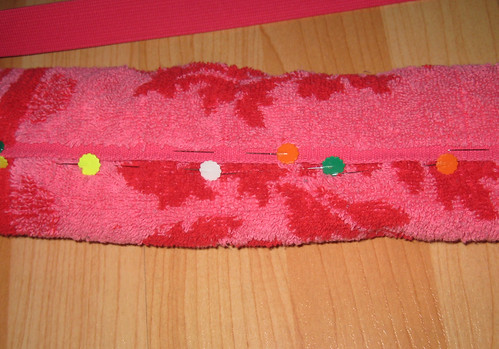
step 8:
unroll the towel, and you'll see your line of pins
step 9:
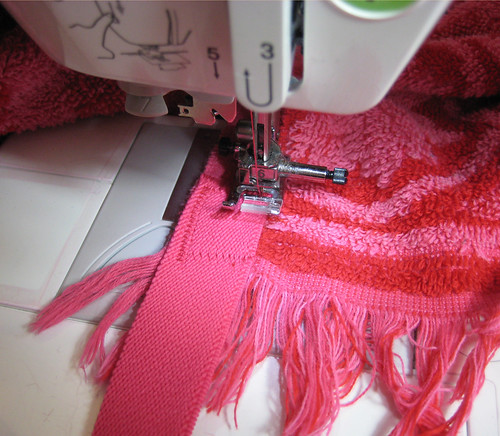
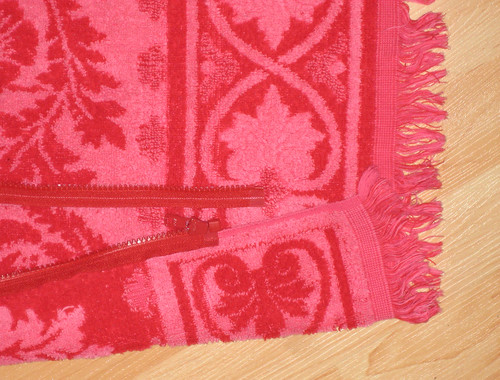
now take your separating zipper and sew it along the line of pins, with the teeth facing the elastic side of the towel
step 10:
take the other half of your separating zipper and sew it to the long side of your towel that doesn't have elastic sewn onto it, with the teeth facing out. you want to sew this zipper face down on the opposite side of towel that the other zipper was sewn on.
this is confusing to explain, but very easy to do! basically, you're going to end up with your two pieces of zipper facing opposite directions.
step 11:
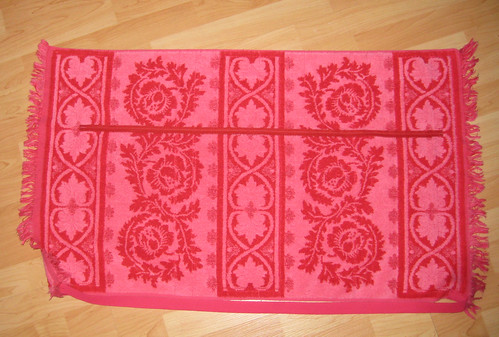
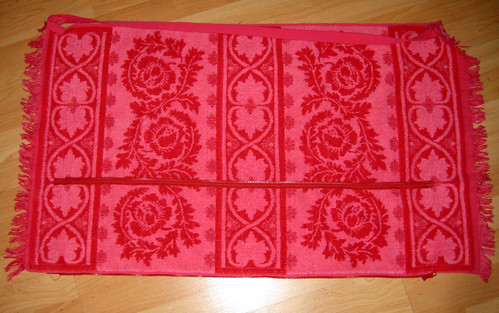
roll your towel up again, like in step 5. once it's fully rolled, do up the zipper.

step 12:
slip the elastic around your door, and put your draft stopper in place.
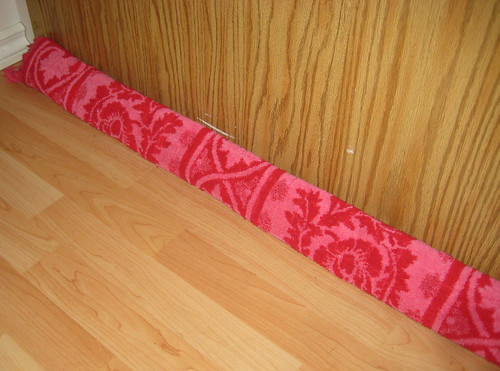
ta-da! draft stopper!
and to wash, just slide it off the door and unzip it. you can toss it in with your regular towels, and it'll wash and dry just like a regular towel, making it super easy to clean!
cool, huh?
this is seriously the quickest, simplest draft stopper ever. it's taken me at least 4 times as long to edit photos and write it out than it did to make it, even with my seampicking (oops!) and photographing every step. if i had a second door, i'd make another one to time it, but i don't, so just trust me when i say it's super quick, kay?
2 comments:
man! those towels are rad!
and the stopper is fabuloso! i might need one!
This is genius! I really love it, thanks for taking the time to put this together :-)
Sandra Rose
Post a Comment