
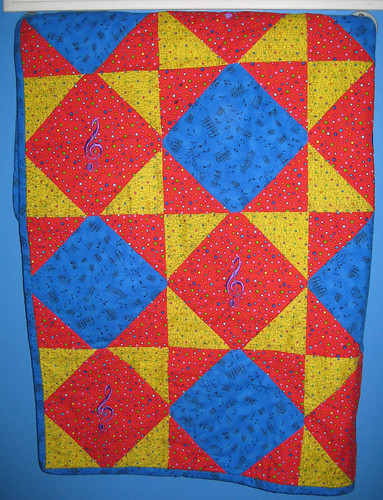
i didn't get around to starting work on the quilt until august, when i did it as part of the Brother machine embroidery campaign. the mom is a musician and a composer who teaches piano and plays both piano and trombone beautifully, so i'm certain that the baby is going to grow up in a music loving household. i found a music themed embroidery card, and the treble clefs on it were perfect for the quilt.
to start, i preshrank the fabric. i don't usually do that with quilts (which is debatable -- some people say you HAVE to, and some people say you NEVER should!), because i rarely use light fabrics where i'd have to worry about bleeding, and i really like the wrinkled slightly vintage look that quilts get when you wash them after quilting. but since i was embroidering on the blocks, preshrinking was a must!
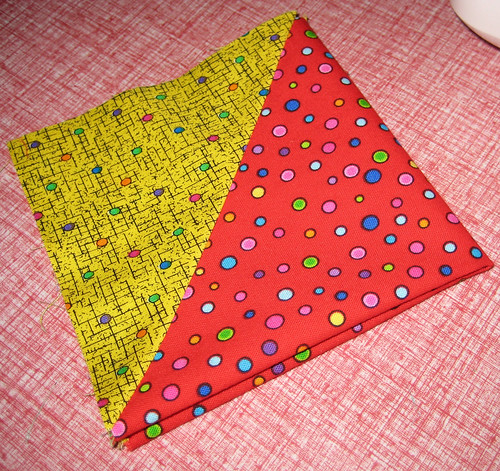
i chose a square in square block design and got started cutting. i quickly realized that i didn't have enough fabric for the larger quilt that i'd planned -- oops. i recalculated my blocks, and decided to go with 5 across and 5 down. one of the really nice things about this pattern is that you can make the blocks any size you like, and i chose 8 1/2" blocks, making a quilt that's about 43" x 43".
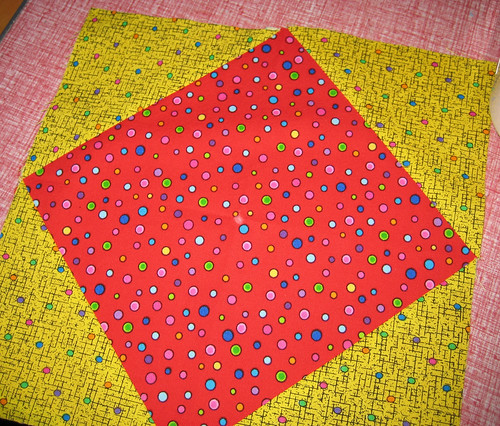
after the blocks were sewn and pressed, i went about folding them into quarters and marking the centres.
i used the guide for my hoop to match up the centres when I stretched the blocks with the tear away stabilizer,
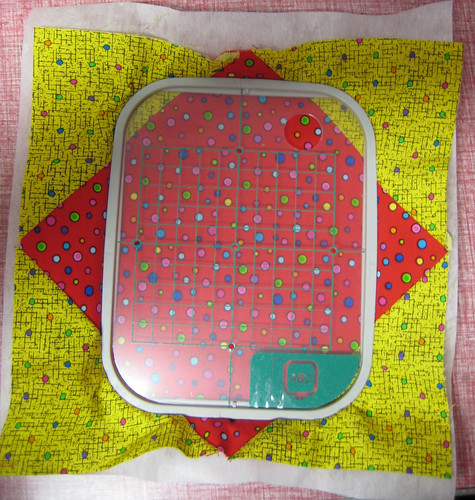
and then, because i'm paranoid, i also lined the centre marking up with the needle as well.

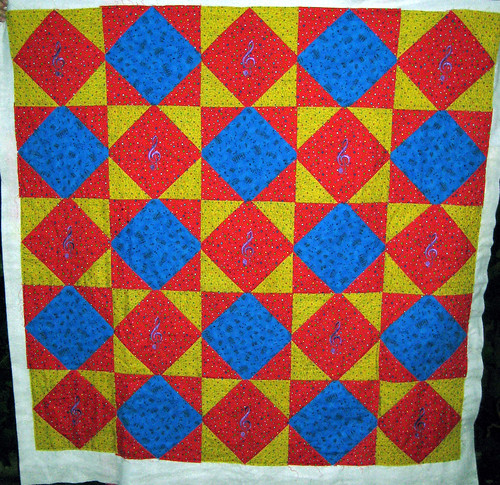
once I'd embroidered the centre of all the red squares, i pieced the quilt squares together. please note that patchwork is apparently NOT my forte! my squares don't match nearly as well as they should.
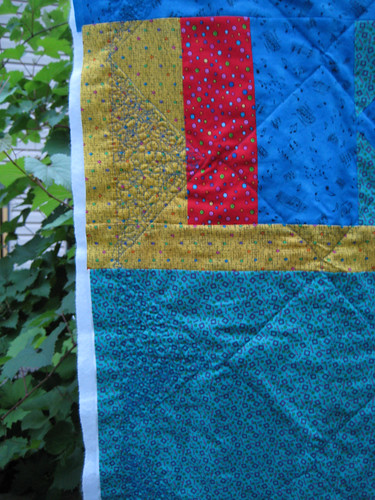
at that point i realized that i really didn't have enough of the backing, so i started piecing that as well. i did three long strips across the back, two really narrow and simple and one wider, with a square in a square block, and then i did two skinny strips going down the quilt, along the same lines as this tutorial. i really love how it turned out - the back suits my personal taste more than the front! (the front squares turned out a bit more traditional looking than i was expecting - i don't know why i didn't realize that they would!)
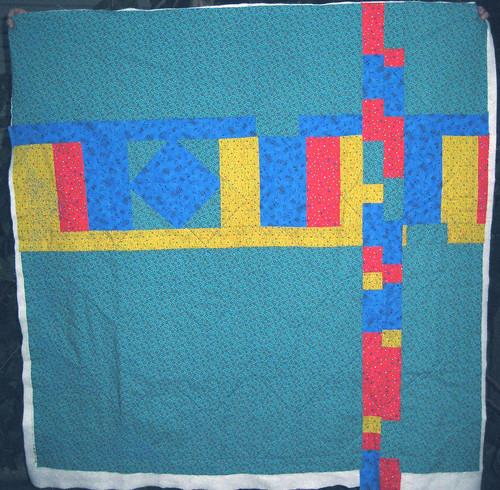
i layered the front and back with batting in between, pinned, and then started stitching in the ditch. i stitched in the ditch around each diamond square (the red and the blue) because i really wanted them to be the focus of the quilt, and then i decided to fill in the rest with stippling.

i got started on the stippling, but ran out of time.
and that's as far as i got. it sat in a box for months, i was totally unmotivated. i used to do a bit more quilting/patchwork, but i've never been good at actually completing them, they just take so damn long! i always end up thinking "but i could be making so many new skirts or bags in the same amount of time..."
it was already late when i started it, so by this point the baby it's for is almost a year and a half old, and i'm STILL dragging my feet about finishing it. luckily, Toronto Craft Alert did a giveaway called "Get 'Er Done" (i posted about it before!), which totally motivated me to get my butt in gear! i didn't win the amazing prize package, but at least it's done, and the recipient hasn't even started school yet (i was worried it would take me that long!).
first, i decided that i didn't like the stipling, and that there was no way in hell i'd ever be able to motivate myself to finish it. i didn't like how stiff it made the quilt, it didn't feel cozy enough to me. so i hauled out my trusty clover seamripper (LOVE that thing!) and started at it. luckily, my stitches were a little big in some places, which made the ripping out easier, but it still took forever though, or at least my back thought so!
after i'd ripped it all out, i cut, seamed and pressed the binding, and machine stitched it onto the quilt. i cut off the extra batting and backing, and hand stitched the binding down, using very tiny stitches, because i figured it needed to be sturdy for a soon to be toddler!
DONE!!!! huraayy!!!!

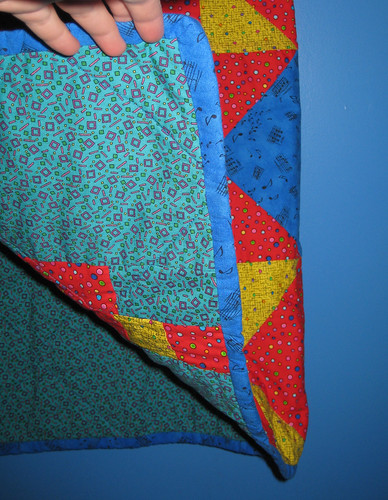
i bound the edges in the same blue music fabric that is used in the blocks.
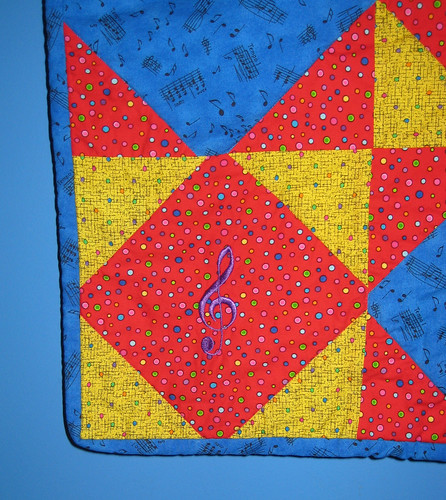
closeup of the squares. i obviously suck at both matching up seams and mitering corners, and of COURSE the most obvious mistakes are in the corner where i took the picture! this quilt was put together really really quickly because of the time constraints of the campaign, so it's even worse than it would be normally in terms of matching up. but i think they'll still like it.
now i just need to get my butt in gear and actually mail it sometime soon....
4 comments:
What a beautiful quilt! I'm sure your friend will love it. No one sees the mistakes except for you :) That's how all sewers/quilters are, though :)
Great job!!!!!
thanks! you're right, i'm sure she'll love it and will never notice the mistakes!
we're all so hard on ourselves, so critical! it's hard to stop though.
thanks!
I love this quilt. I think the treble clefts are perfect. I love how this quilt turned out, so personal and meaningful for the family.
thanks wendy! i am pretty happy with it.
but would you believe it's still sitting in my laundry basket? i need to e-mail her for her address, and i still haven't done it!
Post a Comment