the first thing we're making is the mini bunting. i really love these, because i think the smaller size gives you so much more flexibility. got a small space, or don't want to go overboard with celebration? mini bunting!
they're perfect for cubicles, for adding a bit of cheeriness to your work day, or for celebrating holidays without compromising professionalism. if you don't work in a cubicle (lucky you!), they look fabulous draped across bookshelves, and personally, i think they'd be awesome garlands on your christmas tree.
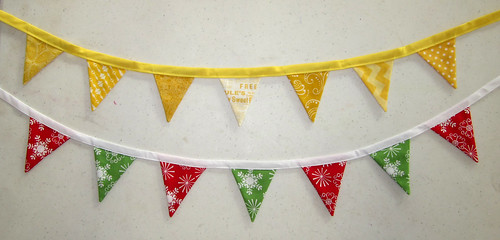
if you're making these for yourself, use whatever fabrics you'd like!
if you're making these for VMQG, it's pretty flexible for you too. if you'd like to use seasonal fabric, that's awesome, just keep it modern. think about the smaller holidays as well - halloween (of course!), pinks and reds for valentine's day, or even just seasonal colours, such as pastels for easter, or shades of green for st patrick's day. you don't have to do seasonal though, there are tons of awesome modern fabrics that would make great bunting as well, for everyday celebrations!
what will you need?
- 40" of double fold bias tape
- fabric scraps, depending on how many different fabrics you're using
- erasable marking pen, such as a Pilot FriXion
- lightweight cardboard, like a cereal box
- something pointy but not too sharp, such as a mechanical pencil
- painter's tape or masking tape
- pinking shears
pattern pieces -
there are three pattern pieces for the bunting - cutting template, pressing template, marking template. you can find the cutting and pressing templates here and the marking template here.
i recommend gluing the pieces to thin cardboard/cardstock for ease of tracing, and the pressing template needs to be either thin cardboard or heat resistant template plastic. you might also want to cut yourself a 1” strip of cardstock for assembling the banner, but we’ll get to that later in the tutorial.
Step 1 – Gather and prep the fabrics that you’ll be using. Press any that are wrinkly, and if you’re making multiple sets of bunting, or using all one fabric, cut a 4” WOF strip of the fabric. If you’re using multiple fabrics, make sure that your pieces are large enough for the number of triangles you want.
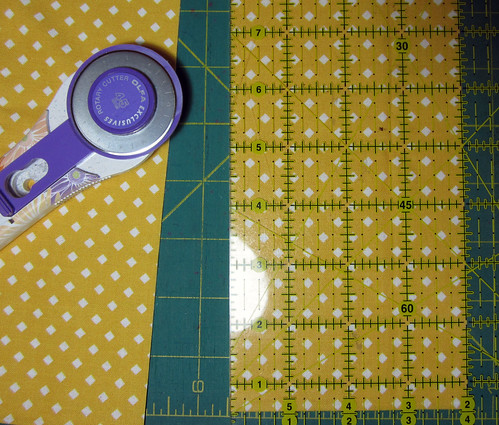
Step 2 - Trace the cutting template onto the back of your chosen fabric. I use a Pilot FriXion pen, which mostly disappears with heat. You’ll need 14 triangles total, 7 front and 7 back.
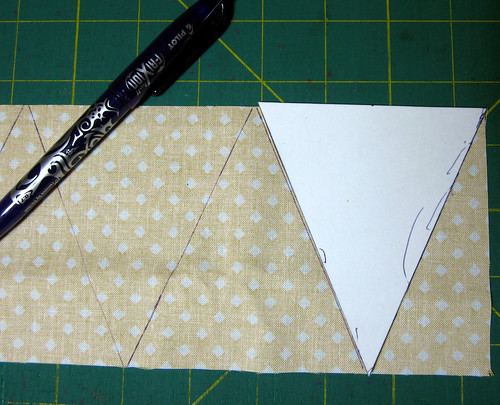
Step 3 – Cut out all of the triangles, and on 7 of the triangles, use the marking template to mark a line across the point of the triangle. This will show you where to pivot when you’re sewing the triangles together.
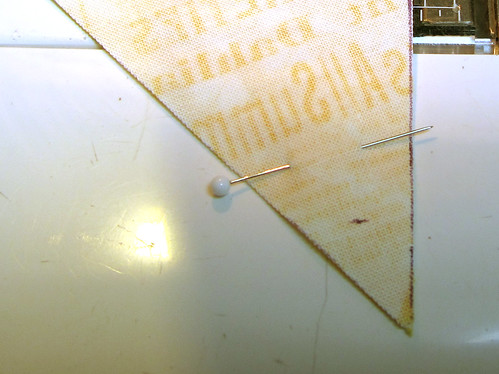
Step 4 - Place two triangles right sides together.
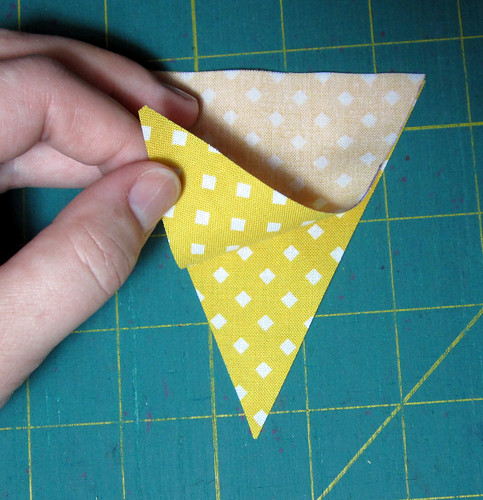
Step 5 - Stitch down one side using a ¼” seam allowance.

Step 6 – When you get to the marking you made, leave your needle in the down position and pivot the triangle to begin sewing back up the other side.
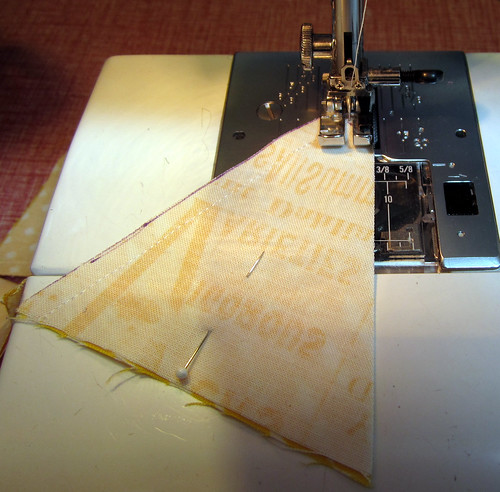
NOTE: several people have asked me why I bother pivoting here, asking why I didn’t just start at the top of the triangle on both sides, sewing off the edge when I got to the point. There are two reasons, one being that it’s a bias edge, so sewing on it any more than I have to will just stretch it, and feed dogs have a tendency to shred bias edges. But the main reason is because of the next step, where we’ll be trimming the point. When we trim the point, we’d be cutting off the ends of the seams, so they might come unstitched, especially when we turn the triangle right side out. By pivoting, there won’t be a break in the seam at the point.
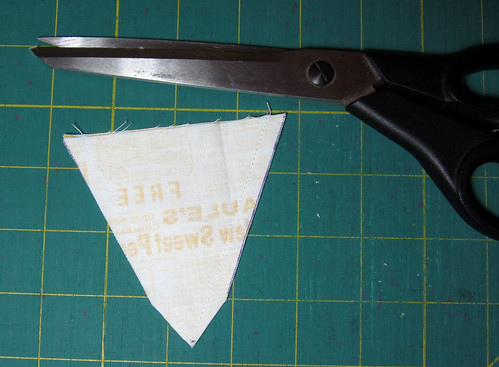
Step 7 – Trim the point. Be careful not to cut the stitching!
Step 8 – Turn the triangle right side out and push out the point. Use something that’s not too sharp, such as a fine knitting needle, or a mechanical pencil with the lead pushed back in.
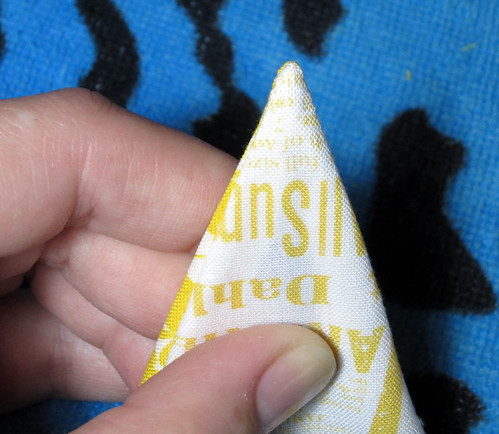
Step 8b – Always push against the seam allowance, not right against the single layer of fabric, because it’s very easy to poke right through with only one layer!
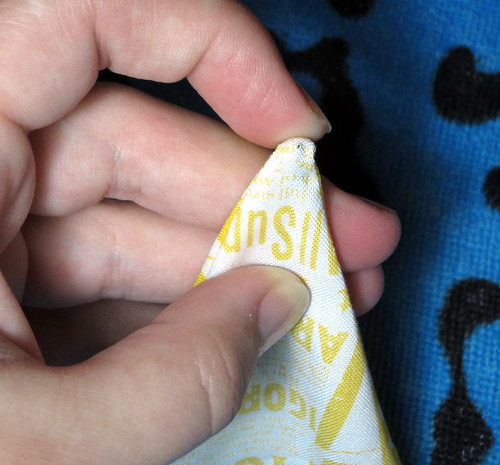
Step 9 – Press! Here’s where you’ll want the pressing guide made of thin cardboard or heat resistant template plastic. Slip your guide inside the triangle, keeping the seam allowance consistently either above or below your template. Press with a hot iron, slip the template out, and move on to the next triangle.
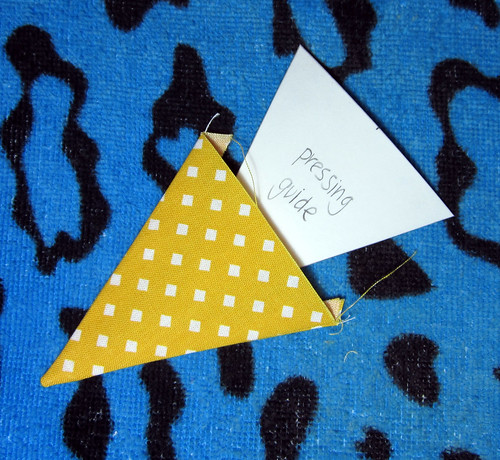
Step 10 – Once you’ve pressed all of the triangles, you’re going to want to trim them along the top raw edge. Position your triangle with the point on a line, the upper corners about ½” past a line, and the raw upper edge just past a vertical line, as shown in the picture above.
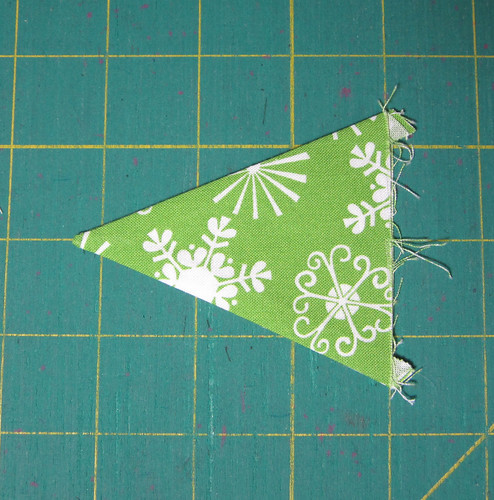
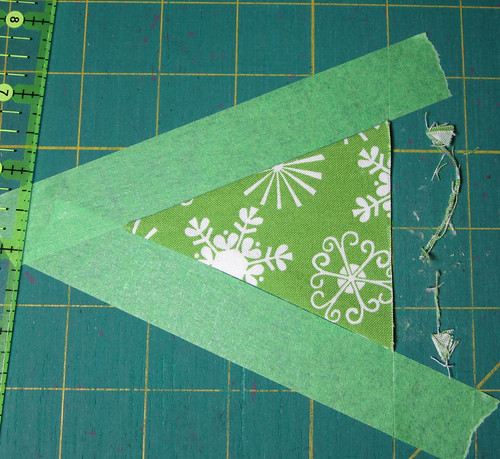
Step 11 - Using painter’s tape, lay a strip of tape along both sides of the triangle, creating guidelines on your cutting board. Line your ruler up with the vertical line just before the raw edge, and use your rotary cutter to trim the triangle.
Step 12 – Figure out which triangle you want to be in the centre of your bunting and mark the centre of it on the top edge. Cut a 40” piece of bias tape, and mark the centre of it.
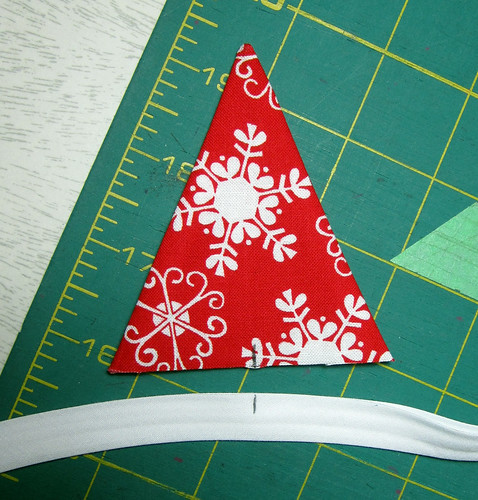
Step 13 - Align the centre of the triangle and the centre of the bias tape and pin in place.
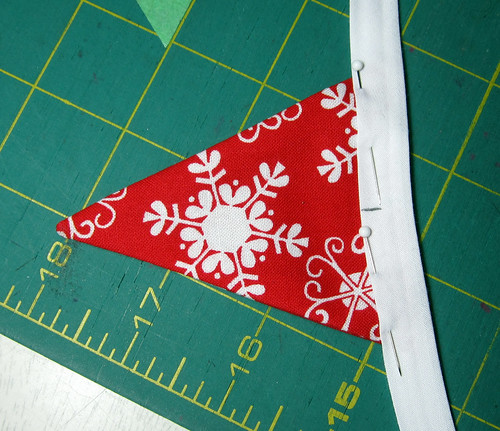
Step 14 – There will be 1”between the outer edge of each triangle. Using a 1” ruler, or a 1” strip of cardstock, space out triangles on either side of the centre triangle. I couldn’t find my 1” ruler, so I just cut a piece of cardstock to help me mark the spaces.
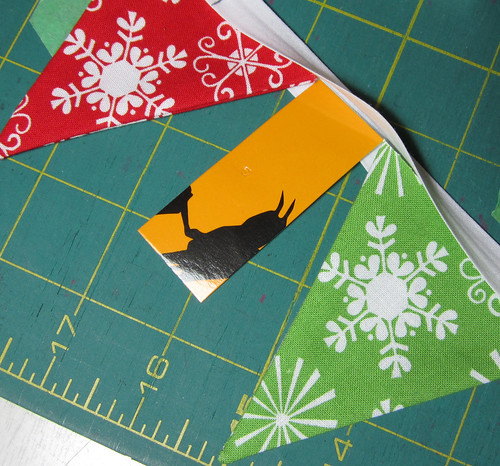
Step 15 – Pin those triangles in place, and add one more triangle to each end. You’ll have 7 triangles total.
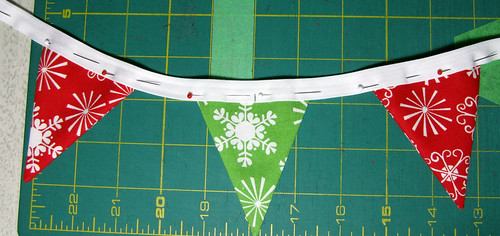
Step 16 – blind hem foot
THIS IS MAGIC! if you get nothing else out of this tutorial, remember this! using a blind hem foot, you can get super awesome topstitching. remember my picnic bowl carrier tutorial? remember how easy and awesome it was to apply the super thin bias tape? the trick works just as well for this project.
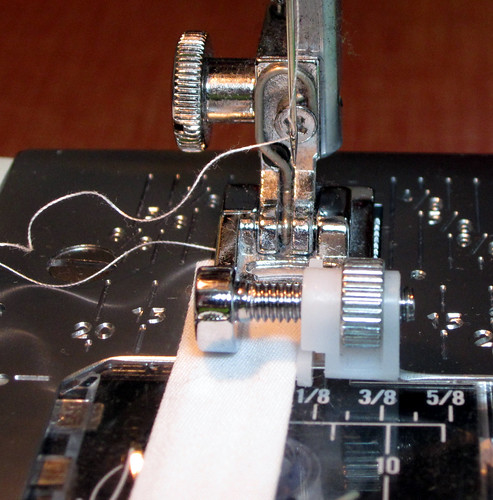
the blind hem foot has a little screw, and you can make the space of the foot wider or narrower, depending on what you're sewing. the edge of your bias tape lines up against the little plastic ledge, so it's super easy to keep it on track. this foot is called several different things, Edge Guide foot or Blind Hem Foot. newer Janomes will have a foot with a metal guide in the centre, and according to teh internetz, Bernina's blind hem foot is similar to Janome's. if you have one of the machines with a fixed guide, you can adjust your needle position instead of the position of the guide like on my foot.
Step 17 – Starting at one end of the bias tape, topstitch along the tape with a 1/8” seam allowance, capturing the raw edges of the flags within the bias tape.
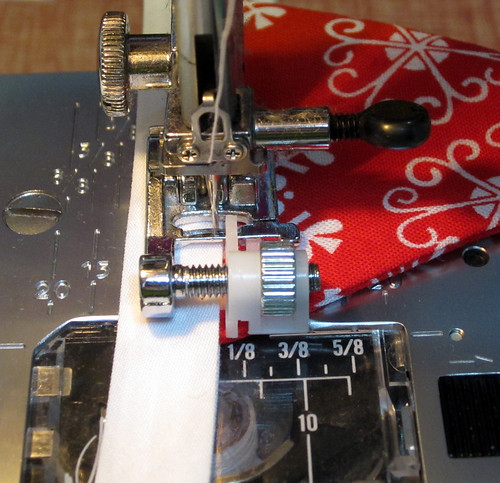
Step 18 – Tie a knot close to each end of the bias tape.
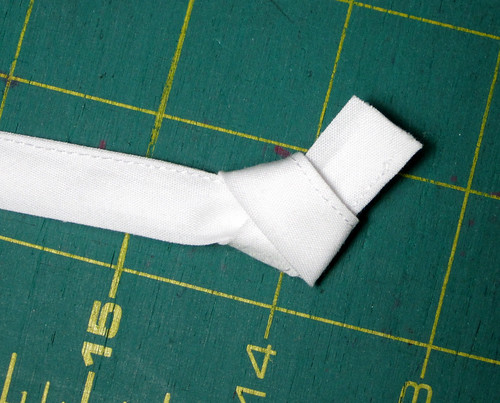
Step 19 – Pull the knot tight and trim the ends with pinking shears. (for VMQG folks, if you don’t have pinking shears, bring your bunting to a sew-in or a meeting and someone else can trim them for you.)
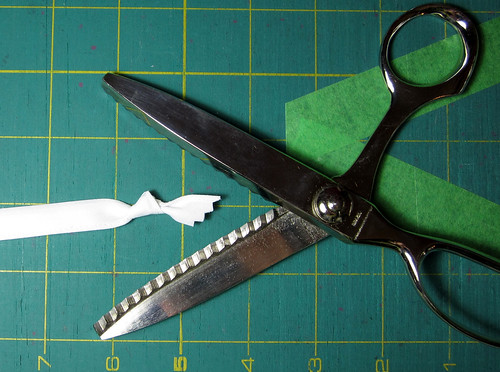
Step 20 – Done!
what do you think? do you like them? will you make some? any questions? did my super-long tutorial scare you away??

5 comments:
Hey thanks for the great tute. I just went out and bought some festive fabric since I had none. Will def make some for the VMQG table. I have one of those funny feet but didn't know what it was called. I used it the other day for edge stitching a fat bulky edge and it worked a storm. I guess now, thanks to you, I know what it's real purpose is.
These are adorable! I want one in every colour! I love your super long and thorough tutorial, Amy! I may make up the triangles and see if you can help with the edgestitching at the sew-in, since I don't have a fancy foot.
Really great - thanks for the pressing point tip - brilliant!
Omg. I have a blind edge/hem foot and i would never have thought touse it! I bow down to you!!!! Genius!
Great tutorial , thanks Amy
Post a Comment