
i finished sewing and pressing all of the blocks, like i mentioned in my last post, and then i had to think about how i was going to lay them out.
i don't have a design wall, or room to put one up, and while i know lots of people use their floor, there's no way my back would've handled that this week! i decided to try laying it out on a smaller scale....
i took the pattern drawing of the quilt top, and played around with it in photoshop. i'd divided my blocks up by the main colour, and had piles of white, pink, green, blue and purple. i counted how many i had of each, and then coloured in that many blocks on the pattern drawing. i had some blocks that were stripes, and i wanted to make sure that i kept them right side up, so i added the little stars on those to keep myself organized.
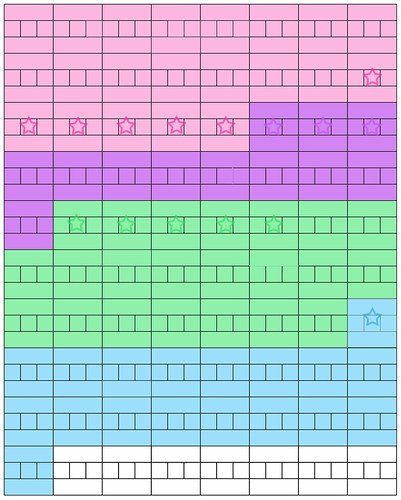
then i took the pattern drawing and played around with it a bit more. i decided to go with the idea suggested in the flickr group and alternate every second block, and i wanted my diagram to indicate that, again so that i could remember to keep the stripes going the right direction.
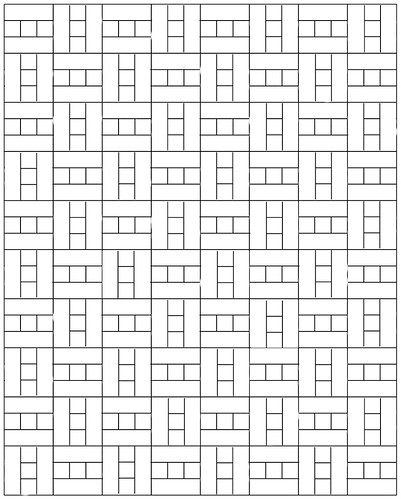
i printed out both pages, and used my paper rotary cutter to cut out the coloured blocks. i played around with them, arranging them on top of the pattern diagram.
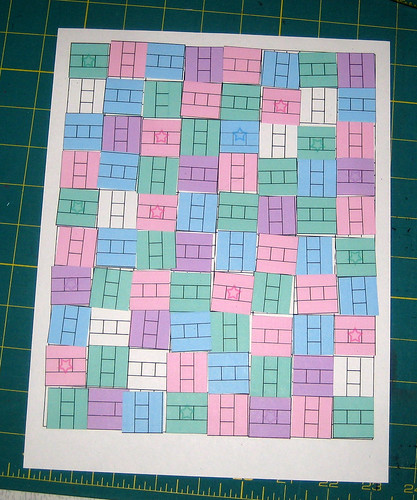
once i was happy with my layout, i transferred my decisions onto the blank diagram.

THEN i laid the blocks out on the floor! i knew i was going to have to at some point, but as it was, i did one or two rows at a time, taking breaks in between. i followed the colour order i'd decided up with the paper, and tried to mix up the fabrics and shades.
because it was laid out on the floor, it was hard to get a good view of it from a distance. i took some pictures of it, and used a filter (palette knife) in photoshop to make the designs less noticeable, so that i could focus entirely on how the colours looked together.
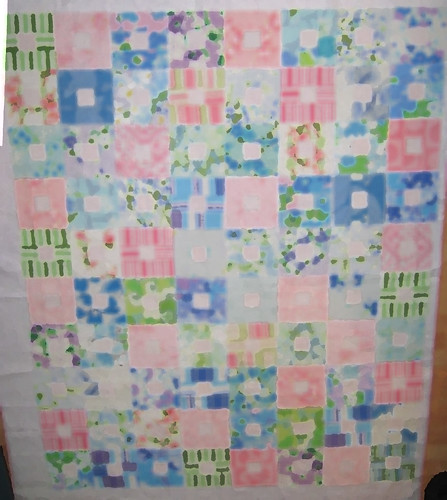
i decided there was a bit too much pale blue in the middle, and switched a few blue blocks around to spread it out more.
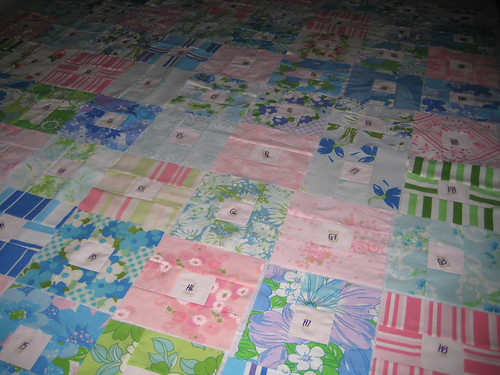
once i had the order i wanted, i labeled them all with masking tape. i could have just piled them up in rows and labeled the top block, but i wanted to be able to chain piece them, working on all the rows at once.
and then i stitched the rows up, pressed them, then stitched the rows together, again, a little bit at a time. i pinned the rows carefully, so that my seams would meet up, and actually basted a few stitches at each intersection, to be sure that it was right before i sewed it with my 1.8 stitch.
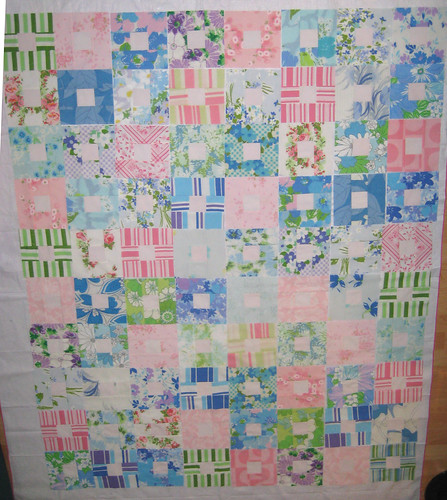
and the top was done! huraay!!
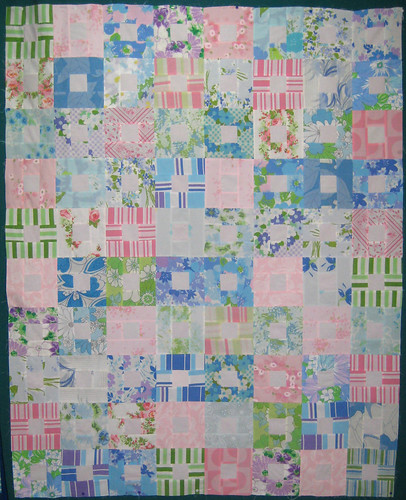
this is a kinda crappy photo, but it's the best that i can do for now. i don't have much free space in my apartment to take pictures! the seams definitely won't be as noticeable, when the top is laid against batting instead of a dark green fortrel curtain!
after all that, i can't decide if i like it or not. i think i'll probably end up liking it once it's all finished, but now i'm kind of feeling blegh about it. we'll see!
4 comments:
Oooh very pretty!! Did you use vintage sheets? I have some for my next quilt to do list- fun!!
i did! i have tons of them, i've been collecting them for a few years. i've got a few other projects planned with them, but if you ever want to do a swap to get more variety, let me know! i'd like to do a string pieced quilt with them at some point, so i want to find as many prints as i can!
It is wonderful! You are so speedy on the quilts! I've been working on my first pieced quilt ever for the last few months!
ha! i totally didn't feel speedy, it felt like it was taking me forever, only working on it in short bits because of my back. but it IS a super simple pattern, and i chain pieced it all, so it wasn't too bad.
did you pick a complicated pattern for your first one? you need to do something simple like a rail fence, strip pieced and chain pieced, for quick satisfaction!
Post a Comment