however, i LOVE how it turned out, and i've already brainstormed a bunch of other projects to be done using the same technique.

i started out with a photo, one i posted on my olympics post back in february. it's a photo i took at the anti-2010 rally the same night as the olympics opening ceremony, and it doesn't even come close to showing how many people were there that day.
the day after especially, but for many days afterwards, i had protest calls and shouts running through my head, the most frequent one being "this is what democracy looks like!" (i was less enamoured by the "this is what democracy feels like" chant after it started raining and my back seized up, let me tell you!)
i knew i needed to stitch it up, and i really wanted to SHOW what democracy looked like in the same piece, so this technique worked really well.
angle

i sized the photo to how large i wanted the pillow, reversed it, and then printed it out onto two iron on transfer sheets. i carefully ironed them onto a good quality white cotton (i've found that the quality of fabric has a huge effect on the longevity of the transfer)
paper covering

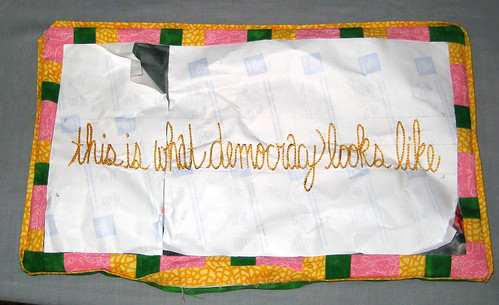
after i transferred the image, i left the paper covering on. i knew i'd want to iron it after i finished stitching, and ironing it without the protective paper would ruin the transfer. i transferred the writing onto the protective paper, and used it as my stitching pattern.
i couldn't hoop this without interfering with the transfer, but it was fine, because the paper backing kept it stabilized.
i stitched in yellow floss, so that it would show up against the photo.
embroidery back

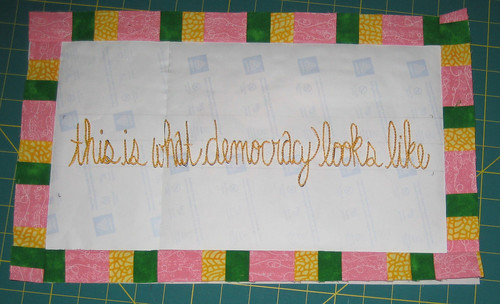
once i finished the embroidery, i decided to do a bit of patchwork around the image, to try to pull some other colours out of the image. i took the photo with me to the fabric store, and bought 3 different calico prints. i made a patchwork border and sewed it on, still with the paper attached.
patchwork

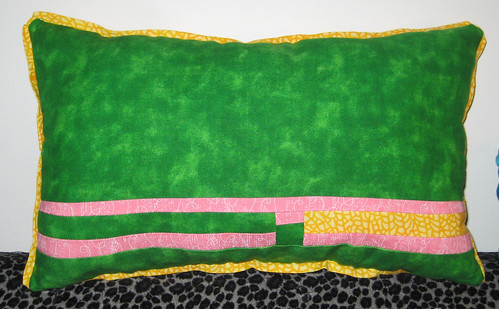
and then i made up the back, with a bit of piecing in the middle cause i love how that pulls everything together.
back

i also added a strip of yellow almost as a fake piping around the edges.
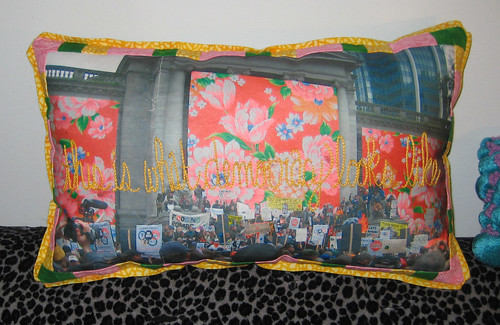
and this was the result!

(taken with flash)
it's not quite as clear as i was envisioning, i should have done the writing a little higher up, rather than centred on the photo, but it is a lot clearer in person than it is in a photo. and i love it anyway!

3 comments:
I need this! I'm remembering all the little things I listed for myself during my last campaign in order to have a good concept of self care, and it was motivating things like this (along with actually taking time for myself. Who knew?).
I need to find a project like this for myself so I can use it to stay motivated.
new reader and follower.
love, love your work, simply fantastic.
can't wait to see more.
Hi, Amy.
I just found your blog recently and added it as a link on mine. Do you ever do mail art? If you do, I think that we have similar sensibilities and it would be fun to exchange.
mad madge (Margaret)
PO Box 10359
Spokane, WA
99209 USA
Post a Comment