
i have to admit that i don't do a lot of mending. it's not that i throw things out, it's just that i rarely need to mend things. i'm sure if i had kids i'd be mending a lot more (my brother was SO hard on the knees of his pants when he was little!). as it is, my "kids" just leave tiny little holes in my sheets as they chase each other across the bed and over me, but i ignore them, because they're just gonna do it again!(i think i'm officially the crazy cat lady now that i've called them my kids!)
but i do have a few mending jobs once in a while, and inspired by all the fabulous tutorials that craftzine has been posting, i decided to write up a tutorial last night as i did one of them. i'm going to do the second job later today, and i'll post that as well.
my sister asked me several weeks ago to fix her boyfriend's shirt. she sews just as well as i do, but used the excuse that she doesn't have a serger, so i had to do it. right. the tshirt is one of the typical Hanes style, ie: boxy with minimal stretch!
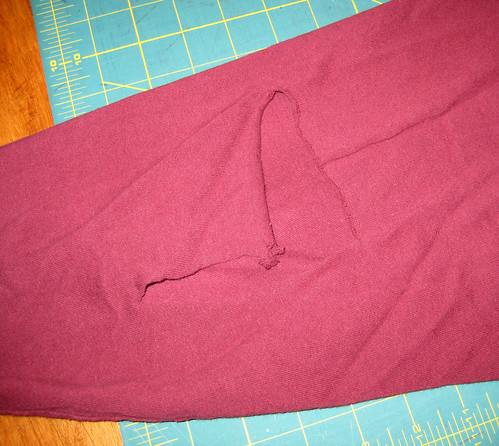
unfortunately, E's favourite long sleeve tshirt had a run-in with his washing machine, which resulted in a large L shaped tear on one of the sleeves. while i could have tried to mend the tear, it would have been visible no matter what, so he requested that the shirt be made into a short sleeved tee instead.
i took a look at a short sleeved tshirt in my closet, and made a note of the angle the sleeve was cut on. you don't want to cut the sleeve straight up and down perpendicular to the armhole, because you'll end up with sleeves that are short around your arm, and long underneath it! i used my cutting board and rotary cutter, but if you don't have one, scissors work just fine! i'd suggest you use a ruler and a chalk pencil though, to make sure that you cut in a straight line!
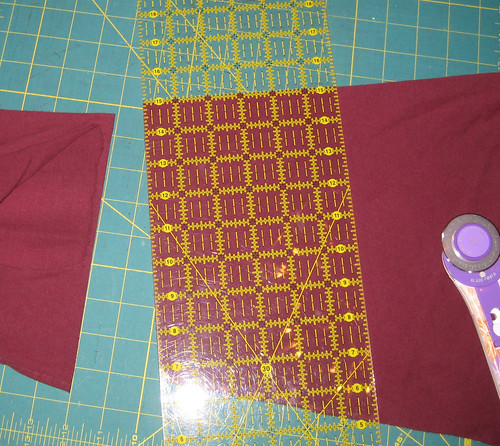
i then took the piece that i cut off and tried to use it as a guide to shorten the other sleeve too. oops.
it's much more accurate to line up the shoulder and armhole seams on both sides of the shirt and shorten the other sleeve that way!
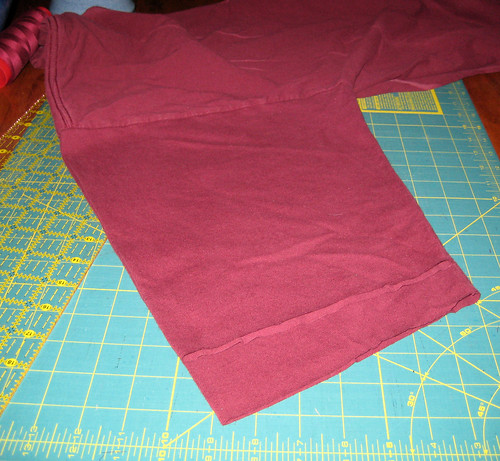
if you have a serger, now is when you'll serge the hem edge that you've just cut. use the stretch knit stitch if your machine has it, don't worry about it if it doesn't, because this style of shirt doesn't have a whole lot of stretch to it anyway.

if you don't have a serger, don't sweat it! you can leave the hem unfinished, since tshirt knits don't really fray, or you could zigzag the edges.
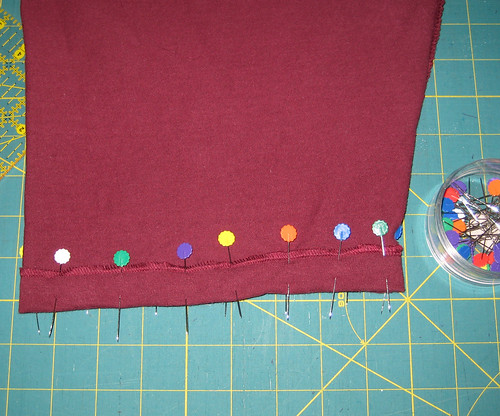
after you finish the hem, you'll want to press the sleeve. when working with knits, your steam iron is your best friend! your hem finish might have stretched the fabric a bit, and we don't want that, so use lots of steam!
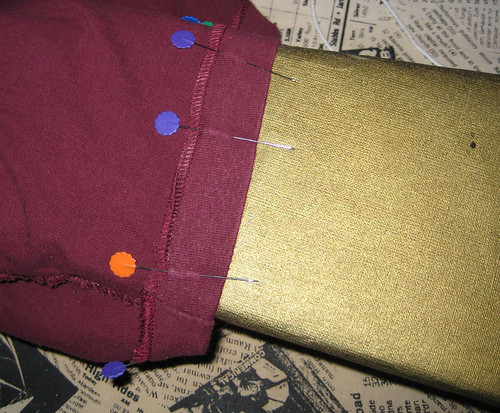
let it cool a bit so that you don't burn your fingers (maybe that's just me!), and fold up the seam. take a look at the bottom of the shirt, and you'll see that knits generally have a fairly deep hem. i folded mine up about an inch, maybe a little less. pin like crazy! when working with knits, pins are your other best friend! (hopefully the pins and the steam iron don't get jealous of each other, that might get ugly...)
press it! remember the difference between pressing and ironing, that's especially important with knits that stretch if you pull the iron across them. i find it easier to press with the pins still in, but some people say that you shouldn't. i say that it depends on the fabric and the pins! these pins have flat heads, so they won't leave big marks in the fabric, and i know that this fabric is pretty forgiving, i'll be able to steam out any marks later. plus, and this is important, i've pressed things using these pins before, so i KNOW that they won't melt into my fabric!
i'm using a sleeve pressing board on top of my regular ironing board, so that i can rotate the sleeve around it while pressing. if you don't have one, that's cool, just use your regular iron board. (but keep an eye out at thrift stores and garage sales, cause they're super handy)
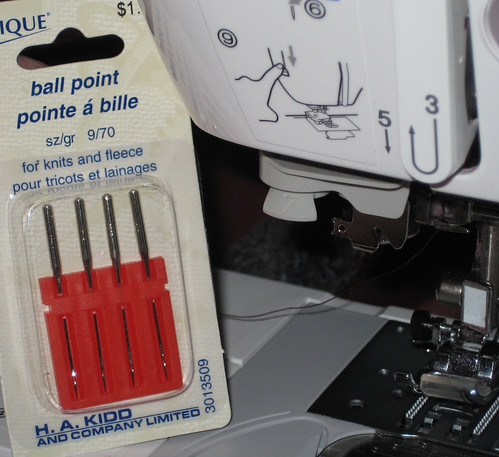
time to sew! i'm using a ballpoint needle that's a 9/70. i think the sizing is different for you americans, but the important thing is that you want a thin needle. this fabric isn't very thick, and i'm only sewing through 2 layers, so we don't want big holes. the most important thing is that i'm using a ballpoint needle. ALWAYS use a ballpoint needle when sewing with knits! sharps are, as the name says, sharp! they cut through the fabric fibers, which is fine for woven fabrics, but you don't want that for a knit. ballpoint needles are slightly rounded, so they'll slip between the fibers instead.
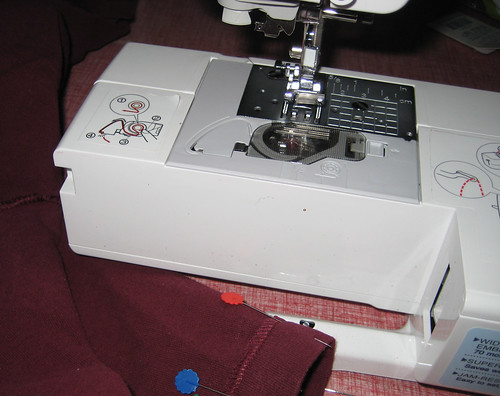
if your machine has a removable cover, remove it now! a lot of machines have a free arm once you remove the cover, which is great for sewing around things like sleeves.
if you have a really old machine that doesn't have a free arm, it'll still work, it just might be a little bit tricky. don't poke yourself with the pins!
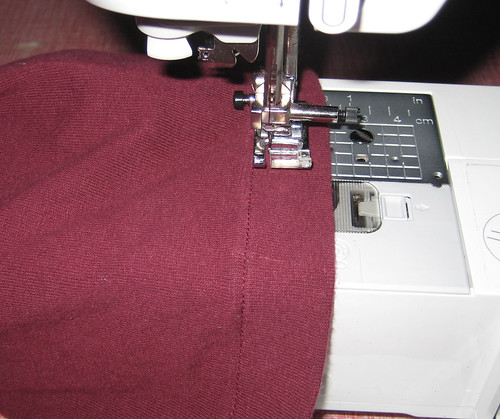
start sewing! line your needle up with the edge of the hem. you want to be close enough to edge to keep the hem from rolling inside the sleeve, but you also don't want to chance sewing off the edge either! it's good to pick a spot on your machine throat plate that you're going to follow, and if the needle isn't in the exact position you want when the edge is lined up with the throat plate spot, it's sometimes easier to just move the needle!
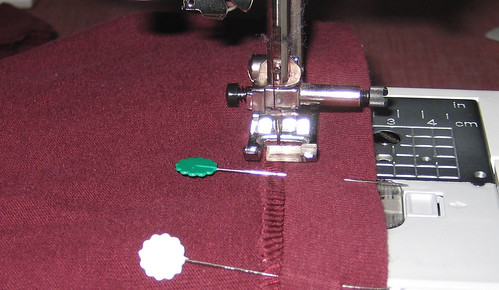
i'm sewing on the inside here, so that i can ensure that i catch the edge. you should have the same matching thread in both your bobbin and your needle, so this shouldn't matter.
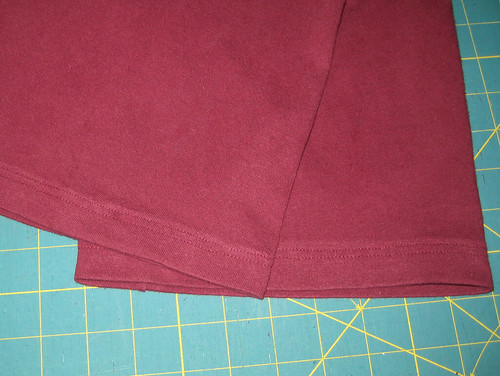
if you look closely at the sleeve of your tshirt, or at the hem, you'll see that there are two lines of stitching. if you look at the back, you'll see that there's a zigzag sort of thing between the two lines. you can create that effect by using a twin needle, but the damn things are mighty expensive for just a mending job, so we're going to imitate the look instead.
so turn the sleeve right side out! lay it on the machine, and line the edge of your presser foot up with the stitching you did in the last step. for this step we won't worry about following the lines on the throat plate, we want to follow the stitching only.
you're done! press the hem again, using lots of steam so that the knit will spring back into place. ta-da!
this is a great fix is you have shirts where the sleeve is too short too, you can easily make them into 3/4 length or short sleeves. if you're small, you might have clothes that are technically "children's", complete with slighter shorter sleeves, or you may just have long arms!
5 comments:
Wow, Amy! What a fantastic tutorial! I *still* have not made the time to get familiar with my serger (a Christmas present -- it's been so long!) but this is really inspirational. Thanks for sharing.
thank you!
i'm such a geek, i love writing up tutorials! i just have problems thinking of project people might like to see...
definitely get to know your serger! i was the same way with this one, i traded with a friend, my old basic brother serger for her computerized elna (it was a gift from her ex, and she was scared of it). it was way fancier than i was used to, and i avoided using it for a while.
then one day my dad sat down, figured it all out, and serged himself a bunch of towels or something, all in less than an hour. i decided if he could do it, i could do it!
and i LOVE my serger now!
awesome tutorial! cant wait to give it a try : )
thanks : )
Excellent tutorial. Very clear and your accompanying images are quite helpful. I'm about to shorten several long sleeved T-shirts to 3/4 length. Does your method provide stretch? The Ts are tight-fitting, so the sleeve hem must have some stretch.
Thanks.
Excellent tutorial! Thanks so much! It really helped me with getting a professional looking finish on my fleece jacket sleeves and hem!
Post a Comment